Many homeowners wonder if they can actually stain or paint their plywood project once it’s completed.
Well, the short answer is yes! But do remember, staining plywood for a DIYer can be a little trickier. The reason is it tends to soak up stains at different rates, and if not done carefully, your results will be a blotchy appearance.
Worry not; there are a few simple DIY staining steps following which you can keep your project made out of plywood in its best-looking condition for a long.
So, without any delay, let’s uncover these experts’ tips and steps in our short step-by-step guide below…
Step 1- Pick the right stain
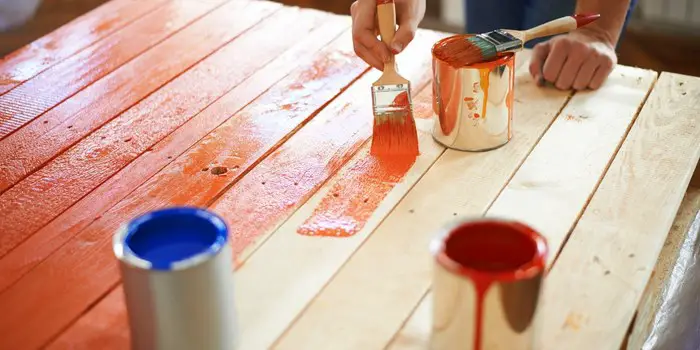
Although there are oil as well as water-based stains available – for plywood planks, furniture, or floors – I recommend using oil-based stains.
Especially if the plywood project is outside and there is continuous exposure to elements, you should choose nothing other than the oil-based version.
For indoors, you can use a water-based stain or a gel stain for a better, even-looking finished product. Also, consider getting a pre-stain conditioner that can be pre-applied to prevent the blotchy appearance afterward.
Step 2- Prep the plywood furniture
Before applying anything, prepare the wood by cleaning and removing the dirt. If required, sand the surface gently with a sand block or an orbital sander.
If there are grains, make sure you sand in the direction of grains which will give your plywood floors a hardwood appearance after painting.
Once you are done with sanding, wipe down the wood surface with a cloth dampened in water to remove all the sanded dust and grime.
If there is any old paint, stain, or varnish present, wipe down the surface with a rag soaked in mineral spirits to remove all the coating.
Step 3- Apply the pre-stain conditioner
Once the wood is completely clean and dry, use a rag or paintbrush to apply a pre-stain conditioner.
Make sure you follow the manufacturer’s instructions provided on the package. Once the conditioner gets dried, it’s time to apply the stain with a fresh piece of rag or paintbrush.
Step 4- Apply the stain to the plywood
Apply the stain evenly on the surface, and let it sit for 15 to 25 minutes.
Keep in mind that the longer you allow the stain to stay on the plywood, the darker the color you get.
Once you’re satisfied with the shade, be sure to wipe off any excess stain that did not soak into the wood.
Step 5- Let the stain on the plywood dry completely
After you have achieved the even layer, allow the stain to dry completely for about 12 to 15 hours.
The drying time it takes for the stain to dry on plywood will majorly depend on the type of stain and brand you have used.
So, it’s good to read the manufacturer’s guidelines & instructions to get an idea.
Step 6- Apply the finishing touches to your plywood project
After the freshly stained plywood floors are dried completely, you can now finish them with a protective coating like polyurethane or lacquer.
Polyurethane and clear lacquer coatings are easy to apply with a paintbrush. But if you want, you can get them in aerosol spray cans, which are easier and quicker.
You should add at least two coats for the best finishing results. This will also ensure that the stain you have applied doesn’t rub off quickly with daily wear and tear.
One thing to remember is clear coatings and finishes for plywood come in a variety of sheens and textures. You can even pick the textures that can help you make plywood look like real wood planks.
So, check the variety available before you buy the product online or at your nearby hardware store.
Does Plywood Take Stain Well?
This is a common question among woodworkers, and the answer depends on the type of plywood you’re using.
Hardwoods like oak take homemade wood stains very well, so if you’re using oak plywood, you shouldn’t have any problems.
Pine and birch plywood, on the other hand, are known for their uneven absorption of stain.
In these cases, using wood conditioners can help to even out the absorption and give you better results.
So, is it better to paint or stain the plywood furniture?
Plywood furniture may be painted or stained. It makes no difference. However, the thing that you need to keep in mind is that the surface will be rougher and more challenging to work with if you go down in plywood grades, as well as the material’s quality deteriorating.
What are the Best Wood Stains for Plywood?
No matter whether it’s birch plywood or any other type of plywood, the best wood stains that can be used on it are oil-based varieties.
Water-based stains can be used on plywood furniture indoors, but they will not penetrate as deeply or provide the same level of protection as oil-based stains.
Some of the best oil-based wood stains that can help you make your plywood look nice include:
- Classic Gray by Minwax
- Weathered Oak by Minwax
- Sun Bleached by Varathane
- Early American by Varathane
- Weathered Wood Accelerator by Varathane
Best Practices to Maintain Stained Plywood Surfaces
Plywood is tough, so it’s not possible to split the plywood.
However, the layers from which it is composed can easily tear or come apart if it’s continuously exposed to environmental elements such as sunlight or moisture.
Regardless of whether you have stained your indoor plywood flooring or a piece of furniture made of plywood outdoors, it’s imperative to maintain them correctly so that the stained wood lasts for a long.
To get things right, here are a few tips you should follow…
a) Clean Plywood
Although stained plywood does not need much maintenance, it’s a good practice to follow minimal cleaning and wiping methods.
With a clean cloth and mild detergents, you can wipe the painted plywood surface at least once a month.
Once wiped, make sure you thoroughly wipe the surface with a dry cloth to remove any excess moisture.
b) Fix the scratches
At least once a year, inspect for scratches, holes, or gouges in your stained plywood furniture and floor.
If you notice any, rub them with fine-grit sandpaper, followed by a wood filler and proper stain. This will extend the overall life of the plywood surfaces.
c) Protect from sun and moisture
Direct sunlight can have a bleaching effect on the timber, causing the stain to fade at a faster pace.
So, when placing your stained plywood furniture outdoors, it’s good to locate them in a shade where they are not exposed to direct UV rays of the sun for longer periods.
Unless it’s marine-grade plywood, moisture can also adversely affect the plywood surfaces.
If you want to place your plywood furniture either choose a grade of plywood that is meant for outdoor use or store the furniture outdoors in a cool dry place.
Also, ensure that the wood is not exposed to any oils, chemicals, or food items (such as oily BBQs and alcoholic liquids) that can cause staining and damage.
The Conclusion
Plywood is tough, but it’s fragile at the same time. The reason why it’s becoming extremely popular is you can get them at a fraction of the price of solid wood.
The only thing is you will need to protect and stain the plywood if you need to give it a nice classy look of hardwood.
Hopefully, the above steps will help you get the best looks that can last long.

We are constantly finding new ways to update our home exteriors. If you are a bit tight on budget, renovating Read more

Cypress wood has been used for thousands of years in shipbuilding, so it is well-known for its water-resistance properties. Due Read more

We all know - Heat is the enemy of wood. When you place a hot item on a wooden surface Read more

If you are looking to upgrade your dining room but are on a budget, then painting your oak table and Read more

Hi, I am Mark Garner a professional carpenter, woodworker, and DIY painter. I live in the small city of Peoria, Arizona as a semi-retired woodworker. I have started this blog with a simple motive to help you with my wood experience in this sector. If you like to know more about what I love doing and how it all got started, you can check more about me here.