Stained finishes may not work well with softwoods such as maple because of the wood density and also the porosity that causes either too much or not enough stain to be absorbed.
If you try to stain woods such as maple, alder, birch, fir, and pine, it can be problematic, and the surface itself may become blotchy or have streaks that are quite unappealing.
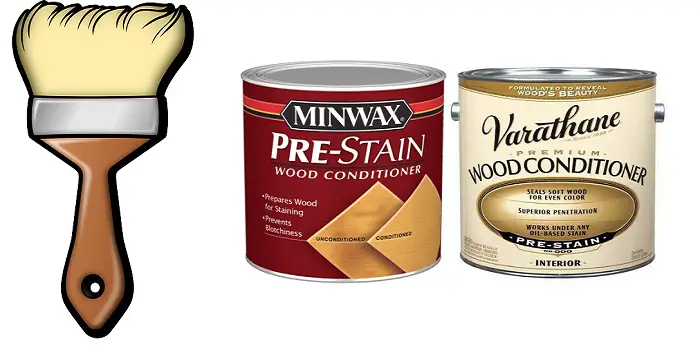
To help out, a pre-stain wood conditioner may be used. A good wood conditioner will penetrate and seal the surface to a certain degree – not too deep into the wood. As a result, the absorption process will even out and prevent blotching from occurring when you stain.
How to Apply the Wood Conditioner?
Using conditioners will generally result in woods such as alder, birch, fir, maple, and pine having a better appearance when the stain is applied. For many other types of wood, a conditioner may not be needed.
The first step is to match the type of conditioner with the type of stain that you will be using.
Since wood conditioners are available in two types, i.e., oil-based and water-based, this means using an oil-based conditioner with an oil-based stain. And a water-based conditioner with a water-based stain.
You can use brush-on pre-stain conditioners with certain woods, but there are also gel stains that tend to work better in terms of preventing blotching from occurring for many other kinds of wood.
You are ready for the next step once you have the right conditioner for your project.

Step 1 – Prep
Remove all blemishes and other issues from the surface of the wood. This means sanding the surface properly and filling any scratches, dents, or gouges that are present. Plus, remember to remove any residue of glue before you begin.
The last part of the preparation process is a light sanding of the surface to make it receptive to the conditioner and stain. Be sure to vacuum all the sawdust and clean it with mineral spirits.
Step 3 – Apply
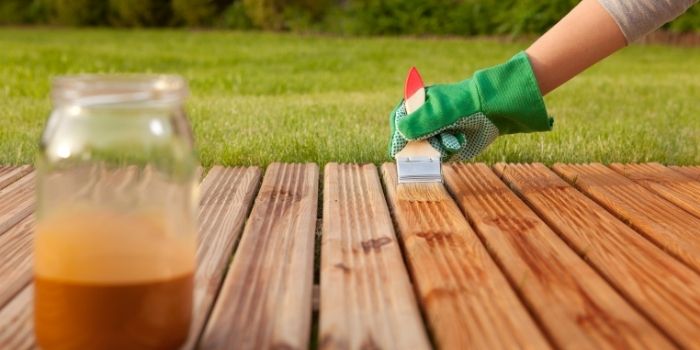
Use a cloth or brush to apply a liberal amount of pre-stain conditioner to the surface. Work it into the wood grain by going in the same direction.
Allow for up to 15 minutes to let the conditioner soak in before wiping away any excessive amount.
Be sure to follow the instructions on the packaging. In most cases, you will be advised to apply the stain no later than two hours after applying the conditioner.
If the wood has really absorbed the conditioner, you may want to apply a second coat first before adding the stain.
Use paint thinner or mineral spirits to clean up any excess. For the most part, you’ll want to apply the stain about 15 minutes after the final coat of the conditioner has been used.
You do have up to two hours, so keep that in mind if you are doing other tasks.
However, if you are working with large surfaces or furniture, then you should keep in mind the time in which you applied the conditioner from the start. Otherwise, you may want to do the job in sections.
Step 3 – Lighter Stain
A good wood conditioner will cause the stain to appear lighter compared to not using a wood conditioner.
So, you may want to test out the conditioner first on an area that is not easily seen and then apply the stain to ensure it is the color that you want.
It may be that you’ll need to apply another coat of stain to get the desired coloring.
A good wood conditioner will help even out the staining process, so you should use it on woods that have a high absorption rate.
This will provide the desired effect while not adding much time to your project.
Few tips and warnings:
- The wood conditioner you are using should be thin enough to wipe on with a cloth.
- Wipe off excess conditioner with a cloth; do not allow it to soak deeper into the wood.
- After the application, give some time to harden the conditioner. If not, the stain you will apply will mix with it and sink deeper than required.
Can You Make Your Own Conditioner at Home?
Making your own DIY wood conditioner at home is not very tricky if you follow the right steps.
All you will need is to mix the right products in the solvents in appropriate quantities.
Varnish, shellac, and lacquer are a few products that you can turn into a homemade wood conditioner.
- For shellac, use denatured alcohol
- If you want to use lacquer, try lacquer thinner for thinning
- But for varnish, it should be reduced with mineral spirits or turpentine
When using a thinner as a solvent, make sure you use one that comes with a slower evaporation rate.
If not, the prepared conditioner will trap the moisture and will cause cloudiness.
This is important to follow, especially if the humidity of the area you are working in is high.
For the concentration and quantities to mix, begin with mixing the solutions and finishes in equal amounts.
Wipe and test some on the small wood area, let it dry, and apply the stain.
If you are happy with the color, you can apply more. If not, you can dilute or concentrate the solvent further.
What Can You Use Instead of a Wood Conditioner?
Store-bought wood conditioners are great to use, but they can easily go wrong if you are not careful while applying them.
This can make your whole project a waste.
That’s the reason I sometimes prefer using some natural alternatives to chemical-based products – that can work equally well.
The good thing is you can easily make them with the stuff you already have in your kitchen.
Some of these great wood conditioner substitutes include:
- Tea Stain – made with water and black tea
- Coffee Stain – made with water and coffee grounds
- Black Walnut Stain – made with water and black walnut hulls
Out of all these, I loved the caramel tone of the wood surface that is being offered by used coffee grounds – it was simply amazing.
You can use it as a pre-condition for wood or simply as a stain without a conditioner.
FAQs
Do you need to condition the oak before staining?
Typically, you do not need to condition oak before staining. Wood varieties like oak and walnut are very dense wood, so it does not absorb stain as quickly as other woods.
The pre-stain conditioner will further limit the absorption, and therefore, the shade of the stain may not be as dark as you desire.
If you do decide to condition the oak, make sure to use a water-based conditioner so that it does not darken the wood.
Apply the conditioner with a clean cloth, working in the direction of the grain.
Wipe off any excess conditioner with a clean, dry cloth. Let the conditioner dry for at least an hour before staining.
Can I use a water-based conditioner with an oil-based stain?
Generally, it’s not a recommended option, but if you need to do it in a pinch, you can.
Just make sure to do a patch test on a small area first to check for compatibility.
Also, make sure that the underlying water-based finish is completely dry (for at least 3-4 days) before you put up the oil-based stain.
Do you need to sand the surface after applying the pre-stain conditioner?
Most pre-stain conditioners are oil-based, which means they can take a little longer to dry. You’ll need to let the conditioner penetrate deep into the wood for about 5-15 minutes.
Once it’s dry, you can then sand the surface slightly using fine-grade sandpaper, but it’s not essential. This will only help to create an even surface for the stain to adhere to.
Water-based pre-stain conditioners work a little differently. They cause the fibers of the wood to bulge.
So you need to essentially sand the surface when the surface is dry to touch – do it after about 30 minutes. This will create a smooth surface for the stain to adhere to.
Final Thoughts
Using a pre-stain wood conditioner is important if you plan to stain interior projects made with porous woods like pine, fir, alder, birch, and maple.
Since these woods are prone to blotching, if you do not condition them, you may end up getting your stained wood look splotchy and uneven.
While there are some good pre-stain conditioners available at online stores to buy, you can always make one in your home if you prefer DIY methods.
Whatever you choose, make sure you follow the right steps and do it patiently.
Share the post "What is Pre-Stain Wood Conditioner – How to Apply It?"

We are constantly finding new ways to update our home exteriors. If you are a bit tight on budget, renovating Read more

Cypress wood has been used for thousands of years in shipbuilding, so it is well-known for its water-resistance properties. Due Read more

We all know - Heat is the enemy of wood. When you place a hot item on a wooden surface Read more

If you are looking to upgrade your dining room but are on a budget, then painting your oak table and Read more

Hi, I am Mark Garner a professional carpenter, woodworker, and DIY painter. I live in the small city of Peoria, Arizona as a semi-retired woodworker. I have started this blog with a simple motive to help you with my wood experience in this sector. If you like to know more about what I love doing and how it all got started, you can check more about me here.