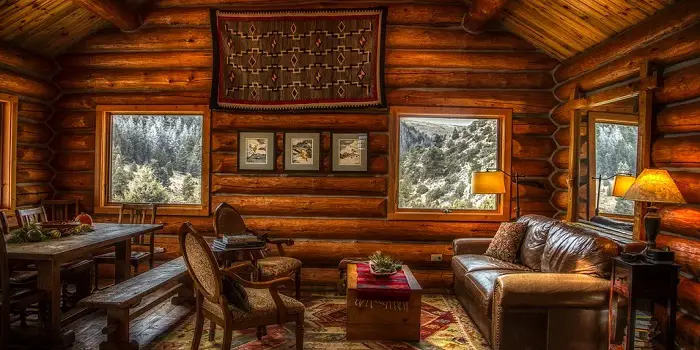
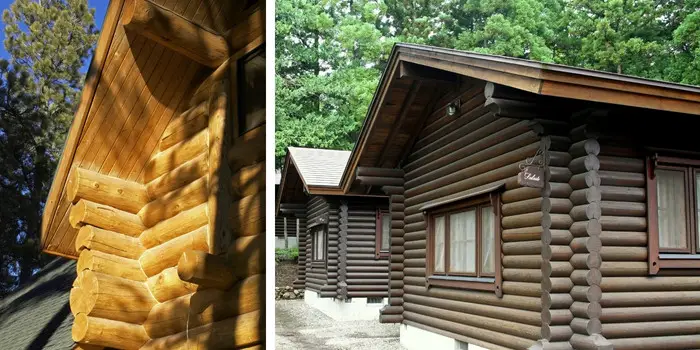
To caulk or chink your log cabin is one of the most important steps to keeping its integrity.
Chinking and caulking prevent decay and insects from penetrating the wood. But for those who are not that familiar with either chinking or caulking, it pays to understand the differences.
While both products may appear quite similar, caulking is more elastic and has virtually no texture compared to chinking. For smaller joints that are a quarter-inch to two inches wide, caulking is the superior choice, thanks to its elasticity.
What is Chinking – What is it used for?
Chinking a log cabin is akin to adding mortar to a brick home. It is a synthetic sealant that is used to seal joints.
Chinking has been around for a long time. Originally, it was made from a combination of materials which include line, silt, sand, dirt, ash, and clay.
However, chinking today is made from acrylic elastic compounds that both stick to the logs while remaining flexible.
The different forms of chinking include old-fashioned homemade materials, cement chinking, and the chinking synthetic, which is the most popular.
Often called Elastomeric chinking, this substance will not chip like mortar.
Working
Chinking is usually placed between the logs to seal any openings. By doing so, it keeps the moisture out, and this reduces potential damage from rot.
In addition to providing protection, chinking is also decorative, thanks to its many colors and textures.
You can use chinking both on the exterior and interior of your log cabin.
To properly protect your logs, the chinking you use needs to be compatible with the stain. To do this, purchase the chinking product from the same manufacturer as the stain.
Durability and Cost
Since most chinking products are based on acrylics, look for a stain that is compatible with that substance.
When applied properly, chinking can last up to 20 years with few issues.
With a little annual maintenance in conditions that do not have extreme temperature variations, the chinking may last up to 40 years before it needs to be replaced.
Covering your cabin with chinking generally costs from $3 to $6 per linear foot.
The larger the gaps, the higher the gable wall is to the ridge, and the type of material used will cause the price to vary.
For a typical-size cabin, you can expect to pay from $3,000 up to $7,000 to cover it with chinking.
However, the annual maintenance costs are often $200 or less, depending on what damage needs to be addressed.

What is Caulking – When and why to use it?
Most caulking that is used for log cabins is either water-based acrylics or urethane.
Just like chinking, you will need to use caulking products that are compatible with the stain of the wood.
This will ensure good adhesion and last for quite some time.
Urethane vs. water-based caulks
Urethane-based caulking products are more weather-resistant thanks to their chemical formula.
It’s also temperature and pest resistant as well compared to water-based acrylics.
When applying, you can use mineral spirits to clean up any mistakes or flaws during the application process.
Another advantage of urethane-based caulking is that it can be sanded and painted or stained to create a more pleasing appearance.
This is not true of water-based acrylic caulking, which will likely cause the paint or stain to simply slide away.
The downside of urethane-based caulking is the odor created by the toxic elements inside the product.
If that is a concern, then you can use acrylic-based caulking, as it has no toxic properties.
However, you can always paint or stain over the urethane-based caulking to reduce or eliminate any odor.
Tips for caulking log cabin homes
When applying the either caulking product, be sure the weather is good, and the temperatures are not extreme.
This means going at least three to four days without rain or extreme heat, as the caulking may not stick properly.
Temperatures from 40 degrees F up to 90 degrees F are fine when applying either type of caulking product.
Caulking is generally best for sealing up smaller openings, while chinking is better for larger ones.
If you have openings greater than two inches, you may need to address the logs themselves.
Chinking vs. Caulking Log Home
As we have seen above, chinking and caulking are two different ways of sealing the spaces between logs in a log home.
Chinking is the traditional method and involves using a mortar-like substance to fill the gaps between logs. Caulking is a more modern method that uses a synthetic sealant to achieve the same goal.
So, what’s the difference between chinking and caulking?
Chinking is a more labor-intensive process, but it results in a stronger seal that is less likely to fail over time. Unlike caulking, chinking also comes in a wide variety of colors and textures that help bolster the appearance of your log cabin.
Caulking, on the other hand, is easier to apply, but it may not last as long as chinking.
If you’re not sure which method to use on your log home, I recommend consulting with a professional. They can help you determine which method is best for your specific needs.
How to Chink Your Old Log Cabin Home?
Fortunately, re-chinking a log cabin is a relatively straightforward process that anyone can do.
All you need is a few tools and some patience, and you’ll have your cabin snug and secure in no time.
Here’s what you’ll need to re-chink your log cabin:
- Chinking compound
- Caulking gun
- Spackle knife
- Wire brush
- Rags or old towels
- Ladder (if needed)
First, take a close look at the existing chinking to see how bad the damage is. If there are only a few small cracks or gaps, you can probably get away with patching them up without having to remove all of the old chinking.
However, if the damage is extensive, you’ll need to remove all of the old chinking before you can start fresh.
To remove old chinking, use a wire brush to scrape it away from the logs. It’s important to be as thorough as possible here, as any old chinking that’s left behind will only cause problems later on.
Once you’ve removed all of the old chinking, use a vacuum cleaner with a hose attachment to suck up any remaining dust and debris.
Now you’re ready to apply the new chinking compound.
Cut the tip off of the caulking gun so that the hole is big enough for the chinking compound to fit through, then load the gun with the compound.
Starting at one end of the cabin, apply a generous bead of the chinking compound to the gap between the logs. Use a spackle knife to smooth it out, then repeat the process until all of the gaps are filled.
If you’re working on a tall cabin, you may need to use a ladder to reach the upper logs. Be careful not to get the chinking compound on your clothing or skin, as it can be difficult to remove once it dries.
Once all of the gaps are filled, clean up any excess chinking compound with a rag or old towel.
Allow the compound to dry for 24 hours before allowing anyone to enter the cabin. Once it’s completely dry, your log cabin will be better than ever!
Final thoughts
Chinking is the material used to seal the gaps between the logs and keep out weather and pests.
If your log cabin is more than a few years old, the chances are good that the chinking between the logs has begun to deteriorate.
Over time, chinking and caulking can crack, crumble, and fall out, leaving your cabin susceptible to all sorts of problems.
Although there are differences, and each one serves different purposes, I would recommend using both chinking and caulking when repairing.
This will help you give your cabin the best chance of staying in good shape for many years to come.
Share the post "Chinking vs. Caulking Log Home: What’s the Difference?"

Wooden pallets are found highly useful in industries that involve packaging and distributing goods. Packing the goods in these wooden Read more
Timber and aluminium windows are the two most popular options when it comes to choosing window frames for your home. Read more
Whether you're drying out some damp lumber for a weekend woodworking project or prepping sola wood flowers for your latest Read more

The old saying that the better you prepare, the more likely you are to succeed applies to painting and any Read more

Hi, I am Mark Garner a professional carpenter, woodworker, and DIY painter. I live in the small city of Peoria, Arizona as a semi-retired woodworker. I have started this blog with a simple motive to help you with my wood experience in this sector. If you like to know more about what I love doing and how it all got started, you can check more about me here.