
We are constantly finding new ways to update our home exteriors.
If you are a bit tight on budget, renovating the wood fence with a fresh paint coat can help.
However, if during the process, you spot mold, moss, lichens, or algae on your privacy fence, what should you do?
Before painting, how should you clean the mold and moss on your cedar wood fence?
I will cover all those steps and tips in this article…
Cleaning Mold and Moss on Cedar Fence
Many homeowners believe that sunshine and harsh UV rays will work to kill mold and moss automatically.
Although it does work to shrivel them hard, cleaning the mold on your wood fence thoroughly is essential before you can apply the paint.
And here are the exact refinishing steps by which you can do it:
Step 1. Wash
The first step to cleaning the black molds and moss is using a scrub brush and water.
If you think it’s a very time-consuming process, you can take the help of a pressure washer.
Make sure you stand at least 36 inches away and keep the washer’s PSI low so it does not damage your aged cedar wood fence.
While washing, use a bit of cleaning solution or detergent soap and spray on both sides of the fence.
This will help remove the layers of dead wood cells and all the mold and mosses.
Step 2. Use Vinegar
White vinegar is a typical kitchen cleaner used for centuries – to clean and prep various surfaces.
Vinegar is also – perhaps the best solution for killing and cleaning the molds and mildew off wood fences.
To clean the molds and algae on a wooden fence with a homemade fence cleaner vinegar solution, here is what you need to do:
- Cover the nearby plants and areas with plastic
- Pour vinegar into a spray bottle without any dilution
- Spray it on the mold and let it be there for several hours
- Once it has thoroughly penetrated the wooden fence surface, scrub with a bristle brush till all the mildew and mold have disappeared.
While doing all the mold cleaning, it is vital to stay safe by wearing a respirator or a mask so that you don’t end up inhaling any mold spores.
Also, vinegar itself may produce a pungent smell, which you should be careful about.
Step 3. Prime the Fence
When you have cleaned the surface and are ready to paint, make sure you don’t paint directly on the surface.
Instead, apply a coat of mold sealing primer (that prevents future mold growth) with a bristle brush.
In most cases, you should only need a single coat of primer to do the job. That is because you will add at least one if not two, coats of regular paint on top.
Simply put, the wood primer can be considered a glue or an adhesive designed to help paint stick properly on wood.
Essentially, you are prepping the surface so the paint will be much easier to apply and look its best.
Plus, they offer other attributes that contribute to creating a smoother, more enticing finish once you are through painting.
When buying the primer, check the ingredients and directions on the primer container to see which type of paint is best used in conjunction.
Make sure that it’s the type that can be applied to wood surfaces.
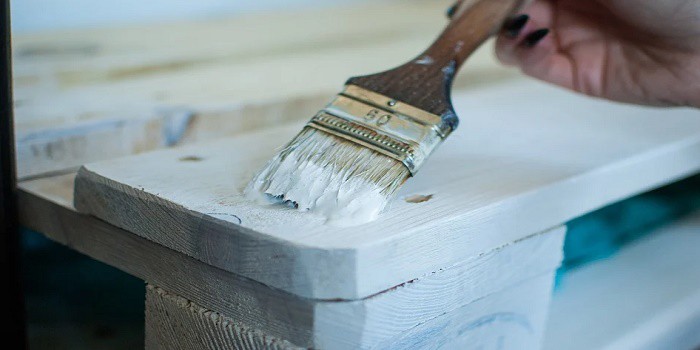
Step 4. Apply Mold-Resistant Paint
Once you have primed the fence, it’s time to apply two coats of mold-resistant paint or a UV-blocking stain using a high-quality paintbrush or a roller.
After applying a coat of the paint, let it dry and look at the results after 3-4 hours.
If it seems too thin, you may want to apply a second coat of paint sealer just to be sure.
And you are done!
Painting or staining a wood fence will help your fence look better and keep the wood from rotting and last longer.
Adding a paint coat is generally unnecessary, although you may want to touch up specific areas that need a little extra attention.
Remember that there is a substantial difference between outdoor and indoor surfaces, so choose the paint for your cedar wood fence wisely.
Investing time in selecting the right paint for the job can be most helpful and will make the paint last a long time.
Step 5. Use Garden Fence Preservative
If you want to further protect your garden fence from different mold varieties, algae, and other biological threats like wood-boring insects, use a water-based or solvent-based wood preserver.
These are the wood sealers that are available in clear as well as colored options.
- Solvent-based wood preservers come with high V.O.C content and are generally more helpful for outdoor structures like fence timbers.
- Water-based fence preservatives are alternatives to solvent-based formulations and are preferred indoors due to their low V.O.C content and less odor.
Some solvent-based wood preservatives also contain a small amount of wax and exterior wood oil, which can help seal the wood better and provide long-term weather protection.
While these wood preservers can help keep your fence panels supple and nourished, they can cost high and will need to be applied by professionals for better long-lasting finishing.
Tips and Warnings
When using products other than water to clean your moldy garden fence, you should always focus on protecting your young plants first.
Although vinegar is a good weed killer, it can also kill your flowering plants, veggies, and grasses near the fence. So, it’s good to cover your landscaping before you use vinegar or other chemicals.
Also, you will need to choose a good sunny day for fence cleaning. Since mold and moss love to thrive during wet or humid weather, your cedar fence will have a hard time getting cleaned and drying.
Can You Paint Over the Mold, Moss, and Algae?
While many painters suggest painting over to hide the molds and green algae, in my opinion, you should NEVER do that because it’s not a long-term solution.
If you paint your wood fence without removing the molds and moss, the problem will return soon as it has not killed the exact roots of the fungus.
Even worse, water-based paints can serve as a food source for molds and fungus, which will keep developing even more problems shortly.
Also, it keeps damaging your cedar fences, and the cost of fixing them will gradually increase.
In the long run, you will be bringing down the value of your property – just in case you are planning to sell it in the future.
Share the post "How to Get Mold, Moss & Algae Off Fence – Before Painting?"

Cypress wood has been used for thousands of years in shipbuilding, so it is well-known for its water-resistance properties. Due Read more

We all know - Heat is the enemy of wood. When you place a hot item on a wooden surface Read more

If you are looking to upgrade your dining room but are on a budget, then painting your oak table and Read more
Yes, you can use emulsion paint on any wood, even as an undercoat. But as these paints are water-based, I Read more

Hi, I am Mark Garner a professional carpenter, woodworker, and DIY painter. I live in the small city of Peoria, Arizona as a semi-retired woodworker. I have started this blog with a simple motive to help you with my wood experience in this sector. If you like to know more about what I love doing and how it all got started, you can check more about me here.