Tea may be the right choice if you are looking for a non-toxic, inexpensive product for staining wood.
I have used tea to stain wood, and I can say that when applied properly, it really works. It’s also quite cheap and easily available, which is why it’s a great substitute for typical wood-staining products.
Why Use Tea to Stain Wood?
There are good reasons why I love to use tea as a wood stain.
First, it is far cheaper compared to many wood staining products. But there are other good reasons as well, like…
- Unlike, Chemicals It’s Non-Toxic and Non-Flammable
- It Delivers a Beautiful Natural Appearance to the Wood
However, one of the best reasons is that tea does not get blotchy, unlike some other staining products.
Because wood contains tannic acid, which is what causes the color of the wood.
And while wood has different shading based on the number of tannins it contains, tea reacts to the tannins even if the tone is not the same.
The result is that the wood gains a uniform color without the blotchiness that sometimes happens.
Once applied, the tea stain will not fade as it dries.
However, you should apply a sealant over the top to ensure that the tea staining remains for a long without any significant wear and tear.

How to Stain Wood with Tea Bags?
To stain the wood, it must be prepared.
For staining my old furniture, I first used a lower grit of sandpaper, rubbed it across the surface, and then worked my way up to 220-grit. This smooths out the wood material and makes the surface more porous.
Then, I wiped the surface with a dry cloth to remove all dust and dirt.
Step 1- Prep the Tea
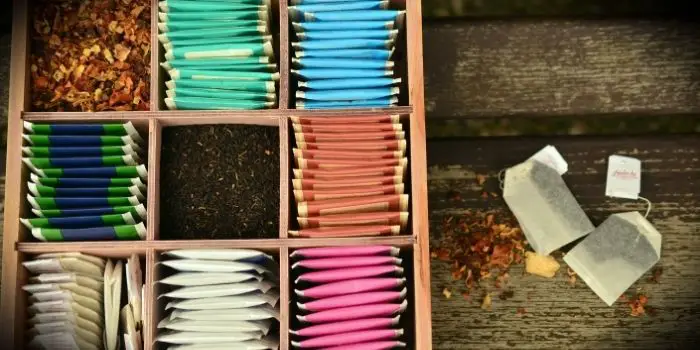
This is really simple as I found a tea close in coloring to the wood and then purchased the tea bags.
The preparation of the tea is the same as if you were to drink it. I simply added the bag to hot water and allowed it to steep – until it cools to room temperature. Then I removed the bag.
Step 2- Apply the Tea
I used a foam brush to apply the tea from the cup. You can even use a rag if you want. Let it dry for about five minutes, and then re-apply.
Three or four applications will generally do, but I have done more because of the desired color I wanted to achieve.
Application is fast as three coats can be applied five minutes apart, although this will depend on how porous the surface of the wood becomes.
If the object is small enough to fit into the cup or container, you can let it soak for five, ten, or fifteen minutes.
Step 3- Apply the Sealant
Finally, for sealing the tea stain on the timber, I let the wood furniture dry for about an hour before applying a sealant.
Depending on the wood location (indoor or outdoor) and the level of protection you need, you can use a sealant of your choice.
What Type of Wood Can You Stain with Tea?
I’ve used tea to stain different types of wood, such as pine and oak.
However, birch and maple can be stained using tea as well. The key is to stain a sample piece of wood first. This should be scrap wood that is the same as the wood you intend to stain on your project.
If you cannot find any, then only stain the wood part that will not usually be seen. On furniture, for example, you can stain the bottom of the legs first and then judge the results.
What Kind of Tea Do You Need to Make Wood Stain?
You can use any kind of tea. Remember that the darker the tea, the darker the stain will be.
However, I have discovered that even dark tea has a lighter stain on the wood.
If you have never stained wood with a particular tea before, I recommend you find some scrap wood that is the same type and stain to see the results.

Can You Stain Your Wood Furniture with Coffee Grounds?
Hard to believe. But yes, your used coffee grounds in the kitchen can also be used as an all-natural, non-toxic way to stain the wood at home.
All you need to do is mix some plain coffee grounds with water and have an effective homemade stain for the wood prepared.
It helps if you use the proper coffee grounds and water ratio to get the best results.
Plus, you can be nuanced by applying a coffee ground stain with different types of wood.
You are only limited by your ability to acquire coffee and your imagination. Here is a step-by-step process you can follow to make a DIY wood stain…
Step 1- Mix Equal Parts of Coffee and Water
No matter the size of the project, you should always mix one part coffee grounds with one part water.
This will provide a fuller concentration of the staining elements offered by the coffee grounds.
Remember that you will need to combine the coffee grounds with boiling water inside a proper container.
How much you mix should be more than enough to cover the wood several times.
For example, if you stain a 6” x 6” board, you can mix two tablespoons of coffee grounds with two tablespoons of water for the best results.
Step 2- Let the Coffee Grounds Dissolve Completely
You will need to mix the coffee grounds in hot water and let them dissolve for about a half-hour.
You can stir it occasionally to help break up the coffee grounds.
However, do not let the mixture sit for more than an hour, or it will start to break down.
Step 3- Staining the Wood Surface with Coffee
Next, use a foam brush and apply the coffee stain mixture to the wood surface.
You should have enough for at least four coats for maximum effectiveness.
However, if you are staining something significant in areas, such as all-wooden furniture, a porch, or a decking floor, you should switch to a paintbrush.
In such cases, you may even spill the mixture onto the surface and then use the brush to paint it into the wood.
Cover with one layer, let it dry, and then apply another layer.
How much time does it take to dry?
There is no set drying time; you will simply have to touch the surface to see if it is still damp.
It should dry quickly if you are outside on a sunny day or in a well-ventilated area.
Adding a hairdryer and directing it to the wood will speed up the drying time.
Evaluate after each layer has dried, and then seal it once you are satisfied with the results.
What Else Can You Use to Make A DIY Wood Stain at Home?
Besides tea and coffee grounds, various other methods can help you prepare a natural homemade wood stain that you can use on your woodworking projects.
For instance, you can prepare a wood stain using black raspberry, hickory bark, or oak bark.
To make a beautiful dark-colored wood stain at home, you can also use beet juice, red cabbage, or pomegranate peel.
Walnuts are also known for the dark color they leave behind. You might have seen them while peeling off their dark brown/black skins.
This is the same color and powerful pigment that can be used as a homemade wood stain!
Making the stain from walnuts is my favorite because it’s non-toxic and easy to find.
To make a homemade wood stain with walnuts, you’ll need to gather some black walnuts, water, and a glass jar.
Here are the steps you will need to follow…
Step 1- First things first, you’ll need to husk the walnuts.
You can do this by putting on a pair of rubber gloves and rubbing the walnuts together until most of the husk has been removed.
Step 2- Once you’ve husked the walnuts, it’s time to make the stain. To do this, place the walnuts into the glass jar and cover them with water.
Let the mixture sit for at least 24 hours, stirring occasionally.
Step 3- After 24 hours have passed, the walnut water mixture should be a deep brown color.
At this point, you can separate the husks from the stain (using a filter) and begin to test the stain on scrap wood pieces.
Step 4- To apply the stain, dip a rag into the mixture and then rub it onto the wood in a circular motion.
Let the stain sit for a few minutes, and then wipe away any excess with a clean cloth.
TIP: To get a deeper stain color that lasts for a long, you should boil water and husks for one hour in a glass jar.
After it’s cooled down, the mixture can be strained and used immediately or stored in a cool, dark place for a few weeks to be used as a wood stain.
Final Thoughts
If you are looking for an effective and inexpensive DIY wood stain, look no further than your kitchen shelf, as tea and coffee grounds beans can do the trick.
Make sure you choose the right products and test the small area first with your homemade wood stain. Also, follow the correct procedure patiently to get warm, welcoming results.
Share the post "How to Make a DIY Natural Wood Stain from Tea?"

We are constantly finding new ways to update our home exteriors. If you are a bit tight on budget, renovating Read more

Cypress wood has been used for thousands of years in shipbuilding, so it is well-known for its water-resistance properties. Due Read more

We all know - Heat is the enemy of wood. When you place a hot item on a wooden surface Read more

If you are looking to upgrade your dining room but are on a budget, then painting your oak table and Read more

Hi, I am Mark Garner a professional carpenter, woodworker, and DIY painter. I live in the small city of Peoria, Arizona as a semi-retired woodworker. I have started this blog with a simple motive to help you with my wood experience in this sector. If you like to know more about what I love doing and how it all got started, you can check more about me here.