Silicone is a wonderful thing—until it ends up somewhere it shouldn’t be. It seals gaps, keeps water out, and lasts for years.
But when silicone caulking lands on your wood surfaces—whether it’s a painted cabinet, deck boards, or delicate wood trim—removing it can feel like trying to peel gum off a shoe.
The challenge is that silicone is designed to stick. Once it cures, it forms a flexible, water-resistant bond that doesn’t simply wipe away with soap and water.
Do You Really Need to Sand Silicone?
Many people immediately assume sanding is the only solution to get dry silicone off wood.
But sanding wood can damage finishes, remove stain, and create uneven patches—especially on fine wood furniture or finished woodwork.
In fact, sanding silicone is usually a mistake because the friction melts the residue, gumming up your sandpaper and driving the silicone oils deeper into the wood grain. This can ruin your ability to apply a new finish later.
The good news is that sanding is rarely necessary.
With the right techniques and a bit of patience, you can remove cured silicone buildup from wood safely and effectively.
The key is using methods that soften, loosen, or break the bond without damaging the surface underneath.
In this guide, we’ll walk through seven proven methods professionals and DIYers use to get dry silicone off wood—all without sanding.
Along the way, you’ll also learn what works best for different wood finishes and how to avoid common mistakes.
How to Remove Silicone Caulk from Wood?
Here is a step-by-step approach that will guide you in removing silicone caulk from wood safely and effectively without the need to sand the surface.
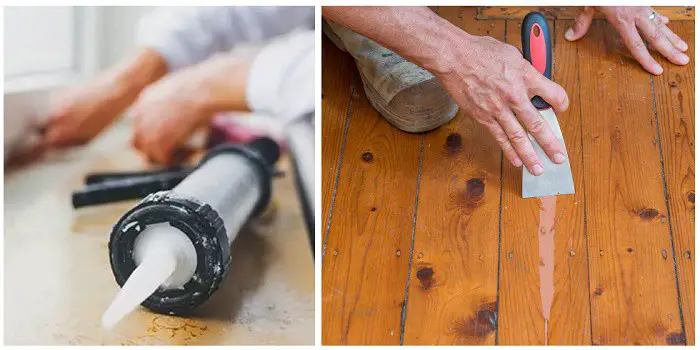
1. Start with Gentle Scraping
The first step in any silicone removal project is mechanical removal.
Because silicone typically sits on the wood surface rather than bonding deeply into wood fibers, you can usually lift away the bulk of the material without harsh chemicals.
Success depends on patience and using the right tools to avoid permanent gouges in your finish.
To protect your wood furniture, trim, or flooring, always prioritize plastic tools over metal ones.
Metal scrapers can easily slice through finishes and leave unsightly scratches, whereas plastic provides enough leverage to break the silicone’s seal while remaining gentle on the underlying surface.
The Essentials
Tools: Use a plastic putty knife, a plastic razor blade, or even an old credit card.
Technique: Hold your tool at a shallow angle, slide it under the edge of the bead, and peel the silicone away in sections.
Grain Direction: If working on hardwood, always scrape with the grain to ensure any minor scuffs blend in naturally.
Cleanup: Keep paper towels handy to wipe away loose debris as you go, preventing small bits from being stepped on or smeared back into the wood.
2. Use Heat to Soften the Silicone
Using heat is a highly effective way to simplify silicone removal, especially for stubborn beads along cabinetry, trim, or window frames.
Warming the silicone softens its bond and increases its elasticity, allowing the material to stretch and peel away in long, satisfying strips rather than crumbling into tiny, frustrating pieces.
For the safest results, always use a hair dryer rather than a heat gun.
Heat guns can quickly reach temperatures that blister paint, melt wood finishes, or even char the timber itself.
A hair dryer on a medium setting provides controlled, gentle warmth that is usually more than enough to break the silicone’s grip without risking a costly refinishing job.
The Warming Method
Preparation: Set your hair dryer to medium heat and hold it 3–6 inches away from the silicone for 30–60 seconds.
Removal: Once the material feels supple, use a plastic scraper to lift the edge and peel the section away while it is still warm.
Target Areas: This method is ideal for long seams, such as those found on baseboards, deck joints, and cabinet edges.
Safety First: Periodically touch the surrounding wood to ensure it isn’t getting too hot; if it’s uncomfortable to the touch, back the heat off or move to a different section.
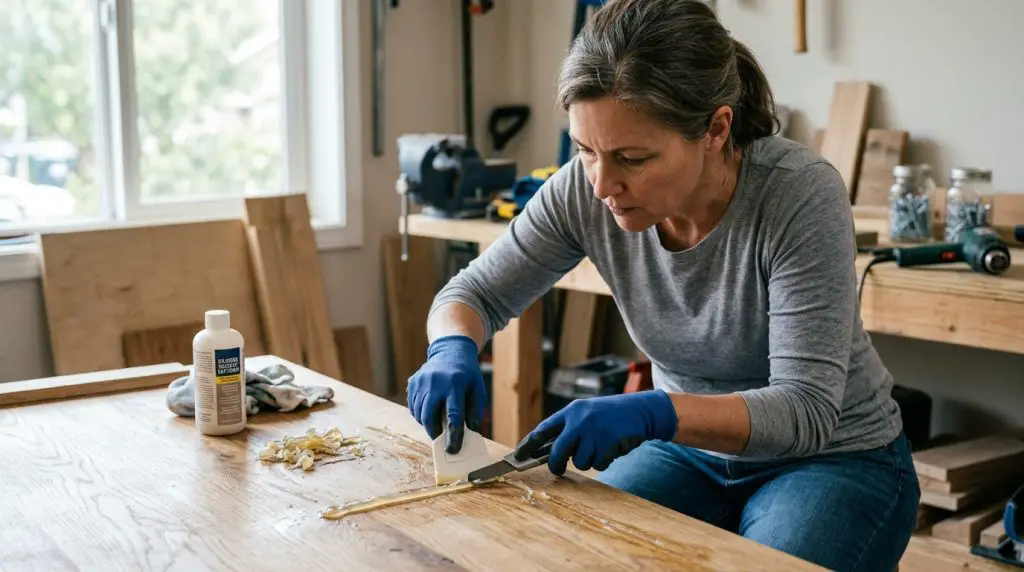
3. Mineral Spirits for Residue Removal
After the bulk of the silicone is removed, a stubborn, oily film often remains on the surface.
Mineral spirits is the ideal solution for dissolving this leftover residue because they break down the silicone’s bond without aggressively attacking most wood finishes or paints.
This makes them a much safer alternative to harsh solvents like acetone, which can melt finishes instantly.
While silicone doesn’t “dissolve” in the traditional sense, the mineral spirits penetrate the interface between the residue and the wood.
This lubrication allows the film to slide off the surface rather than sticking to it.
It is an essential finishing step, especially if you plan to re-caulk or refinish the area, as new sealants will not bond to a greasy, silicone-contaminated surface.
Removing the Residue
Application: Dampen a soft cloth with a small amount of mineral spirits—avoid soaking the wood—and rub the affected area.
Dwell Time: Let the spirits sit for 2–3 minutes to penetrate the film; this “wait time” does most of the hard work for you.
Final Wipe: Use a clean section of the cloth or a plastic scraper to gently lift the softened residue away.
Surface Safety: This approach is particularly effective for painted cabinets and finished furniture, where maintaining the integrity of the topcoat is a priority.
4. Vinegar for Light Silicone Residue
White vinegar is an excellent, non-toxic alternative for tackling light silicone and wood filler residue, particularly in poorly ventilated indoor spaces where you’d prefer to avoid chemical fumes.
As a mild acetic acid, vinegar works by subtly breaking down the adhesive bond of the sealant’s film, making it a budget-friendly and surface-safe closer for your cleaning process.
While vinegar won’t power through a thick, cured bead of silicone, it is surprisingly effective at lifting the “ghosting” or haze left behind after mechanical scraping.
Because it is gentle on most wood finishes and paints, it’s a go-to solution for kitchen cabinetry or nursery furniture where harsh solvents are a last resort.
The Vinegar Soak
Application: Saturate a cloth or paper towel with white vinegar and lay it directly over the silicone residue.
Wait Time: Let it dwell for 5–10 minutes; the acidity needs this time to penetrate the film’s grip.
Removal: Use a plastic scraper or a clean cloth to wipe away the softened material once the soak is complete.
Why Use It: It’s non-toxic, inexpensive, and safe for most finished surfaces, making it the ideal “green” cleanup method.
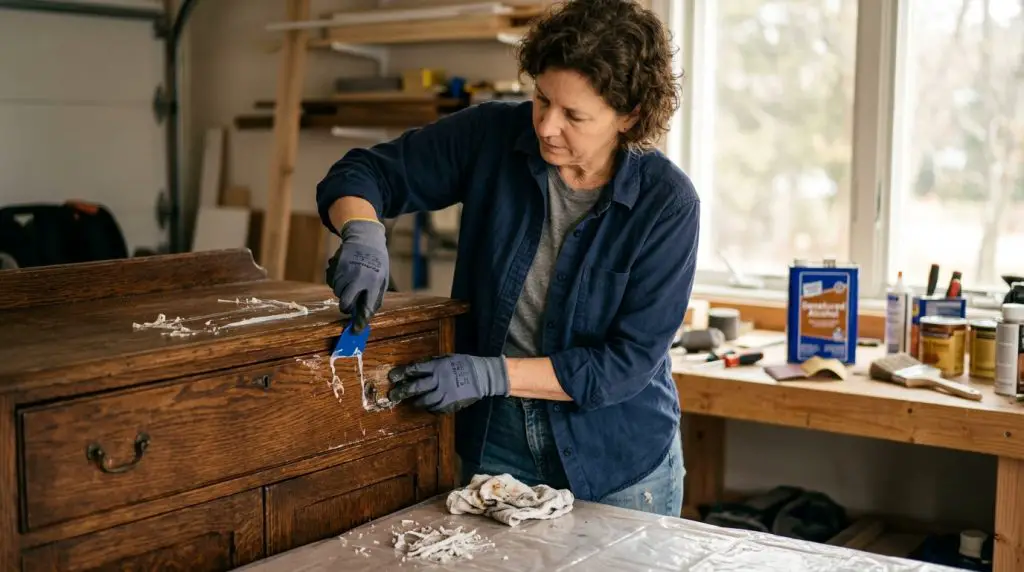
5. WD-40 to Loosen Stubborn Silicone
When mechanical scraping and mild cleaners fail, a lubricating penetrant like WD-40 Multi-Use Product can be a lifesaver for stubborn, sticky films.
WD-40 works by creeping into the microscopic gaps between the silicone and the wood, effectively “lifting” the bond from the surface.
It’s a powerful shortcut for those frustratingly thin layers of residue that seem impossible to grip with a scraper.
Because WD-40 is an oil-based lubricant, it’s vital to remember that it leaves its own residue behind.
If you plan to paint, stain, or apply new caulk to the area, you must thoroughly degrease the wood afterward. New finishes simply won’t stick to a surface that has even a trace of lubricant on it.
Using Lubricants for Residue
Application: Spray a light, targeted amount of WD-40 directly onto the remaining silicone film.
Dwell Time: Let it penetrate for 5 minutes to ensure it has fully undermined the adhesive bond.
Removal: Wipe the area with a clean cloth or use a plastic scraper for any thickened spots; the residue should slide right off.
The “Must-Do” Step: Always wash the area with mild soap and water afterward to remove the oily film before moving on to refinishing.
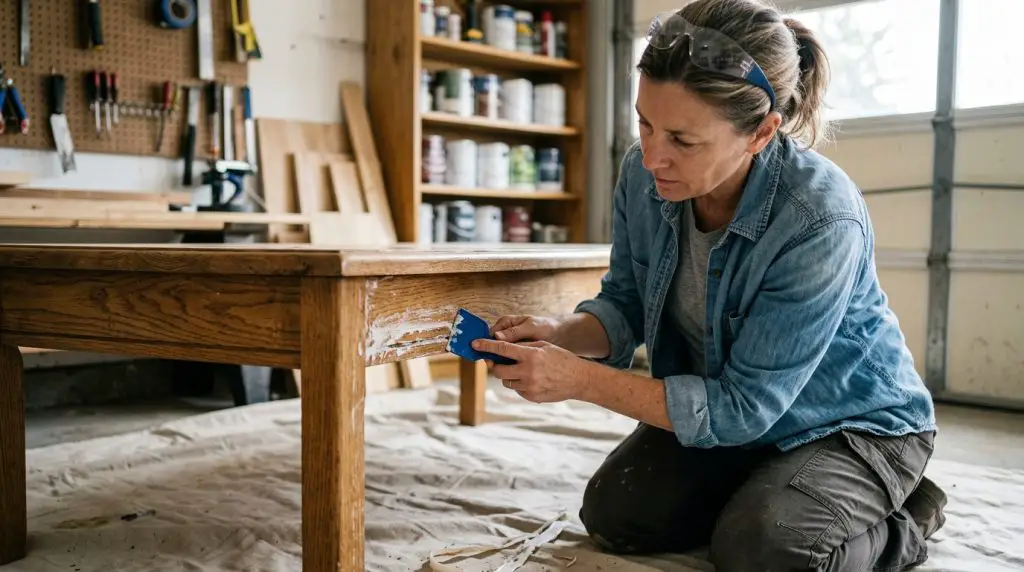
6. Adhesive Removers for Stubborn Buildup
Dedicated adhesive removers, such as Goo Gone, are also the “heavy hitters” for silicone that has hardened on a wooden surface over many years.
These products are specifically formulated to dissolve the complex polymers and oils in adhesives that household cleaners might miss.
They are particularly effective for cleaning up thick buildup around trim or fixtures where the silicone has become brittle and stubborn.
While these removers are designed to be safe for most finished surfaces, they are potent.
The key is to let the chemistry do the heavy lifting rather than relying on aggressive scrubbing, which could mar the wood.
A short dwell time allows the solvent to penetrate the bond, turning a difficult scraping job into a simple wipe-down.
Using Adhesive Removers
Application: Apply a small, targeted amount directly to the residue—a little goes a long way.
Dwell Time: Let the remover sit for 3–5 minutes to fully break down the sticky bonds.
Removal: Wipe the area with a clean cloth, repeating the process if any stubborn patches remain.
Pro Tip: Always test on a hidden spot first to ensure the solvent doesn’t soften your specific wood finish or paint.
7. Rubbing Alcohol for Final Cleanup
The final, and perhaps most critical, step in silicone removal is the rubbing alcohol wipe.
Even if the wood looks pristine, an invisible, microscopic film of silicone or cleaning solvent often remains.
Rubbing alcohol acts as a powerful degreaser, stripping away these lingering oils and ensuring the surface is chemically clean and ready for a fresh start.
Because alcohol evaporates rapidly and leaves no residue behind, it’s the perfect “reset button” for your project.
Whether you used WD-40, mineral spirits, or a commercial adhesive remover, this step ensures that your new paint, stain, or caulk will actually bond to the wood rather than peeling off a greasy surface.
The Final Decontamination
The Result: This process leaves you with a bone-dry, oil-free surface that is perfectly prepped for refinishing or painting.
Application: Dampen a clean, lint-free cloth with rubbing alcohol—do not saturate the wood, as excessive alcohol can dull some delicate finishes.
The Wipe: Firmly wipe the entire treated area to pull up any remaining “ghost” films or oily solvents.
Drying Time: Allow the wood to air dry completely; because alcohol is highly volatile, this usually only takes a minute or two.
Why is Silicone Caulking So Hard to Remove from Wood?
Before diving into removal methods, it helps to understand why silicone is so stubborn.
Silicone sealants are made from siloxane polymers, which cure into a rubber-like material. Once cured, they become:
- Water resistant
- Temperature resistant
- Chemically stable
- Flexible and elastic
Those properties make silicone perfect for sealing bathrooms, kitchens, windows, and outdoor joints.
Unfortunately, they also make it difficult to remove and break the silicone seal once it sticks to wood.
The typical problem homeowners face is silicone caulk residue left behind after scraping.
Even when the bulk of the bead is gone, a thin, invisible film may remain, preventing paint or stain from adhering properly.
This is why effective silicone removal usually requires two stages, which include mechanical removal (scraping or lifting the bulk material) and chemical softening (removing the remaining residue).
Common Mistakes to Avoid While Removing Silicone Caulking
Remember that even the most experienced DIYers can run into trouble when removing silicone, as the most significant issues often arise from what you can’t see.
The most notorious problem is “fish-eyeing,” where new paint or stain pulls away from the wood because of microscopic silicone contamination.
Whether you are working on kitchen cabinetry, window frames, or hardwood floors, the goal is to remove the physical bead without compromising the wood’s structural integrity or finish.
To protect your surfaces, adopt a “least-aggressive first” philosophy. Start with plastic tools and patience before escalating to heat or solvents.
Rushing the process or reaching for a metal blade might save five minutes, but it can result in permanent gouges or chemical bleaching that requires a full, expensive sanding and refinishing job to fix.
Pitfalls to Avoid
The Metal Trap: Never use metal scrapers or razor blades; they are harder than the wood and will almost certainly leave “chatter marks” or deep scratches.
The “Invisible” Film: Don’t stop once the bulk of the silicone is gone. That thin, waxy residue will act as a permanent barrier to any future paint, stain, or glue.
Chemical Overkill: Avoid harsh solvents like acetone or lacquer thinner, which can melt wood finishes and turn a simple cleanup into a major repair.
Refinishing Defects: Be aware that leftover silicone on flooring can cause new topcoats to separate, creating unsightly circular craters known as “fish-eyes.”
Tips for Protecting Your Wood Surface While Getting the Silicone Off
When working with finished wood surfaces, always take a cautious approach by following these best practices:
The Test Spot: Always apply solvents to an inconspicuous area (like the back of a cabinet or inside a closet) to ensure it doesn’t discolor the wood.
Plastic-Only Rule: Use plastic putty knives, old credit cards, or specialized plastic razor blades to maintain total control.
Slow & Steady: Combine mechanical lifting with chemical softening; let the solvents do the work so you don’t have to use excessive force.
Total Decontamination: Always finish with a degreaser like rubbing alcohol to ensure a “squeaky clean” surface ready for its next life.
Final Thoughts
Silicone may be tough, but removing it from wood doesn’t have to involve sanding or damaging your surfaces.
By combining careful scraping with gentle solvents, you can effectively remove cured silicone buildup while protecting the integrity of the wood beneath it.
Whether you’re dealing with residue on deck boards, cabinetry, trim, or furniture, the seven methods in this guide provide safe and effective solutions.
The key is patience—start with the least aggressive technique, work slowly, and clean thoroughly afterward.
Once the surface is fully clean, your wood will be ready for whatever comes next: repainting, staining, sealing, or simply looking its best again.
Share the post "How to Get Silicone Caulk Off of Wood Without Sanding?"
Termites are recognized as one of the most troublesome pests all over the world. They are small and numerous and Read more

Our bedroom is a special place where we find relaxation and refresh after a hard day of toil - the Read more

Let’s be honest: buying a sofa is a bit like dating. In the beginning, it’s all about the looks. You Read more

Wooden furniture, trims, doors, and windows are so long-lasting that you can easily repair and reuse them even after they Read more

Hi, I am Mark Garner a professional carpenter, woodworker, and DIY painter. I live in the small city of Peoria, Arizona as a semi-retired woodworker. I have started this blog with a simple motive to help you with my wood experience in this sector. If you like to know more about what I love doing and how it all got started, you can check more about me here.