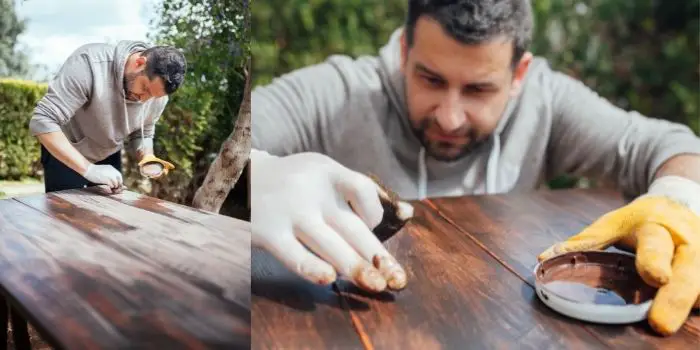
Wipe-on poly is a kind of polyurethane that has been pre-thinned and wiped on easily. Unlike other kinds of this material, it should be applied using a lint-free cloth because it’s too thin of a material to be efficiently applied using a roller or a brush.
Beyond that, using wipe-on poly is supposed to provide a hand-rubbed appearance, which can be achieved by spraying, rolling, or brushing. It was specifically made for certain applications and is particularly useful when:
- You are short on time
- Touching up minor errors
- Putting polyurethane on vertical structures
- Working with edges or tight curves that brushes can’t reach
In general, it can be used on any woodworking project, though using it on large projects can be time-consuming and frustrating.
Most most smaller projects and DIY enthusiasts, it is easy to apply and dries fast, but buying the product outright can quickly get expensive. Fortunately, there is a way to make wipe-on poly on your own to save you plenty of time and money. Let’s have a look at how…
How to Make DIY Wipe-On Poly?
To make the wipe-on poly, you will first need to gather the right tools:
- mineral spirits or paint thinner
- oil-based polyurethane
- plastic bottle or mason jar
- funnel and a measuring cup
Now, follow these three steps:
Step 1. Stir Up the Oil-based Polyurethane
Mix or shake the product in the can it comes in. Some of them have flattening agents that will need a good mix to ensure the consistency and appearance is nice and even.
Otherwise, some areas of the wood may turn out glossier than others. Be sure you don’t shake it. Otherwise, this could cause bubbles to form.
Step 2. Pour the Polyurethane into the Jar or Bottle
After properly stirring the material, pour it into the mason jar, water bottle, or any other kind of container that can be sealed tightly.
This will eliminate the need to make a fresh batch every time you need to use it.
Step 3. Dump Some of the Mineral Spirits into the Container
Apply an equal amount of spirits to the poly. Do this by using a measuring cup, or just get an approximate mix by eyeballing it.
A 50-50 ratio is most commonly used for wipe-on poly, but you are free to use less or more mineral spirits as needed.
Test the new wipe-on poly you have made on a scrap of wood to ensure that it is not so thin that it runs but is still thin enough to easily apply it with a cloth.
Add more of one ingredient or the other until you achieve the best consistency.
What are the Different Kinds of Wipe-On Poly?
Up until recently, you could only find oil-based wipe-on poly, but lately, water-based products are cropping up.
Oil-based wipe-on poly has been thinned with paint thinner or mineral spirits and has the same properties as oil-based polyurethane:
- Emits high VOC levels
- Waterproof
- Dries to a durable, hard surface
- Scuff and scratch resistant
- Has a clear coat
In a similar vein, water-based finishes get thinned using water and have overlapping traits with oil-based poly. The main differences are:
- It dries clear and stays clear
- Its smell is more tolerable, and it has lower VOC levels.
Why Should You Make Your Own Wipe-On Polyurethane?
Water-based poly is much thinner than its oil-based alternative, meaning it requires less effort to apply and it dries much more quickly.
Some people even avoid using water-based poly, believing that it dries too quickly. And there comes Wipe-On Poly.
Though it is, of course, quicker and simpler to just buy your own wipe-on poly, there are a few reasons why making your own is the better decision.
1- Mixes to the Perfect Consistency
When you make your own wipe-on poly, you won’t have to worry about buying a container of it whose consistency is all wrong for the type of project you’re doing.
You can make your own container of it and then thin it out or thicken it up, depending on what your project calls for.
2- There are no Streaks, Drips, or Runs
The best way to apply either poly to a product is with a brush, but typical poly is known to leave ugly bubbles, brush marks, and drips.
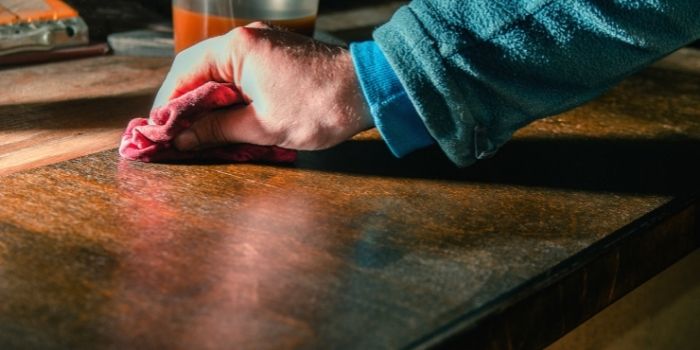
This isn’t something you have to work with when using wiping poly. Since you are using lint-free rags, there won’t be any markings left behind.
The thin coat you apply means there won’t be any drips, and bubbles will pop quite quickly.
3- Simple to Apply
Without the right skills, typical poly can be difficult to apply while avoiding lint, streaks, and puddles.
Using wipe-on poly, you don’t have to worry about this at all. It is nearly impossible to not achieve a smooth finish when you wipe it on by hand this way.
It is a good idea to sand between the different coats of polyurethane, but you will need to do so gently. If you are too aggressive, it can strip away some coats altogether.
4- It Dries Quickly
Applying thin coats of poly helps reduce the tacky feeling, but you can only get coats so thin by using a roller or a brush.
Wiping poly, on the other hand, applies nearly as thinly as water itself does. This means that it dries quickly and will be ready for another coat in as little as two or three hours.
Compare this to the 12 to 24 hours it takes for oil-based poly to dry. Even when you compare it to fast-drying poly, this material still takes up to six hours to dry entirely.
5- Perfect for Hard-to-reach Areas
It is good for use in crevices and tight corners that typical tools and brushes can’t easily access. So long as you can fit a finger into that area, you can use wipe-on poly.
Besides that, you can wrap the cloth on a smaller item to get into even tighter locations.
6- It isn’t Prone to Dust Nibs, and it Saves Money
Another issue with polyurethane that crops up often is dust nibs. Since this material takes a lot of time to dry, you run the risk of getting dust in the finished product.
Then, you are left with no choice but to sand the surface to remove the dust.
Since wipe-on poly is thinner and dries more quickly, you are less likely to give dust enough time to stick to the material, eliminating that risk.
Above all, wipe-on poly bought from a store can be pretty expensive, but making your own can save you money.
It is likely you already have polyurethane in your supplies, so you’ll just need to get the other supplies to begin.
Final Thoughts
Wipe-on poly is a great alternative to standard polyurethane in that it goes on more evenly, dries more quickly, and leaves less room for error. Unfortunately, it can be expensive to buy outright.
In this article, we outlined the steps you need to take to make your own wipe-on poly and answered a few frequently asked questions about the material.
Share the post "How to Make Wipe-On Polyurethane? (DIY Homemade Option)"

We are constantly finding new ways to update our home exteriors. If you are a bit tight on budget, renovating Read more

Cypress wood has been used for thousands of years in shipbuilding, so it is well-known for its water-resistance properties. Due Read more

We all know - Heat is the enemy of wood. When you place a hot item on a wooden surface Read more

If you are looking to upgrade your dining room but are on a budget, then painting your oak table and Read more

Hi, I am Mark Garner a professional carpenter, woodworker, and DIY painter. I live in the small city of Peoria, Arizona as a semi-retired woodworker. I have started this blog with a simple motive to help you with my wood experience in this sector. If you like to know more about what I love doing and how it all got started, you can check more about me here.