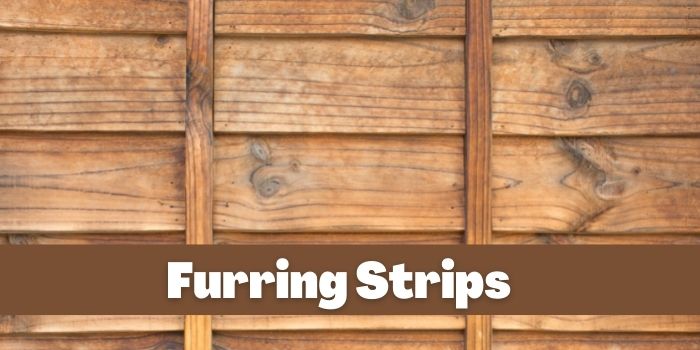
Otherwise called wood strapping or furring board, furring strips are narrow pieces of lumber that are commonly used for a number of exterior and interior construction projects.
They are usually employed to make a level plane upon which you can make space for insulation or lay flat materials to prevent dampness. Basically, they prepare a surface for different projects, both indoors and out.
They are thin pieces of lumber, which makes them easy to hold screws and nails and easy to glue down. They are often sold untreated but can be stained or painted for your building projects or hobby.
Furring Strip Spacing
This type of strip is used to attach wall panels and works similarly to wall studs that you find in various areas of your living space.
The wood strapping needs to be installed 16 inches on the center, just like 2×4 stud spacing. Be sure to leave marks on the bottom of the wall for each 16-inch interval and do the same on the top of the wall.
From there, you can draw vertical lines that connect the dots on the bottom and top. These lines will serve as a guide that you can use to indicate just where you want to attach the furring strips.
When it comes to thickness, typical furring strips are usually one inch thick, though there are some two-inch strips. The actual thickness is often just under one inch. This thickness makes them quite versatile for use with various construction projects.
Different Types of Furring Strips
a) Wood
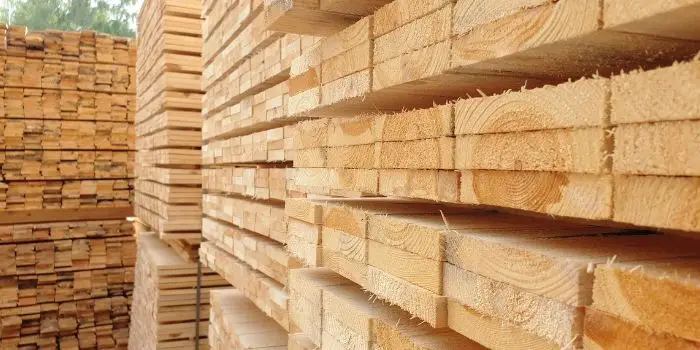
Wood strapping is usually made from high-quality, durable wood that promises structural integrity for various projects.
These strips are usually milled from fir wood, spruce or southern yellow pine. Choose pressure-treated lumber for added stability.
b) Metal
Metal furring strips are constructed using aluminum or galvanized steel.
It is important to remember aluminum is much simpler to cut than steel, so it may be the wiser choice if you are planning to make a lot of cuts.
These types of strips are most often used in concrete work or masonry, thanks to their rigidity and structural integrity.
c) Hat Channel
This is one kind of metal furring. It got its name because of the way it looks like the silhouette of a fedora hat. This type of channel comes available in lengths of 10 or 12 feet.
They are similar to wood strapping in that they make a level, raised surface made to attach to the sheathing of your choice.
d) Z-Channel
Otherwise known as x-furring, this product is often used for interior masonry, metal roofing, and a variety of other projects.
It is installed vertically or horizontally, putting the flange against any substrate the project is using.
The shape of it lets you enjoy a more level, firmer foundation for structural constructions.
The installation is water directional, meaning this kind of furring is particularly useful in exterior wall and metal roofing applications as it stops water from penetrating it.
What Can You Use Furring Strips For?
Furring strips have a number of different uses. Wood strapping is commonly used for hobby work, carpentry, shelving, and general finish work to make an even, level surface for attaching paneling, wallboard, or siding.
It is also used to make air space for insulation, masonry, or metal roofs. If you want to give a solid base to an uneven area, furring strips are necessary.
The wood will make sure the project comes out with a level surface that is also smooth and flat.
Regardless of whether you are resurfacing the walls or ceiling, these strips are important for getting a professional, clean, and long-lasting, completed result.
1- Make Space for Insulation
To make room for insulation, you will need to “fur out” the walls.
This just means expanding the thickness of a wall by way of wood strapping, sort of like building a wall inside of another one.
The space made between the structural walls and the furring strips will provide room for insulation.
Insulating the walls helps keep the home’s temperature better regulated but can also serve as a barrier against sound, helping you create a quiet atmosphere for offices, studios, or bedrooms.
Furring can also generate enough room for small copper pipes and wiring that sit close to the wall.
After the space has been “furred out,” you can place the installation there and then install drywall or another kind of wall planning to insulate and further protect the structure.
2- Install Drywall & Siding
When turning an unfinished space into a finished space, you will have to install drywall on any uneven surface on cement, especially.
You may need to install furring strips to accomplish this. Furring strips are also crucial when you install the exterior siding.
The space yielded by the wood promises a smooth and flat surface for adhering siding, as well as proper water drainage and air ventilation.
You should be sure to leave a minimum .5-inch opening at the bottom of the walls to ensure proper airflow behind the siding and the rest of the wall.
Above the exterior sheeting, rigid foam will usually be applied. The furring strips can adhere to the insulation as well as any siding placed atop the furring boards.
If you install them vertically, you will make the area compatible with horizontal siding. If you plan to install it vertically, you might choose to double-fur the outside wall.
This means starting with installing the original vertical furring and finishing it with horizontal furring strips atop the vertical furring. These will need to be installed every 12 inches.
3- Installing Metal Roofing
By taking advantage of furring strips, you can reduce the price of the installation of a metal roof by putting the furring strips and rigid isolation on top of the existing roof.
During this process, the purpose of these strips will stay the same: promote drying, create airflow, prepare a level surface for a project and make room for insulation.
Much like any other kind of exterior construction, you’ll need to install rigid insulation to stop condensation from forming.
Then you can follow up with the furring. Be sure you measure the spacing in the wood strapping correctly to limit the retention of condensation inside the roof.
The general rule is to space it every 24 inches. They tend to be angled downward to encourage any moisture to run toward the bottom.
Attaching Furring Strips – Step-by-Step Process
Usually, it is best to use rigid foam when insulating a wall. This is because the rigid foam doesn’t absorb any moisture. Because of this, you won’t need to make any kind of vapor barrier.
That said, if you’re using drywall to finish a wall after insulation, you’ll need to attach furring strips every 16 inches from top to bottom.
This will give the drywall something to attach to:
- Take a pressure-treated two-by-four and place it on the ground. Move the two-by four-to the corner where the foam and floor meet. Ensure there are no gaps between the foam and the board.
- Turn the two-by-four over and apply a strong adhesive from end to end using a construction-grade adhesive. Flip the board back over and firmly press it to the corner of the room. Repeat this process and place the new board at the end of the other. Continue this throughout the length of the room.
- Use a power drill to drill angled holes carefully through the top of the board and then the concrete wall. The holes in these boards must be spaced around 16 inches apart and will need to be driven in the concrete to 1.5 inches.
- Use 3-inch fluted nails and put them in the pilot holes and concrete. Be sure to use a three-pound sledgehammer to accomplish this.
- Take a tape measure and determine the length of one of the boards. Fur two furring strips to this exact length.
- Apply strong adhesive to one side of the furring strip along its complete length. Then, press it into the foam insulation. At this point, this should be located in the left corner of the room.
- Drill .425-inch holes through the furring strip on the foam. Drill another into the insulation, followed by 1.5-inch holes on the concrete wall. They should all be spaced a minimum of 16 inches apart.
- Hammer the 3-inch nails into the pilot holes.
- Use the second furring strip and apply more adhesive to one side. Then, press it to the insulation as you did with the first furring strip. Keep applying these strips all of the ways down the wall until you reach the right side.
Final Thoughts
Furring strips are an important part of any project that needs an even surface upon which to work. They come in different types and materials that each suit specific types of projects.
Above, we explained their purpose and provided a guide on how to install them in your projects.
Share the post "What Are Furring Strips? Types, Uses & Installation Tips"

The wooden worktop is best suited for your kitchen no matter whether you want to get a traditional or a Read more
Used for many centuries, wood is strong, durable, and relatively easy to shape, which makes it the perfect choice for Read more
Usually called names like medium density fiberboards, and particleboards are both commonly found in the construction of homes and furniture Read more
Baltic birch is considered to be hardwood because it’s entirely made of birch plies and layers (that are hardwood and Read more

Hi, I am Mark Garner a professional carpenter, woodworker, and DIY painter. I live in the small city of Peoria, Arizona as a semi-retired woodworker. I have started this blog with a simple motive to help you with my wood experience in this sector. If you like to know more about what I love doing and how it all got started, you can check more about me here.