Chalk paint has earned its cult following for a reason. It’s low-prep, ultra-matte, forgiving, and capable of transforming a tired oak dresser into a modern farmhouse showpiece in a weekend.
But here’s the truth most Pinterest boards won’t tell you: chalk paint isn’t foolproof.
When it goes wrong, it can go visibly wrong—streaks, peeling, blotchy patches, weird texture, or a finish that just feels… off.
The good news is that most chalk paint problems on wood aren’t product failures—they’re application, surface prep, or sealing issues.
If you’ve ever stepped back from your project and thought, “Why does my chalk paint look streaky?” or “Did I just use bad chalk paint for furniture?”—this guide is for you.
7 Most Common Chalk Paint Problems and Fixes
Below are seven common chalk paint problems on wood, what causes them, and how to fix them professionally (without starting over).
Quick Reference Table: Problem vs. Solution
| Problem | Likely Cause | Best Fix |
|---|---|---|
| Streaky chalk paint | Thick coat, fast drying | Sand lightly, thin paint, recoat evenly |
| Peeling or lifting | No prep, glossy surface | Sand + degrease + bonding primer |
| Bleed-through stains | Tannins or old damage | Shellac primer before repainting |
| Blotchy finish | Uneven absorption | Sand + thin second coat |
| Thick texture | Paint too heavy | Thin slightly + sand between coats |
| Chalk paint over wax failure | Wax barrier | Remove wax + prime |
| Weak durability | No sealant applied | Wax or polycrylic topcoat |
1. Streaky or Uneven Brush Marks
Few things are more frustrating than applying a beautiful matte coat only to see streaky chalk paint once it dries.
Chalk paint is thick and highly pigmented, which is great for coverage—but it also means brush technique matters more than people think.
Streaking typically happens when:
- The paint is applied too thickly.
- The brush is overloaded.
- The paint starts drying before you’ve finished blending.
- The surface is too porous and absorbs paint unevenly.
Wood, especially raw or sanded wood, can suck up moisture quickly, leaving visible lap lines and inconsistent sheen. Sometimes people assume they’ve used bad chalk paint, when in reality, it’s a moisture balance issue.
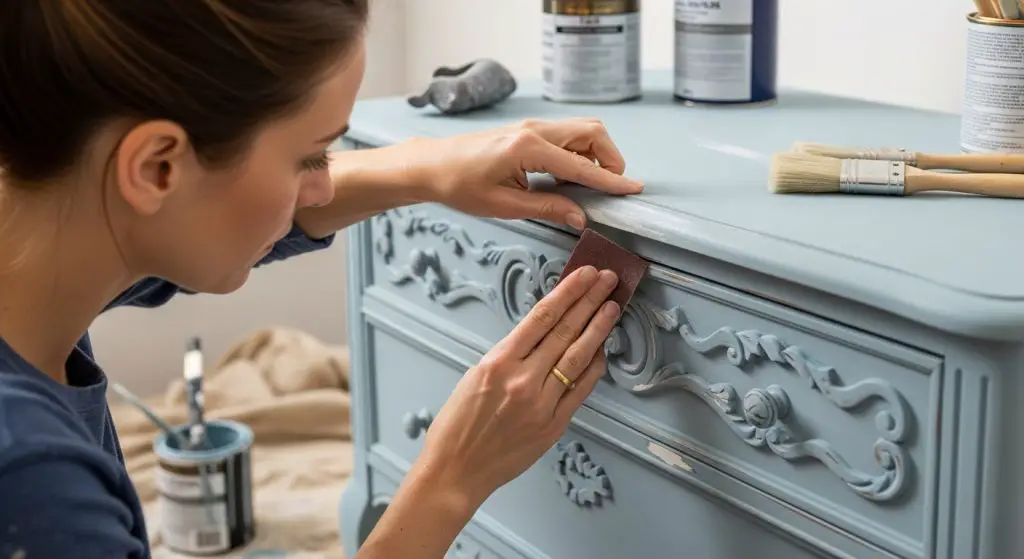
How to Fix It
- Lightly sand with 220–320 grit sandpaper after it dries.
- Apply a second, thinner coat with a slightly damp brush.
- Add a small amount of water (5–10%) to improve flow.
- Work in small sections and keep a “wet edge.”
- Use long, consistent strokes in one direction for the final pass.
2. Peeling or Poor Adhesion
Chalk paint is famous for “no sanding required,” but that doesn’t mean no prep ever. When chalk paint starts peeling, scratching off easily, or chipping in sheets, adhesion is the culprit.
This is common when painting over:
- Glossy polyurethane
- Laminate surfaces
- Oil-based finishes
- Furniture with silicone polish residue
If you’re seeing chalk paint lifting during light sanding or distressing, you’re likely dealing with a contaminated or slick surface.
How to Fix It
- Sand glossy surfaces lightly (150–180 grit) before repainting.
- Degrease thoroughly with TSP or a degreasing cleaner.
- For laminate, apply a bonding primer first.
- Remove all dust before repainting.
- Allow full cure time (24–48 hours minimum) before sealing.
3. Bleed-Through and Stains Showing Through
You’ve applied a crisp white coat—and hours later, yellow or brown stains creep through like ghosts from projects past. That’s tannin bleed-through, and wood species like oak, mahogany, and cherry are notorious for it.
Water-based chalk paint reactivates tannins in wood. Even worse, old furniture may contain water stains, ink, or smoke damage that resurfaces after painting.
This is one of the most misunderstood chalk paint problems because it looks like discoloration or uneven application—but it’s chemical migration.
How to Fix It
- Let the surface dry completely.
- Spot-prime stains with a shellac-based primer.
- Repaint once primer dries.
- For heavy bleed-through, prime the entire piece before repainting.
- Avoid using water to thin paint on tannin-prone woods.
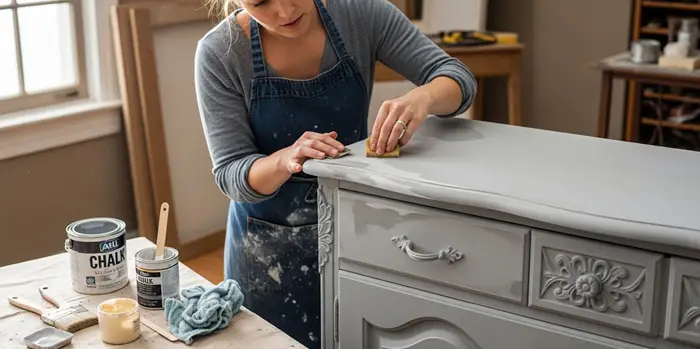
4. Chalk Paint Looks Blotchy or Patchy
Sometimes chalk paint looks streaky, but other times it appears cloudy, dull in some spots, and slightly shiny in others. This usually happens due to uneven absorption or inconsistent topcoat application.
Raw wood absorbs paint differently across grain patterns. Additionally, applying wax unevenly can create blotchy sheen variations.
Humidity and temperature also play a role—high humidity can delay drying and alter the final finish appearance.
How to Fix It
- Lightly sand uneven areas once dry.
- Apply another thin, even coat.
- Use a foam roller for smoother consistency.
- If wax caused blotching, buff evenly with a lint-free cloth.
- Maintain indoor temperatures between 60–80°F.
5. Brush Drag or Thick, Textured Finish
Chalk paint is thicker than latex, which gives it character—but if it feels like you’re dragging peanut butter across wood, something’s off.
Heavy texture happens when:
- Paint is applied too thickly.
- The brush is too stiff.
- The room temperature is too warm.
- The paint has thickened in the can.
A textured finish isn’t always bad (some people want that rustic look), but if you’re aiming for smooth modern lines, it becomes a problem.
How to Fix It
- Stir paint thoroughly—don’t shake.
- Add a small amount of water to loosen the consistency.
- Use a high-quality synthetic bristle brush.
- Sand lightly between coats.
- Apply thinner coats and build up coverage gradually.
6. Problems Applying Chalk Paint Over Wax
Applying chalk paint over wax is a guaranteed adhesion risk. Wax acts as a moisture barrier, preventing paint from bonding properly.
If you paint directly over waxed furniture, the paint may bead up, slide, or peel later. This often gets labeled as bad chalk paint—but the surface chemistry is the real issue.
Wax must be fully removed before repainting. There’s no shortcut here.
How to Fix It
- Use mineral spirits to dissolve and remove wax.
- Wipe thoroughly with clean cloths until residue is gone.
- Lightly sand to create a mechanical tooth.
- Clean again to remove dust.
- Apply bonding primer before repainting.
7. Chalky Residue or Weak Durability After Drying
Chalk paint dries to a porous, matte finish. Without sealing, it can feel dusty, absorb stains, and scratch easily.
Some people panic and assume they’ve used bad chalk paint for furniture—but that soft feel is intentional.
Chalk paint must be sealed with wood wax or a water-based polyurethane for durability. Skipping this step leads to premature wear, especially on tabletops, dressers, and cabinets.
How to Fix It
- Allow paint to cure 24 hours before sealing.
- Apply clear wax with a lint-free cloth or wax brush.
- Buff after 15–30 minutes.
- Alternatively, use a water-based polycrylic for high-traffic pieces.
- Avoid heavy use for 7–21 days while curing completes.
Is Chalk Paint Good for Wood Furniture?
Short answer? Yes—if you use it for the right reasons.
Chalk paint has become a favorite among DIYers and furniture flippers across the U.S. because it’s beginner-friendly, low-prep, and forgiving.
Unlike traditional latex or oil-based paints, chalk paint has a thick, matte formula that adheres well to wood, laminate, metal, and even previously finished surfaces.
That means little to no sanding and usually no primer. For busy homeowners or weekend warriors, that’s a big win.
Technically speaking, chalk paint contains calcium carbonate or similar additives that give it that signature velvety, ultra-matte finish.
It dries quickly, distresses beautifully, and creates that soft farmhouse or vintage aesthetic people love. If you’re refinishing a dresser, nightstand, or cabinet and want character—not factory-perfect gloss—chalk paint delivers.
However, it’s not bulletproof. Chalk paint is porous and must be sealed with wax or a topcoat for durability.
Without sealing, it can stain, scuff, or absorb moisture. Even with wax, it’s generally better suited for low-to-moderate traffic pieces rather than heavily used kitchen tables or bathroom vanities (unless sealed with a tougher polyurethane).
So, is it good for furniture? Absolutely—for decorative pieces, accent furniture, and projects where ease and style matter more than industrial-grade durability.
| Pros | Cons |
|---|---|
| Minimal prep – often no sanding or priming required | Must be sealed (wax or topcoat) for durability |
| Excellent adhesion to multiple surfaces | Can scratch or scuff if not properly sealed |
| Dries quickly | Matte finish isn’t for everyone |
| Easy to distress for vintage looks | Wax topcoat requires maintenance over time |
| Thick formula hides minor surface flaws | Not ideal for high-moisture or heavy-use surfaces |
| Beginner-friendly application | Can show brush strokes if applied unevenly |
How to Fix Blotchy Wax on Chalk Painted Wood Furniture?
Blotchy wax on chalk-painted furniture is the DIY equivalent of spinach in your teeth—small mistake, big distraction.
Instead of that smooth, velvety matte finish chalk paint is famous for, you’re left staring at dark patches, streaks, or cloudy spots.
The good news is that in most cases, it’s completely fixable—no need to banish your dresser to the garage.
Here’s how to bring that finish back to life.
1. Buff it out first (the simplest fix)
Before you panic, give the wax time to cure—about 24 hours. Wax that’s still soft or tacky can smear instead of smooth out. Once dry, grab a lint-free cloth or a dedicated buffing brush and apply firm, even pressure.
Work in small sections using circular or long back-and-forth motions. The goal is to redistribute and level the wax, not grind it into submission.
If the blotches start fading, continue buffing the entire piece for a consistent sheen. Many uneven wax issues are simply the result of excess product that hasn’t been properly buffed.
2. Apply a thin, even fresh coat
If buffing doesn’t fully solve it, try applying a very thin coat of soft wax over the existing layer. Use a quality wax brush or lint-free cloth and work in controlled, small sections.
Think “less is more.” Heavy-handed waxing is usually what caused the blotches in the first place. Spread the wax evenly, then immediately remove excess with long, smooth strokes. This reactivates the underlying wax slightly and helps blend uneven areas into a uniform finish.
3. Remove and reapply (reset button)
Still blotchy? Time for a reset. Dampen a clean cloth with mineral spirits and gently wipe the surface to dissolve and remove the wax. You’ll know it’s gone when you can feel the chalk paint’s natural, slightly porous texture again.
Wipe down with a lightly damp cloth to remove residue and let the surface dry for at least an hour. Then reapply wax—thin coats only—allowing each layer to dry fully before adding another. Avoid sanding until all wax is removed; otherwise, you’ll clog your sandpaper fast.
4. Turn the flaw into a feature
If the blotch won’t budge and it’s localized, consider getting creative. Stenciling, layering a darker glaze, or incorporating decorative elements can transform an “oops” into intentional character. Chalk paint thrives in distressed and artistic finishes—sometimes imperfection works in your favor.
5. Strip and start fresh (last resort)
If the entire piece looks uneven and nothing else works, you may need to strip the wax—and possibly the paint—and start over. Remove wax with mineral spirits, then lightly sand to strip chalk paint. Once clean, wipe down, repaint, and wax again properly.
It’s more labor-intensive, but it guarantees a clean slate.
Final Thoughts
Chalk paint is wonderfully forgiving—but it still follows the laws of surface science. Wood expands, contracts, absorbs, and releases moisture. Paint responds to all of it.
The good news is that nearly every chalk paint problem can be corrected without stripping everything back to bare wood. Whether you’re dealing with streaky chalk paint, adhesion issues, or surface texture problems, the fix usually involves better prep, thinner coats, and proper sealing.
The next time your chalk paint looks streaky or behaves unexpectedly, don’t panic. Step back, diagnose the cause, and approach it methodically.
Because in most cases, it’s not bad chalk paint—it’s just paint asking for a little more respect. And once you understand that, you’re no longer just painting furniture. You’re finishing it properly.
Share the post "7 Chalk Paint Problems on Wood (How to Fix Them)"

We are constantly finding new ways to update our home exteriors. If you are a bit tight on budget, renovating Read more

Cypress wood has been used for thousands of years in shipbuilding, so it is well-known for its water-resistance properties. Due Read more

We all know - Heat is the enemy of wood. When you place a hot item on a wooden surface Read more

If you are looking to upgrade your dining room but are on a budget, then painting your oak table and Read more

Hi, I am Mark Garner a professional carpenter, woodworker, and DIY painter. I live in the small city of Peoria, Arizona as a semi-retired woodworker. I have started this blog with a simple motive to help you with my wood experience in this sector. If you like to know more about what I love doing and how it all got started, you can check more about me here.