We all know – Heat is the enemy of wood.
When you place a hot item on a wooden surface such as a coffee table, for example, it may cause damage which results in a burn mark.
Burn marks are more than just surface damage; they can penetrate the wood depending on the amount of heat applied and its duration.
Getting rid of burn marks takes considerable effort, but it can be done depending on the amount of damage that has occurred.
But before you start, it pays to fully understand what causes heat or burn marks in the wood, how they should be addressed, and what are the most used home remedies to reduce their appearance.
What Causes Heat or Burn Marks on Wood?
The heat or burn mark you see on a wood table is typically caused by two components, the heat and the moisture that is present in the wood.
When you place something hot on a wooden surface of your dining tabletop, the pores of the wood open up, which allows the moisture to seep inside.
Once the wood starts to cool, the pores will close and trap the water or liquid which has collected deep inside.
It is the presence of moisture that changes the appearance of the wood.
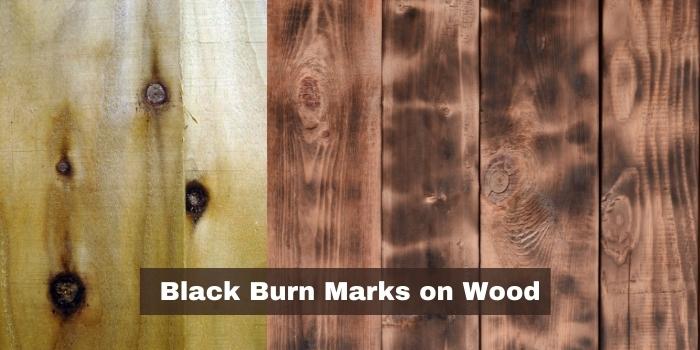
It will usually result in a darker stain that can be easily seen as black burn marks.
Signs:
A heat mark alone without moisture is normally white.
But if the mark is black, then the causes include rot, oxidation, or charring.
Older furniture is subject to darker heat or burn marks – because of the other materials present, such as dirt, debris, or the age of the wood itself.
Prevention:
Of course, the best way to treat a burn (or heat marks) on your table is to prevent it from happening in the first place.
The use of heat mats, coasters, and the like will prevent the heat from coming into contact with the wood.
Plus, these wood protective items are inexpensive and easy to use. And if you do not have them, then a thick book or magazine can do in a pinch.
However, accidents can happen even with the best preparation.
So, what happens if the painted wooden surface should show a burn mark?

Steps to Remove Burn Marks from Painted Wood
Removing burn marks from painted wood is problematic because you will need to remove the old paint and replace it across the entire surface.
Otherwise, the area that was burned will still clearly be seen even after you touch it up.
But there are steps you can take to remove the burn mark and restore your wooden item.
If the wood is varnished, you will need to cover the entire area that was affected. This means prepping the area and choosing the right paint varnish.
You’ll have some leeway when choosing the varnish depending on the type of wood. In some cases, a water-soluble lacquer may be the perfect solution.
What follows are the basic steps to remove burn marks from wood that has been painted.
Step 1- Sand:
Use 80-grit sandpaper across the affected surface.
Step 2- Vacuum:
Remove all the sanded dust from the surface to make it clean.
Step 3- Sand & Vacuum Again:
This time, use 140-grit sandpaper to sand the surface once more.
And then remove the dust from the surface again.
Step 4- Wipe:
If you see any sanded dust remaining, remove any dirt with a damp cloth.
Step 5- Putty:
Let the surface dry, and then repair all the bumps, holes, and scratches with wood putty.
Step 6- Sand:
Once it is dry, sand again with 140-grit sandpaper.
Vacuum away the dust, and now you are ready to apply the primer and varnish.
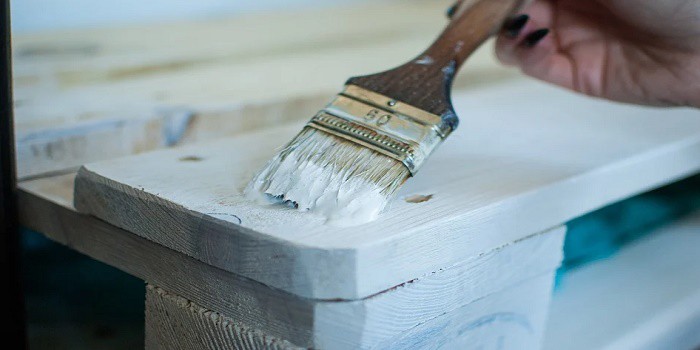
Step 7- Primer and Varnish:
To apply the finish on the wood surface, follow these simple steps…
- Primer: Apply the primer with a roller or brush
- Let It Dry: For about 2 hours, at least
- Sand: use 140-grit sandpaper to roughen the surface
- Vacuum: Remove the dust from the surface
- Varnish: Apply the varnish as per instructions to seal the surface
You need to move with care but not too slowly, lest part of the varnish dries too soon.
After it has been applied and fully dried, you may need to apply a second coat.
To fully protect the paint for years to come, add at least three coats of the clear coat once the cleaning and priming are finished.
This will protect the underlying paint directly and make it easier to clean and dust your dining table.
Few Home Remedies That Can Remove Heat Marks from Wood
If you need to get rid of scorch or burn marks from wood, a few home remedies work quite nicely. Here they are…
1- Baking Soda & Toothpaste:
Mix these ingredients together in equal parts. What you get will be a paste that is a little sticky.
Apply the paste to the burn or scorch mark for at least five minutes. Then wipe it away with a clean cloth, including all residue.
When using this method, be sure to use the classic paste and not the gel-type of toothpaste.
2- Cigarette Ash & Lemon Juice:
This method can also work well to fix burn and scorch marks on your worktops, countertop, wooden floor, or deck.
This will particularly work very well for fixing cigarette burn marks.
Just mix the two together in a cup, then soak a towel or washcloth in the mixture. Rub it into the burn mark until you see the stain disappear.
If you do not have any cigarette ashes, the ashes from the fireplace will work as well.
3- Extra Fine Steel Wool:
With this method, you will need to rub the extra-fine steel wool gently into the burned surface area.
The trick is to fully remove the burn mark without digging into the undamaged wood. Be sure to stop rubbing once the burnt stain is fully removed.
Remember, steel wool that is coarser than the extra-fine will damage the wood. So, avoid using that.
4- Iron:
You may think that applying more heat will only make the burn mark worse, but actually, the opposite is true if you apply the right type of heat.
The heat will open up the pores of the wood and allow the moisture inside to rise.
This will essentially pull out the stain from the wood.
You will need to take the following steps…
- Clean the Table: Wipe it down with a damp cloth and let it fully dry
- Iron on Low Heat: Do not use the steam option at this point
- Cover and Apply the Heat: Put an old towel over the spot and then apply the iron
Remember to keep the iron moving. If it sits too long in one spot, it may warp the wood underneath the towel.
- Steam: If the stain is a really tough one or has been around for a long time, then you might need to use the steam option after trying the iron on low heat first.
Only apply small amounts of steam and keep using the towel.
Check frequently under the towel to see if the stain is being lifted up. Once it is fully gone, stop applying the heat.
Now you can apply the finish once the stain is gone and the surface is fully dry.
After the work you put into removing the stain, spending a little money on coasters or heat mats will definitely be worth it to prevent a new stain from being created.
5- Mayonnaise:
It may not seem intuitive at first, but mayonnaise has ingredients that will bolster the wood that has been damaged.
All you need to do is apply a small amount to the affected area and let it sit for a while.
You may want to do this overnight just to be sure, but it can work in less time than that.
Rub off the mayo and judge the results. If they are not sufficient, then you may want to re-apply and let it sit for longer.
Final Thoughts
It’s never easy to remove a burn or scorch mark from a well-painted wooden dining table, but it can be done.
All you will need is to proceed carefully and do things step-by-step.
If you do not have any of the above materials, it is possible to use fine grit sandpaper or even a sharp knife to remove the burned area.
Just remember that you will need to repair it with putty once completed.
Share the post "How Do You Get Burn Marks Off Painted Wood Table?"

We are constantly finding new ways to update our home exteriors. If you are a bit tight on budget, renovating Read more

Cypress wood has been used for thousands of years in shipbuilding, so it is well-known for its water-resistance properties. Due Read more

If you are looking to upgrade your dining room but are on a budget, then painting your oak table and Read more
Yes, you can use emulsion paint on any wood, even as an undercoat. But as these paints are water-based, I Read more

Hi, I am Mark Garner a professional carpenter, woodworker, and DIY painter. I live in the small city of Peoria, Arizona as a semi-retired woodworker. I have started this blog with a simple motive to help you with my wood experience in this sector. If you like to know more about what I love doing and how it all got started, you can check more about me here.