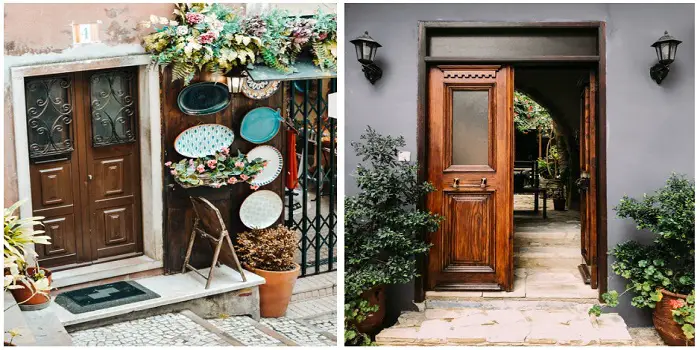
Lacquering the wood is a way by which you can enhance the natural grains and beauty of the doors you have in your home without worrying about primer, stains, paints, and other stuff.
In simplest terms, putting up the clear coats of lacquer on your wooden door or furniture means adding a layer of nice glossy finish that isn’t only durable but also attractive.
Knowing how to lacquer your wood piece properly is however the key to success. It’s like fine art, which will need some patience, skills, and experience.
If you apply it too lightly, it will not offer the finish you desire. And if you go one step ahead to apply it heavily, it can create a gummy, tacky layer that takes forever to dry and looks uneven.
For the sake of upkeeping the beauty of your interior and exterior wood doors, here is a step-by-step detailed guide you can follow when you plan to lacquer your wood doors.
How to Spray Lacquer Wood Door?
For applying lacquer, you can either use a brush or a sprayer machine.
While application with a brush is easier for DIYers who are working on smaller jobs, using a sprayer is what I recommend if you need to lacquer large-size doors or other larger wood projects.
Spraying lacquer is also a recommended option because lacquers will dry to touch very fast (usually within a minute). And keeping a wet edge when brushing lacquer on doors can be challenging.
Below are the steps you will need to follow when spraying the lacquer on wood.
Step 1 – Gather tools and materials
For lacquering wood, you will need the following materials:
- Lacquer
- Respirator
- Gloves
- Tack-cloth
- Steel wool
- Sandpaper
- Spray gun
- Paintbrush
- Paste wax
- Lacquer thinner
- Water-based sealer
After you are ready with all these things, start by wearing your respirator and gloves.
Step 2 – Prepare Your Wood for Lacquer
Preparing the wood surface generally means inspecting and filling the holes and cracks in wood with lacquer-based or water-based filler.
You can seal the gaps using a putty knife and then stuff the filler into the holes using a tip of a screwdriver. Make sure you fill the cracks evenly and do not overfill the surface.
Next, you will need to sand the wood surface gently with a #120 grit sandpaper. Ensure that you sand over the filled areas properly to even the surface.
After sanding, clean the sanded dust using a tack cloth or a vacuum.
TIP: If the door is too old and there is dirt or grime accumulated, you may need to sand the complete surface and clean it with a dampened cloth in warm water.
Step 3 – Spray the Lacquer Using HVLP Sprayer
Once you have prepared the surface well, it’s time to apply the lacquer using an HVLP (high volume, low pressure) sprayer.
Here is how you can do it…
- Make a sealant mix with 50/50 parts of lacquer and the lacquer thinner
- Using a brush apply a coat of sealant and wait for about 30 minutes to dry
- Once dry, sand lightly with a piece of 0000-grade steel wool ball
- Fill your sprayer gun with lacquer and lacquer thinner in 70/30 parts
- Adjust the air pressure regulator of the sprayer gun to 30-PSI and apply an even coat of lacquer carefully
When spraying, make sure that you work along the surface of the wood.
Do not spray the surface randomly or in circular motions, as it will not form a good even layer.
Also, keep in mind that you should hold your sprayer gun at least 6 to 8 inches away from the wood surface to get a nice coat of lacquer while preventing oversprays.
Step 4 – Allow the Surface to Dry
Once you have applied the first lacquer coat, allow 2-3 hours of time for drying the surface.
After giving this much time, check the surface to ensure it’s not tacky to the touch.
At this time, you can check the surface for any rough edges or unevenness. If required, lightly sand the surface with sandpaper and clean the residue with a tack cloth.
Make sure you use fine-grit sandpaper that does not damage the lacquer coat.
Step 5 – Apply Multiple Lacquer Coats
Now it’s time to add another layer of lacquer to your wood piece.
Depending on the condition of your door, and the shiny, smooth finish you desire to get, you can apply a second, third, or even fourth coat of lacquer.
For spraying and applying the additional coats, simply repeat the above steps.
Keep in mind that additional coats of lacquer will also add some depth and darkness to your wood door. So, if you want to get a lighter color, avoid applying too many coats.
Step 6 – Allow Enough Curing Time and Finish
Once you have achieved the desired finish, allow the freshly lacquered wood for around 2 days to get cured completely.
After 48 hours, wipe the surface gently with steel wool to remove any dust. Then with wet sandpaper, sand the surface lightly and polish it with paste wax.
Tips and Warnings for Lacquering Wood:
Spraying lacquer and lacquer thinner can be dangerous as it can cause toxic fumes in the air. So, always work in a well-ventilated area and wear proper protective gear.
For spraying, either use pre-thinned lacquers or mix the standard lacquer in a thinner solvent recommended by the manufacturer of the specific lacquer product you’re using.
Thinning to the right consistency is important if you want to spray lacquers in an airless sprayer. Also, make sure that you allow enough time to get the surface dry between every lacquer coat.
How to Lacquer Wood Using a Brush?
Applying lacquer to the wood surfaces (like doors, tabletop, worktops, etc) can also be done using a brush if you do not want to use a sprayer.
In fact, you should only use a brush if the surface is small and uneven.
- Use a pre-thinned brushable lacquer or prepare a sealant by mixing lacquer with a lacquer thinner (50:50 parts)
- With a brush, apply the sealant evenly on the surface quickly using long strokes
- Make sure you make one stroke at a time and avoid back-and-forth movements
- Allow the wood to dry for about 30 minutes, and then sand lightly with a fine-grit sandpaper
- Wipe off the sanded dust with a cloth and apply a second lacquer coat on the wood
Can You Use a Paint Roller to Apply Lacquer?
Yes, lacquer can also be applied to wood doors using a roller.
In fact, it’s the right way if you do not have a sprayer available and need to lacquer a large area.
The thing you need to keep in mind is to use a high-quality sponge roller.
Dip the roller cover in the lacquer and softly roll on the wood surface to apply a thin, even film.
Do not forget to lightly sand between the coats if you are applying more than one lacquer coat to your wood surface.
What are the Preferred Weather Conditions for Lacquering Wood?
When lacquering wood projects, it’s important that you consider your local weather conditions.
Plan a day when the temperature and humidity are favorable for lacquering and drying.
For getting the best finishing, lacquer your wood items when the temperature is below 65 degrees, and humidity is less than 65%.
Higher humidity can slow down the drying time and turn the lacquer tacky.
While higher temperatures can cause the lacquer to evaporate fast – even when you are still spraying or applying with a brush.
Also, make sure:
- You don’t apply the lacquer in a dusty area
- Avoid direct sunlight over the surface you are lacquering
- Avoid areas where there are insects or bugs, as they like to stick to wet lacquer and can affect the finishing
To get a pleasant-looking finish, it’s good to postpone your project until you find a day with optimum conditions.
Or if it’s really urgent, you can remove your door to work in a room where you can regulate the temperature and humidity.
Final Thoughts
Spraying lacquer on wood doors (inside or outside) isn’t very easy. It needs a level of expertise to lacquer the wood properly surfaces, no matter its teak, oak, mahogany, or something else.
The truth is if you are not careful, not only will you create a mess, but it can damage your wood items forever.
If you really think you have the skills and patience to do it correctly, follow the above guidelines and steps carefully. Or else hire a professional to do the job and stay worry-free.
Share the post "Putting Lacquer Finish On Wood Doors (Step-By-Step Guide)"

We are constantly finding new ways to update our home exteriors. If you are a bit tight on budget, renovating Read more

Cypress wood has been used for thousands of years in shipbuilding, so it is well-known for its water-resistance properties. Due Read more

We all know - Heat is the enemy of wood. When you place a hot item on a wooden surface Read more

If you are looking to upgrade your dining room but are on a budget, then painting your oak table and Read more

Hi, I am Mark Garner a professional carpenter, woodworker, and DIY painter. I live in the small city of Peoria, Arizona as a semi-retired woodworker. I have started this blog with a simple motive to help you with my wood experience in this sector. If you like to know more about what I love doing and how it all got started, you can check more about me here.