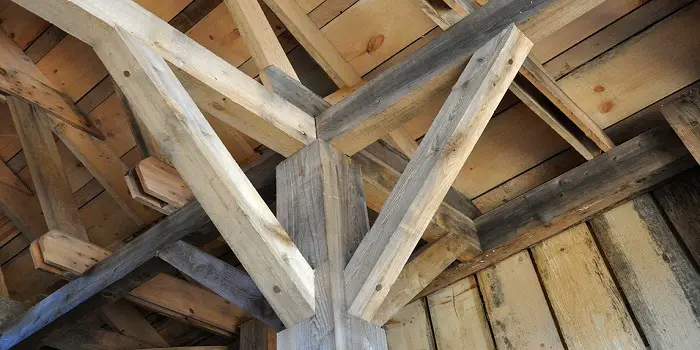
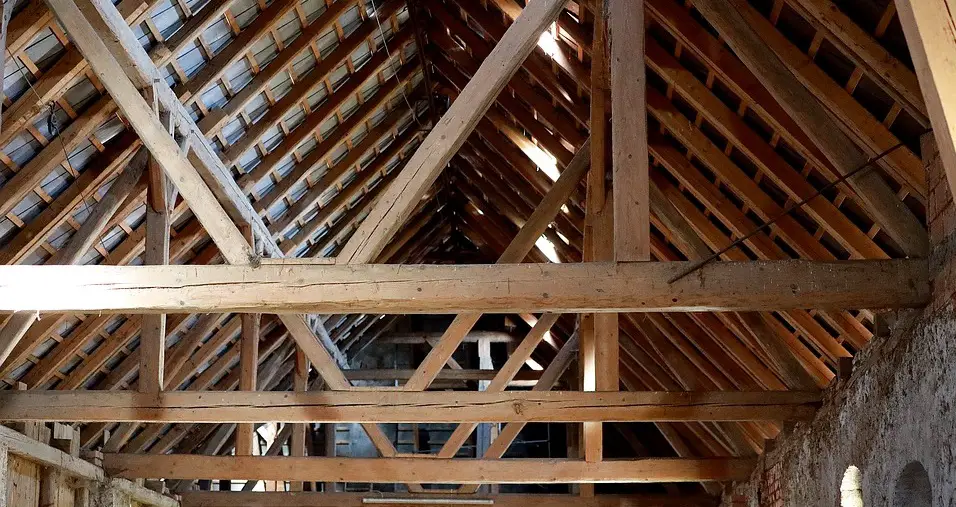
Wood beams add that touch of class to rooms.
They are not only quite attractive, but they can also add to the value of the home as well.
However, if you have rough, unfinished wood beams or ones that need to be re-stained or refurbished, you will need the right tools and supplies for the job.
It may not be the easiest task you have ever tried, but it can be done when you do it the right way.
Staining Wood Beams
The first step is to evaluate the condition of the beams.
If they are in good shape, then you can proceed to the color you want to paint them or if you want to use stain.
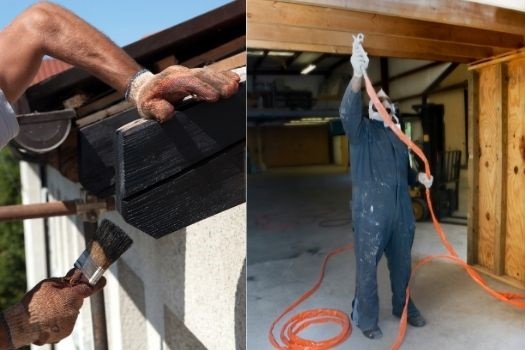
Step 1- Get the Protection:
Before you start, be sure to wear gloves, goggles, and a breathing mask to prevent touching or inhaling any fumes generated from the stain.
It also helps to have someone hold the ladder as you do the work.
Step 2- Prepare:
On the day you decide to apply the new stain, be sure to ventilate the area properly.
Open the windows, turn on a fan or two, and let the air flow through.
Next, remove all unnecessary items from the room and cover everything else with tarps, drop cloths, or old blankets you no longer need.
Also, apply painter’s tape to the areas around the beams that may come into contact with the brush. And be sure to cover both ends of the beam, so no paint touches the ceiling.
Step 3- Strip the old paint:
For the right finish, you will most likely have to strip the old paint away first.
You can sand off the paint, but if the wood beams are old or have been damaged, sanding may cause even more harm.
Instead, you may want to use a paint stripper to do the job. Once you have stripped the old paint away, you can finish the beams using the stain, oil, and/or wax.
Step 4- Clean the beams:
Be sure to prep the wood properly before applying the water-based stain. This means removing all dust particles, wetting the wood, and letting it sit overnight.
Then on the next morning, sand away any roughness on the surface before applying the stain.
Step 5- Staining the wood beams:
Once the beams are ready, apply the primer, let it dry, and then apply the first coat of stain.
Let that dry, and apply a second coat – keep a piece of rag handy to wipe off all the excess wood stain as you apply.
When the second coat of stain is completely dry, you can remove the painter’s tape.
Always use a rag or a soft-bristled brush to stain the wood beams. Never use a foam roller or a sponge for stain application, as the stain will get soaked up and affect the finish.
Once you have applied the stain on the rough beams, you will need to seal the results using a wood varnish or oil. When applying the stain and the sealant, you’ll also want to be careful around the edges.
What Colors to Use for Staining Beams?
Choosing the right color can be a bit of a challenge.
Essentially, you can either paint the beams to match the colors on the ceiling or walls or contrast them beams by painting them with a complementary color.
Dark beams against a light ceiling are a popular choice.
Another is to match the beams to the color of the floor.
Another popular selection is if you have light walls and ceilings, you can paint the beams of wood brown so they stand out.
If you want to express your artistic side, you can add designs or even paint freehand.
Oil-Based vs. Water-Based Stains: What’s Better?
Oil-based stains are the most popular for staining wooden support beams. This is because they really penetrate the wood and help protect the surface during construction.
You’ll find many oil-based stains using linseed oil that includes varnish. Since linseed oil is natural and contains no toxins, it really does preserve the wood.
Oil-based stains can be identified by the mineral spirits which thin the product.
Mineral spirits or aliphatic hydrocarbons are used as a solvent to help thin the stain so it can be properly applied.
You may find iron oxide pigments or dyes in certain oil-based stains.
Plus, some may contain binders as well, which helps attach the pigments to the wood for better results.
Another ingredient, though it may not be listed, is a thickening agent. This controls the amount of penetration into the wood. Be sure that the oil-based stain you use is compatible with the wood of the beams.
Latex/Acrylic-Based Stains
Latex, Acrylic, or Water-based stains, on the other hand, use water instead of organic thinners. They also contain aniline dyes that are water-soluble and stain the wood.
Such dyes are chemically derived and often come from coal tar which provides colorfastness when dissolved.
The advantage of solid water-based stains over oil-based ones starts with their environmentally friendly chemicals.
There are no volatile organic compounds (VOCs), and they offer a great look when properly applied.
However, the fast-drying nature of the water-based stains makes them difficult to make look even across the surface.
This is why many professionals apply the stain in sections over short periods or add a slow evaporating solvent, but this will reduce the color of the stain.
What’s My Opinion?
When choosing the stain, I think a water-based acrylic wood stain or dye can enhance the natural beauty of the wood grain with relatively little effort.
Water-based stains are also friendly since you can choose from hundreds of color that works well with your home décor.
Can You Use Paint on Rough Wooden Beams?
While you can apply paint on bare wooden beams, staining them is a much better option, I think because it will get soaked inside and provide better protection.
If you decide to apply the paint rather than stain, acrylic interior paint is an excellent choice, but be sure to use a primer first after you have removed the old paint.
That will help stick the paint to the beams.
Good latex paint also works quite well since it dries fast and doesn’t cost much money.
However, if you want that distressed appearance that is quite popular, you can use chalk or milk paint for the job. If you want to include an extra touch, then use semi or high-gloss paint, which adds sheen to the beams.

Different Types of Stains for Different Wood Beams
When finishing the wood beams, you will need to identify the type of wood first before choosing the stain.
It is best if you can start with scrap wood that matches the type of wood used for your beam.
Test out the oil-based and water-based stains first on the scrap wood and judge the results. That way, you’ll know which stain will work best.
What follows are some common woods used in making the beams and the type of finish you should choose for them…
a) Alder Wood
The biggest issue with alder wood is that it absorbs the stain unevenly, which creates blotchy results.
So, you will need to pre-treat the alder wood before applying the stain. Otherwise, it may become discolored over time.
Use aniline dyes and apply a thin coat. Wait for the coat to dry, and then apply another to help even out the results.
b) Birchwood
Birch may be less expensive compared to maple, but it’s considerably harder to stain. This is why a water-based stain is best.
Apply a pre-stain conditioner and then brush on the water-based stain, so it is even on the surface. If it does not look even after drying, add a toner to the birch.
c) Hardwoods
If you have an ash or oak beam, you will need a stain designed for hardwoods.
A penetrating oil-based stain is arguably the best. It enhances the beauty while absorbing the stain for maximum protection.
The amount of color intensity will depend on how long you spend staining the wood. So, expect the drying times to be longer.
One tip is to wipe down the wood after applying the stain so that any excess is not present when it dries.
Otherwise, you may have lumps or bumps of stain on the surface.
d) Pale Woods
For pale woods such as pine, you only need a light coating of oil-based stain to gain the desired results.
Plus, it is recommended that you use a pigmented oil stain that does not actually penetrate the wood.
It helps that the stain will turn the wood into an oak or cherry coloring that makes it look more expensive and beautiful. Be sure to apply a pre-staining conditioner and select either a light or medium stain for the job.
Final Thoughts
And that is how you stain rough, unfinished wooden beams.
When choosing the stain, keep in mind that a water-based stain delivers great-looking results, but it can take a while to apply and does not offer protection compared to an oil-based stain.
If choosing an oil-based stain, you should expect them to take up to three hours to dry. After that, apply another coat of the oil-based stain and wait around ten hours before applying the wood finish.
Also, be sure to take your time when staining, wear the proper protective gear, and test out the stains first before deciding which one works best.

We are constantly finding new ways to update our home exteriors. If you are a bit tight on budget, renovating Read more

Cypress wood has been used for thousands of years in shipbuilding, so it is well-known for its water-resistance properties. Due Read more

We all know - Heat is the enemy of wood. When you place a hot item on a wooden surface Read more

If you are looking to upgrade your dining room but are on a budget, then painting your oak table and Read more

Hi, I am Mark Garner a professional carpenter, woodworker, and DIY painter. I live in the small city of Peoria, Arizona as a semi-retired woodworker. I have started this blog with a simple motive to help you with my wood experience in this sector. If you like to know more about what I love doing and how it all got started, you can check more about me here.