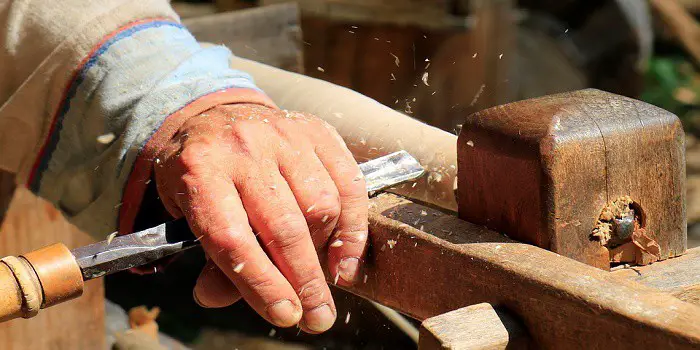
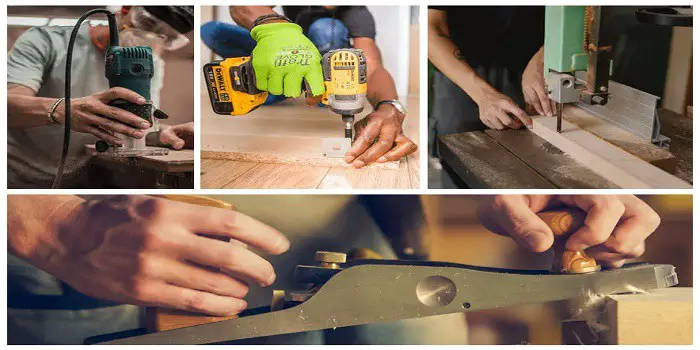
Whether you have been working with wood all your life or just getting started, having the proper tools is a must to do the job right.
Even those who are just beginning will benefit from having the proper hand tools for the job.
The advantage of many hand tools is that they have come down from prehistoric times, so their design has been refined over thousands of years.
As the Stone Age gave way to the Bronze Age, Iron Age, and ultimately to our modern times, stronger materials were introduced to make the hand tools better, more durable, and effective at their job.
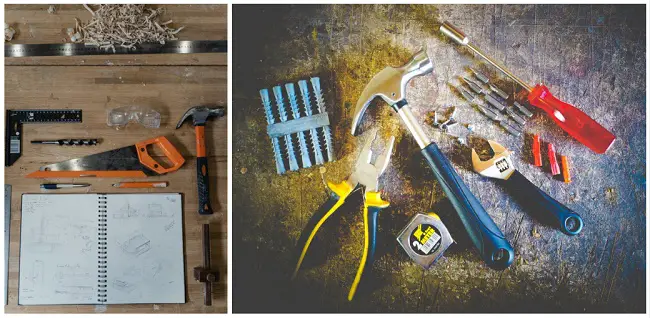
Must-Have Woodworking Hand Tools
With so many hand tools available, it may seem rather daunting to narrow the selection to just the most essential for beginners.
However, the following tools are the right place to get started.
If you need more tools, that will become apparent as you gain experience working with wood.
Until then, you can start with the essential hand tools on this list.
1- Chisel
The chisel is used to chip and remove pieces or layers of wood.
Many different types of chisels are available, but the bevel chisel is the most common and arguably the most versatile hand tool you should have if you are just starting as a beginner.
As you gain some experience, get some woodworking skills, and feel the need, you can choose a quality chisel set (of 6).
Chisels are strong, durable, and often made to be used with mallets.
You will need to be careful and wear safety goggles to prevent the chips from the wood from getting in your eyes.
Primary uses:
- Shaping the wood
- Carving and decorative purposes
- Shaving, dressing, and sharpening the solid wood
2- Clamps
The clamp is designed to hold materials in place. This includes materials that need to be secured for all types of woodworking.
Clamps come in all different sizes, from tiny ones used by surgeons to massive ones used by lumberjacks.
There are also many types of clamps used to perform different jobs.
The clamps you are most likely to see in woodworking are 10 – 12 inches. While there are inexpensive and basic, these are super helpful for holding joints and boards.
Primary uses:
- Hold freshly glued joints
- Holding the boards together when drilling and screwing
- Many other heavy-duty clamps are useful in bigger projects and construction
3- Hammer
Perhaps the most recognizable and one of the more versatile tools on this list is a hammer.
You can use them primarily to drive nails, pull them out from the walls (if they have a claw feature), and break apart materials for different uses.
There are different types of hammers, so you will need the right one for the task at hand.
But a typical claw hammer is a good place to start.
Primary uses:
- Pounding and prying
- Driving small as well as long nails and tacks
- Other woodworking and heavy carpentry work
4- Mallet
The mallet may have the same basic function as a hammer, which is to break apart materials. But there are some differences between a hammer and a mallet which you should take into account.
However, a Wooden Joiner’s Mallet is a must-have for your traditional woodworking shop.
It can do several tasks, most notably being used with chisels to cut joints into the wood. The types of joints include dovetail, chipping mortises, and the like.
Mallets are typically crafted out of hardwood, such as beech wood, maple, or oak.
Remember that a metal hammer is no substitute for a wooden mallet, especially when striking chisels.
Plus, the mallet you purchase should have a good balance and be easy to swing and direct to avoid making any striking marks.
Primary uses:
- Tapping wood joints together
- Useful while driving chisels and dowels
- Adjusting large wooden posts and beams
- Useful in various other industries besides woodworking
5- Pliers
Most pliers are constructed from two pieces of high carbon or alloy steel for greater strength.
They provide a solid grip when your hands are not small enough or strong enough to do the job.
Essentially, the pliers are a necessity for beginner woodworkers as they multiply the force that your hand provides.
They are generally used to:
- Bend metal and wires
- Pull out stuck bolts
- Gripping rounded pipes or rods
- Hold nuts in place when woodworking
6- Saw
Today, most saws are powered by electricity. However, hand saws (also called panel saws) still have their places in the shop.
This is most common with hacksaws, as using them by hand is more straightforward and often more efficient.
Using a backsaw with a miter box is also quite popular for cutting angles into the wood. Other options include Carcass handsaws, Combination handsaws, Coping handsaws, Crosscut handsaws, Dovetail handsaws, Keyhole handsaws, and Ripping handsaws.
Hand saws like these are inexpensive compared to their powered counterparts.
While there are many other different types of hand saws available for woodworkers, not all are essentially useful for beginners. If you want to buy more than one, you can check them in detail to find the one that is most suitable.
Primary uses:
- Cutting solid lumber, trees, and branches
- Cutting plywood, chipboards, etc. in carpentry
- Cutting pieces of wood into different angles and shapes
7- Screwdriver
This is the elementary tool we have been using since our childhood.
You use a screwdriver to drive screws into the wood or other material, hence the name.
While there are many different shapes to the heads of screwdrivers (like Square, Triangle, Tri-Wing, Hex Key, Torx Key, etc.), the two most common you will need as a beginner are Flat-Head and Philips, which is a cross-shaped heads.
Many people use screwdrivers for chisels and other tools that they are not designed to do. While this is not recommended, if you use them creatively, they can make the various tasks easier.
Primary uses:
- Building and Construction
- Electronics and electrical equipment
- Working with bolt and fastener assemblies
- Loosening or tightening of wood screws, machine screws, fasteners, etc
8- Tape Measure
The tape measure has taken the place of the folding rule thanks to its compact design and ease of use.
However, folding rules are fundamental and can still be used as a guide when cutting boards.
You can also use a ruler if you desire; a 24″ one is perfect for most wood measuring jobs.
The retractable steel tape is another tape measure that woodworkers often use – you have seen them hooked in the belt oftentimes.
Primary usage and application:
- Measurements in woodworking and construction work
- Measuring distance across a room or a long object such as framing and beams
9- Wrench
Called a spanner in the UK, the wrench is used to tighten bolts and nuts along with holding items in place while being turned.
Wrenches for woodworking are available in different shapes and sizes for different jobs.
There are open-ended and closed-ended, or ring wrenches along with combination wrenches which are quite common.
Wrenches are primarily used for:
- Fastening the joints
- Gripping, fastening, and turning of nuts and bolts
- Tightening and loosening things like pipes and pipe fittings
10- Smoothing Plane
The smoothing plane is an essential woodworking tool for beginners that can help with all the wood-planing tasks.
When you require to sand hard the surface, using a smoothing plane (like low angle jack plane or block plane) can be a time savior and an easier option.
You can also use these beginners hand tools for jobs such as:
- smoothing the boards
- trim end grain
- trim your joints
- rough stock removal
- jointing board edges
In my opinion, for beginners, it’s not worth investing in a power planer or joiner. It not only costs more but will also consume lots of space.
Also, for a beginner who is just learning/starting with the craft and woodworking, it will be a waste of time without first knowing how to operate and use other hand-held smoothing planes like Rabbet planes and Scraper planes.
11- Spokeshaves
Spokeshaves are hand woodworking tools used to shape and smooth the surface of the wood.
These tools have a blade set at an angle to the body of the tool, and they are pushed or pulled across the surface of the wood.
The blade cuts as it moves, and the amount of material removed, can be controlled by adjusting the blade depth or the pressure applied to the tool.
There are a few types of spokeshaves available which include:
- Flat
- Concave
- Convex
- Rounded Bottom
- Combination Spokeshave
While all these spokeshaves have some differences in design and purposes, they are all typically used for shaping round or irregularly shaped pieces of wood, such as spindles or dowels.
Spokeshaves can also be used for:
- Remove the material
- Creating rounded pieces
- Rounding over the edges of boards
- For creating other decorative effects
12- Surform Tool
Although small and rather uniquely shaped, it is a versatile tool that can be used as a file or a rasp, draw knife, spoke shave, and plane. You may hear it called a multi-rasp by some.
It is a manually operated tool that is built around its unique blade. The term ‘Surform’ derives from two separate words, ‘surface’ and ‘form.’
It is designed to strip thin slices of material away, much like a knife but with much greater accuracy.
The blade itself consists of steel that has holes punched into it. The rim of each hole is a cutting edge that assists with the removal of material.
You are not far off if this looks like a cheese grader to you. The sharpened edge of each hole works to cut away materials a little at a time.
You hold the surform on its molded body so that you can properly manipulate the blade. Different blades and handles are available for use as a plane, shaver, or file.
You work the tool by either pushing or pulling it across the surface. When pressed into the material as it moves, it will remove thin slices of the top layer.
The teeth along the holes will dig into the surface and remove the material as it slides.
Some surform tools are one-handed while others are two-handed.
While it can do a considerable amount of work, the downside is that it leaves the surface relatively coarse. You will need to sand it down if a smooth surface is required.
The surform tool can be used on hardwoods such as beech, mahogany, and oak and softwoods such as pine, spruce, and larch.
However, the surform tool is not limited to wood. You can use it on various materials, including aluminum, copper, foam, laminates, plasterboard, and plastics.
Primary uses:
- Creation of wooden furniture
- Trim plasterboard
- Create sculptures
- Shape surfboards
- Shape the hooves of horses
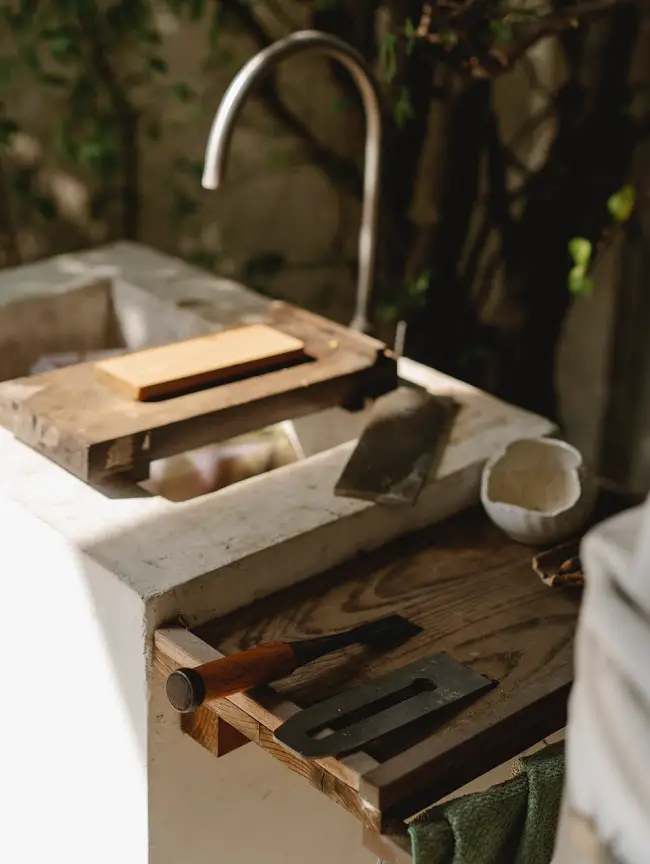
13- Sharpening Stones
To keep your plane, chisel, hand saw, and other hand tools in good working condition, you will need to keep them in an excellent sharpened condition.
Keeping the right sharpening tools and/or stones is, therefore, most essential in your toolbox.
Sharpening stones will make your woodworking task easier, faster, and more precise by sharpening the dull edges of the cutting tools as and when you need them.
You can consider buying two basic types of sharpening stones for woodworking. These include whetstones (or water stones) and diamond plates.
Water stones are available in different grit levels and can help sharpen your tools with only water. However, the downside is as you use them, they will get abraded. If that happens, you must flatten them from the center or completely replace the piece.
Diamond plates, on the other hand, are more expensive but are worth buying if you need to sharpen your hand tools more frequently.
I will recommend keeping both of them if you can afford them. But because diamond ones are slightly expensive, you can consider buying only water stones if you start as a beginner.
Primary uses:
- Sharpening and flattening chisels
- Sharpening planes, saws, knives, and even garden tools
In addition to the basic tools on the list above, you should also have a utility knife and scissors, which are quite handy when working with wood.

Why Choose Hand Tools Over Power Tools?
Given the sheer number of power tools available, starting with only some basic hand tools may seem strange.
But there are good reasons why beginners should purchase some high-quality hand tools for their woodworking needs.
Some of these, I think, are:
- Simple to use
- Inexpensive
- Cost-effective to maintain
- Durable & Long Lasting
In addition, for the times when getting electricity is not practical, having hand tools around can be exceptionally fortuitous.
And depending on the type of work you are doing, a powered tool may be a waste of money.
Unless you are churning out large projects regularly, hand tools will most likely be the primary tools used for the job.
Consider These Accessories to Complement Your Tool Box
Now that you have your basic woodworking hand tools, you should also get a toolbox to contain them.
As you expand the number of tools you own, you can purchase a tool belt or caddy to hold the essential tools on your person.
It can be pretty easy to get carried away and purchase tools you do not need or only rarely use.
For example, a conduit bender is quite handy when bending a conduit.
But if that doesn’t happen often, consider renting tools that are much cheaper than purchasing something that will not be used again.
How to Clean and Maintain Your Old Hand Tools for Longevity?
Old tools have a near-infinite lifespan so long as you’re willing to care for them.
When in use, the effects of age are kept at bay.
When they are shoved in the back of some drawer, rust begins to take over, turning them into what seems like trash.
Don’t be fooled, though.
Refurbishing old tools is exactly what’s needed to breathe life back into these treasures, no matter how degraded they look.
Workspace
When you start restoring these tools, make sure you do so in an environment that is both dry and warm.
This is because the metal, typically steel, remains warmer than in a cooler location, causing condensation to form, which can later result in the formation of rust.
In that same vein, once you’re done restoring the tool, ensure you have a container made of wood or lined with an excellent material that absorbs moisture to keep any further water damage minimal.
Disassembly
The first step in any good restoration project is taking apart the tool.
Because each material requires a little different work, there’s no way to do it all at once and expect the wood and metal to look fabulous.
Disassembly also alerts you to any replacement parts you’ll need.
Are there stripped screws? Is the wood rotten? Can the different parts even pull apart, or do you need some more muscle?
Cleaning
The essential part to tackle first is the metal since this end is what does the work.
For rust, that means submerging the various heads into a white vinegar solution for about four hours.
Following this, a bit of steel wool works great to remove the loose rust bits.
If there are still more stubborn spots, leave the metal in vinegar overnight and wipe away the rest in the morning with the wool.
Once all the rust is gone, run the metal under water to wash away vinegar traces and dry thoroughly.
For any pits or scratches, gently sand the exposed metal down until it is smooth.
Wipe it with mineral spirits, coat it with a metal primer and paint it with a gloss.
You should piece it back together or add a new handle after all that is done.
Precision Work
Not all tools are as general as hammers. Some are used for specific jobs and can’t be restored through some general process.
Again, disassemble all of the parts. However, instead of soaking in vinegar, you’ll want to avoid its extreme corrosive power in favor of a wire brush, rubbing the metal down until the rust comes off.
Following this, it’s all about sharpening what needs to be sharpened and then piecing it back together after covering it in a nice coat of anti-rust primer.
Final Thoughts
Using the right tool for the job is arguably the best advice that can be given.
However, by limiting the number of basic woodworking hand tools you own, you can get the most out of them and save money in the process.
So, go through the list above and choose the ones you need to use most or get them all if your budget allows.
Share the post "What are the Essential Woodworking Hand Tools for Beginners?"
One of the best ways to clean your yard of twigs, leaves, and tree branches after a storm is to Read more
It’s possible to only use hand or manual tools when woodworking, but then it becomes a slower process. For certain Read more

If you have never used this, steel wool is a collection of very thin steel wires bundled together in the Read more

It is easy to believe that all measuring tools for woodworking are alike. After all, their basic function is to Read more

Hi, I am Mark Garner a professional carpenter, woodworker, and DIY painter. I live in the small city of Peoria, Arizona as a semi-retired woodworker. I have started this blog with a simple motive to help you with my wood experience in this sector. If you like to know more about what I love doing and how it all got started, you can check more about me here.