
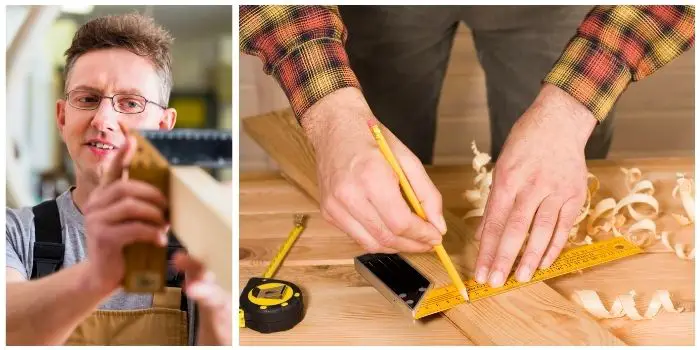
It is easy to believe that all measuring tools for woodworking are alike.
After all, their basic function is to measure surfaces for cutting, drawing, shaping, and the like.
However, when you step back and see the sheer number of different types of measuring tools used by woodworkers and carpenters, you have to consider why they all exist.
Choosing the right measuring tool may seem quite daunting for someone new to woodworking.
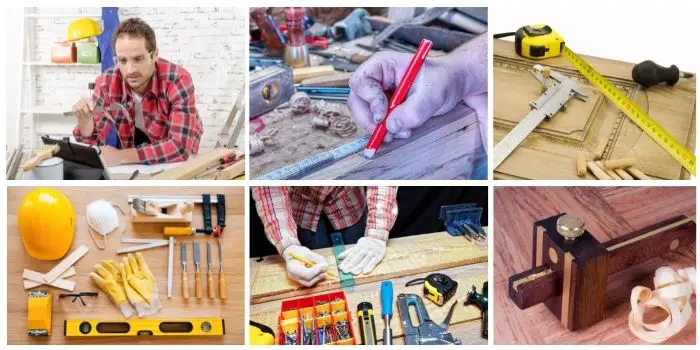
Particularly for beginners, the most essential 5 measuring tools used in carpentry include the tape measure, framing square, level, short rule, and the try square.
But there are a few more, including the tools for marking wood, that will help you cut the wood precisely once you have measured it.
In this article, you will get a much better sense of what the essential measuring tools are, how they function, and what specific jobs they are designed to carry out.
So, let’s dive in a bit deeper…
Marking & Measurement Tools in Carpentry
Not only the carpenters but even experienced woodworkers may benefit from a better understanding of the different marking and measuring tools that are available and are listed here.
So, check them out and get the ones you do not have in your toolbox.
1) Calipers
Calipers are a set of jaws in which the ends are brought together to measure certain objects.
The distance between the ends of the jaws tells you what the overall measurement is.
Some calipers come with a sliding rule scale, while others offer a digital screen that provides precise measurement.
2) Combination Square
A popular tool that lets you measure flat surfaces, the combination square has an adjustable head.
This allows the square to measure machinery and be used on joinery.
Combination squares can be found from 4” in length up to 12” and more.
3) Folding Rule
The folding rule is yet another great carpentry tool that helps in precise measurements.
For longer distances that a measuring tape is not well-suited, the folding rule works quite well.
Because there is no hook at the end, such as you find with measuring tape, the result will be a more accurate measurement.
4) Framing Square
When you need to measure a corner, the framing square is the perfect tool.
Consisting of two arms that are normally 24” and 16” in length, the framing square is an L-shaped tool that works perfectly when you must make 90-degree measurements.
The framing square also comes in smaller sizes as well.
5) Measuring Tape
Arguably the most recognizable of all measuring tools used by woodworkers, you will often see this on the belt or in the toolbox of a woodworker.
They come in different sizes to be used for different jobs.
In most cases, this will be the first measuring tool you will reach for when a measurement is needed.
6) Mechanical Pencil
This is a great marking tool for carpentry, and it’s different than a standard pencil because the line it makes is considerably thinner.
These pencils allow you to mark workpieces for drilling, to size, and cutting with greater accuracy.
7) Miter Hook
When you need to measure the dimensions of a mitered piece in carpentry, then the miter hook is for you.
You can hook a retractable tape measure into the groove provided by the hook so you can measure with ease.
8) Moisture Meter
To avoid shrinkage, the moisture in the wood must be measured to ensure that it is not significantly different compared to other pieces of wood that can be joined together.
When the moisture level is the same, then the shrinkage is even.
When it is far apart, the differences in shrinkage can tear apart wood that was otherwise joined together.
The moisture meter measures the moisture levels to ensure that it is roughly the same as all wood that is being put together.
9) Mortise Gauge
If you are making a parallel line on plywood for cutting, you will most likely need a mortise gauge.
The pin marks the wood while the thumbscrew locks the sliding mortise into place, making your cutting job much easier and fast.
10) Plumb Bob
This tool goes back thousands of years to ancient Egypt.
It is basically a string with a weight on the end suspended from a stick or level.
When in use, the vertical line of the string is compared to the vertical line of the structure.
This allows you to see if the line of your workpiece or structure is straight. If not, you can make the adjustments.
11) Quick Corners
When you need to mark angles and radii on workpieces, the quick corners can do the job.
Similar to using a round object to draw a circle by tracing its outline, the quick corners let you make outlines on surfaces so that you can use tools like routers to make the cuts.
12) Ruler Stop
You can now ensure that the cuts and holes you make in the wood material are accurate, thanks to the ruler stop.
This is normally a stainless-steel attachment placed on a steel ruler that locks into the desired position so you can easily start marking off your measurements.
13) Short Rule
As the name suggests, this is a ruler that is normally 6” in length or possibly less.
You can carry this around in your pocket, so you can make quick measurements without the need for measuring tape.
14) Sliding T-Bevel
To measure and mark angles on your workpiece, the sliding T-bevel lets you do so easily.
If you want to duplicate an angle, it is easy to use the sliding T-bevel to initially mark and then transfer that angle to another surface.
15) Spirit Level
This lets you know how to level the surface when installing projects such as counters, tables, or cabinets.
It’s pretty easy to read. You place the level flat on the surface.
If the bubble is between the middle lines, then the surface is level. If not, you can make the adjustments so that the project is level.
16) Steel Rule
A basic steel rule (both a 6” and a 12” rule) is a must-have marking tool for carpenters and woodworkers.
You should get the ones that come with etched markings, as they are more accurate and reliable than the ones with stamped markings.
Make sure to get a matte or satin finished rule along with a combination square head for better usage and performance.
17) Try Square
The try square looks similar to a framing square but is generally smaller in size.
The wooden handle serves as a lip on each side of the blade, allowing it to rest on the surface.
18) Universal Angle Guide
If you want to mark an original angle, not copy or duplicate one, then the universal angle guide is the answer.
This is often used with a miter gauge to measure angles with a workpiece.
Angles can be measured from 0 to 180 degrees.
19) 9” Protractor Square
This may be the perfect size for a protractor square for use as a bevel gauge.
The miter saw can be adjusted thanks to using this measuring tool so that you can get the proper angle.
20) 12” Adjustable Hook Rule
If you need to make a measurement from an overhanging edge, then this is the tool for you.
The hook can be repositioned along the end, which allows you to work with thinner materials.
21) Digital Bevel Square
Larger versions of the bevel square are used by woodworkers when conventional protractors or angle finders are not enough.
The bevel square makes use of digital technology to compute and measure angles quickly.
These handy tools, which are more efficient than the old-school sliding bevel square, include bold screens that measure and display the angle to ease your job.
Why is it Important to Use Measuring Tools in Carpentry?
Carpenters use a variety of tools to measure, mark, and cut wood.
While a tape measure is the most common measuring tool used by carpenters, there are other types of measuring tools that are also used depending on the project.
For example, a ruler or square can be used to mark straight lines on wood, while a level is used to make sure those lines are perfectly horizontal or vertical.
Using the correct measuring tool for the job at hand is important in order to get accurate measurements.
This is especially critical when cutting wood, as even a small error can result in a piece that does not fit correctly.
Measuring tools also help ensure that multiple pieces of wood are cut to the same size, which is important for projects like building a bookshelf or table where everything needs to line up perfectly.
What is a Clinometer Protractor – Is it Useful in Woodworking?
A clinometer is an instrument used for measuring angles of slope, elevation, or depression.
It can be used to measure the height of tall objects, such as trees, and the depth of deep holes.
Clinometer protractors are specially designed for use in woodworking.
They feature a scale that is calibrated precisely for measuring angles in degrees, making them ideal for use when creating angled cuts in wood.
A clinometer protractor can help ensure that your cuts are precise and accurate when used correctly.
What Gadget Can I Use for Measuring Odd Corners and Shapes in Woodworking?
There are a few different gadgets that can be used for measuring odd corners and shapes in woodworking.
One option is to use a template, which is a thin piece of cardboard or other material that can be used to trace the shape onto the wood.
Another option is to use a jig, which is a specialized tool that helps to guide the saw or other cutting tool along the desired path.
Finally, you have the option to use a combination square, which has a built-in protractor that can be used to measure angles.
There are also a few more complex tools, such as polar planimeters and contour gauges that can help.
However, you may want to consult with a carpenter or other experienced woodworker before using these tools to make sure you are using them correctly.
Whichever option you choose, make sure to take accurate measurements to ensure that your cuts are precise.
Conclusion
Using the right tool for the right job is more than an axiom; it is how to get the job done correctly.
The dimensions of the components must be matched, or they will not work together.
The result will be – projects that fall apart because they do not match. This is why having the right wood measuring tools is so important.
Because even state-of-the-art power tools will not help if the basic measurements are wrong.
You can start with measuring tape and then purchase other precision measuring tools needed to do different tasks in your workshop.
Share the post "21 Must-Have Marking and Measuring Tools for Carpenters"

One of the best ways to clean your yard of twigs, leaves, and tree branches after a storm is to Read more
Whether you have been working with wood all your life or just getting started, having the proper tools is a Read more
It’s possible to only use hand or manual tools when woodworking, but then it becomes a slower process. For certain Read more

If you have never used this, steel wool is a collection of very thin steel wires bundled together in the Read more

Hi, I am Mark Garner a professional carpenter, woodworker, and DIY painter. I live in the small city of Peoria, Arizona as a semi-retired woodworker. I have started this blog with a simple motive to help you with my wood experience in this sector. If you like to know more about what I love doing and how it all got started, you can check more about me here.