A wooden fence is relatively easy-care. You’ll be amazed to see how long-lasting and beautiful you can keep your old fence with only a stain and a few minutes of caring now and then.
The best way to sustain the beauty of your wood fence for a long time is to stain it right using the right tools like a pump sprayer.
Before going to the steps, let’s quickly have a look at why you exactly need to stain your wood fence.
Simply because…
- It refreshes the look and style.
- It prevents rotting or pest infestations.
- It provides better endurance to seasonal changes and weather conditions.
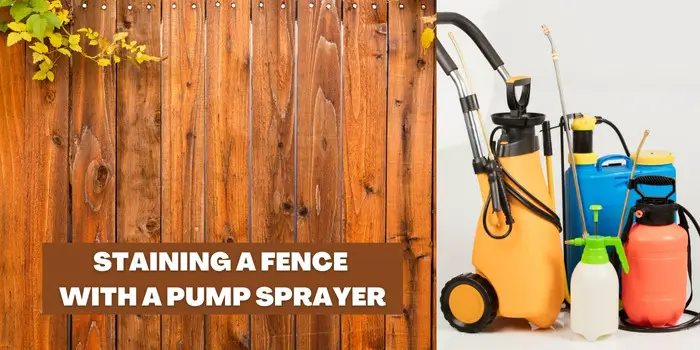
Staining Fence with Pump Sprayer
Before we jump into the steps, let’s understand what a pump sprayer is and why to use it for staining fences.
A pump sprayer is a device used to apply liquids to a surface or area, typically in the form of a mist or fine stream.
These sprayers are usually handheld and are commonly used for applications such as gardening, pest control, and cleaning.
Handheld pump sprayers are typically trigger-operated. They have a tank filled with the liquid to be sprayed, a pump that pressurizes the liquid, and a nozzle that controls the direction and amount of liquid sprayed.
While there are other stain applicators and methods, a pump sprayer makes the job easier by allowing you to quickly and evenly apply the stain over a larger area.
Properly staining the fence with a pump sprayer requires a little preparation and a bit of patience. Hence do not skip the preparation steps, whatever the condition is.
Step 1. Prepare the area around the fence
Clear out the workspace, and cover the surrounding areas like plants and vegetation using a clean cloth or newspapers to ensure that any stain which does not hit the fence does not go anywhere it is not supposed to go.
You should also remove all objects near the work area that might be covered when using a paint pump sprayer. So, outdoor garden furniture, pot plants, and the like can be removed.
Although being outdoors means plenty of ventilation, you should wear a protective mask to keep from inhaling the fumes and odors generated from the wet stain.
This also means wearing gloves and clothing to protect the skin. You might consider specialized clothing that is easy to wash or simply throw away.
You may not be able to prevent all oversprays, but you can minimize them considerably when taking the proper precautions.
Step 2. Check the fence and prepare it for staining
Now that you have prepared the area, the next step is checking the fence for infestation.
If any termites are seen on the fence, kill them before staining.
Once they are killed, you’ll want to make repairs (like filling the nail holes, cracks, etc.) before you add the stain.
Plus, you’ll also want to remove or tighten any loose screws or nails in the fence itself.
Now you will need to clean the fence to ensure you are not covering dirt or other debris.
For cleaning a wood fence before staining, you can start by washing the fence and taking notice of any flaking paint.
Just remove all the old stain or paint that is loose. A good fence cleaner can remove any additional debris if left behind.
Now when you have cleaned the fence for staining, you are ready to add the primer coating.
Step 3. Apply the primer coat to your fence
A primer coat will help the stain stick to the old fence.
So, using a clean paintbrush, apply the primer coat evenly to the entire fence parts, including posts, backer rails, and pickets.
This will take longer than using a pump sprayer or a paint gun, but it will ensure that you cover all the fences.
As the primer coat dries, use that time to prepare the pump sprayer for staining.
Step 4. Stain the fence with a pump sprayer
Purchase the type of anti-termite stain you want to use, and pour it into the pump sprayer.
Next, turn the lid counter-clockwise to make an air seal. This enables you to build up the needed vacuum in the sprayer, allowing you to apply it evenly.
Once the lid is sealed correctly, hold the pump from the handle and begin the pumping by pressing the trigger on the hose. This will create pressure in the sprayer and force the stain to come through the nozzle.
Aim the pump sprayer at the area of the fence you want to address first. You should generally be about eight to ten inches away from the fence and spray according to the panels’ position.
- For horizontal panels, spray up and down
- For vertical panels, spray back and forth
Try to keep the action even and not arc or curve when spraying, or you might miss some areas.
Keep a paintbrush handy to correct any areas where the stain may puddle or gather. The brush will even such areas out.
How many coats will you need?
In most cases, you should not have to add a second coat of stain unless the coat you applied was too thin.
This can happen when diluting the stain, so it goes through the pump sprayer properly. Otherwise, you can now relax and enjoy the day.
Step 5. Let the stain dry thoroughly and clean
Depending on how much stain you use, it will generally take about 18 to 24 hours before it fully dries.
This will depend on the temperature and weather conditions. A warm, sunny day will mean less; a cold, cloudy day will take longer to dry.
Be sure to look at the instructions on the can to see the expected time.
After you have stained your fence and it’s dried, it’s time to remove all the coverage from your plants.
If you used any plant cane and ties, do remove them as well carefully.
Drying the stain before removing the covering from plants is essential as the wet stain can get in contact with the plants and damage them.
Finally, when you are done, do not forget to wash the painting materials you used (pump sprayer, brushes, roller, trays, or any other).
Properly cleaning your tools using white spirit or thinner is crucial before you can store them.
This will help you preserve them in good condition for future use.
What Kind of Stain to Use for a Fence?
Remember, many products are available on the market for staining fences.
Since not all of them are good enough, you will need to have your research done.
Make sure that you check for a product that is weather-resistant and can be used for exterior wood.
You can quickly determine the paint’s intended use by checking the product information.
The stains for fences (like DEFY, KILZ, Wood Defender, etc.) are highly durable and can easily resist harsh weather conditions, no matter where you live.
Plus, you can easily wipe them clean with a soft cloth and lacquer thinner.
Many of these oil-based wood paints for fence painting are best suited for your rough-sawn timber, cider, pine, redwood, spruce, and even pressure-treated wood.
You can use them for protecting wood fences and sheds, cabins, backyard wood storage, or any other garden wood.
Whichever brand name or product you pick, make sure you buy the right quantity that is enough to cover all the fence area you intend to coat
If you are using a paint sprayer, you will also need to check that the stain you choose is good for spraying and can be easily sprayed over.
How Much Wood Stain Do You Need for a Fence?
If you know how much stain you will need before you make the purchase, you can save a considerable amount of money.
You’ll also save time and effort as well in buying what you need the first time.
What follows is an easy way to calculate the coverage and, based on that, how much stain you will need for your wood fence.
- Measure the Height and Length of the Fence
- Multiply the Height by the Length: This determines the square footage
- Double the Result: If you are staining both sides of the fence
Now that you know the square footage that needs to be covered, you can go to the store and read the can.
Most stains offer between 150 to 200 square feet per gallon, but this may vary, so check the information carefully.
Divide the total square feet by the coverage found on the can.
This will determine how many cans you will need to stain your wooden fence completely.
If you have 1,000 square feet to cover and each gallon of stain covers 200 square feet, then you divide 1,000 by 200, resulting in five gallons.
Remember to round up all fraction results to ensure you are getting enough termite-resistant wood stains.

How Often Should You Pump Spray the Stain to Your Fence?
In most cases, you will need to repaint or stain your wood fence every 2 to 3 years.
This can be a bit more or less depending on what kind of wood you have, the type of stain you use on them, and the level of termite protection you seek.
Your exterior wood fence is exposed to all kinds of harsh weather conditions.
Mainly moisture is the worst enemy that can damage your wood fencing earlier.
How soon you will need to repaint your fence will, therefore, depend on the specific weather conditions in your region.
For example, if it’s a region that gets heavy rains, you may need to spray your fence more often.
The same is also true for places with scorching hot days.
Regions with moderate climate will, however, require less frequent fence maintenance.
One of the best ways to figure out when it’s time for fence maintenance is to check for water beading.
On your adequately stained and sealed fence surface, if the water does not bead up (but gets soaked in), it’s the best time for repainting.
You may also check for any cracks, chips, or wear on your fence to know whether it needs the repaint or not.
Related Questions
Can you paint over the stained wood fence?
Painting over the stained wood fence to protect it from bugs and insects would not be a problem if there were no signs of peeling paint.
However, if you see any dried-up peeling or weathering signs, you should remove the old stain properly before staining the fence fresh.
There are fence cleaners available in the market that can be used for cleaning and removing the stain.
How much does it cost to stain a wood fence?
The price to paint or stain your wood fence may range from $750 to $4500.
In general, it’s found that the cost may average $1 to $3 per square foot.
However, this will generally depend on factors such as the condition of your old fence, the height, the length, the quality of the stain, etc.
The cost will also vary depending on whether you want to get them DIY stained or through a professional.
Is it better to pump spray or roll a stain on your fence?
While you may have already worked with traditional paint rollers for coating walls, if you have window trim, plywood cabinets, rough wood siding, or other textured surfaces, an airless paint sprayer or a pump sprayer is the way to go.
You will get all these done with a good paint sprayer pumping machine in a snap.
The problem with rollers is they can leave behind some drips and will be time-consuming if you use them for smaller areas.
And with paint pump sprayers, you will always need to do more preparation, including thinning the paint.
Final Thoughts
Using a pump sprayer is the fastest way to stain a fence as it allows you to evenly coat the entire surface very soon without wasting your time and energy.
Hopefully, by following the tips in this guide, you’ll get that good-looking, termite-free fence in no time—with no hassle to boot.
Share the post "How to Stain Your Fence with a Pump Sprayer [5 Easy Steps]"

We are constantly finding new ways to update our home exteriors. If you are a bit tight on budget, renovating Read more

Cypress wood has been used for thousands of years in shipbuilding, so it is well-known for its water-resistance properties. Due Read more

We all know - Heat is the enemy of wood. When you place a hot item on a wooden surface Read more

If you are looking to upgrade your dining room but are on a budget, then painting your oak table and Read more

Hi, I am Mark Garner a professional carpenter, woodworker, and DIY painter. I live in the small city of Peoria, Arizona as a semi-retired woodworker. I have started this blog with a simple motive to help you with my wood experience in this sector. If you like to know more about what I love doing and how it all got started, you can check more about me here.