Understanding the way to get chalk paint off of wood can help you eliminate excess or thick layers of paint or even paint splatters.
While applying chalk paint is a fun activity, it can be a headache to get rid of if you don’t have the right tools at hand.
Below, we will look at the most effective DIY ways to remove chalk paint from wood without damaging the surface itself.
How to Remove Chalk Paint from Wood Surfaces?
Removing chalk paint from wood isn’t difficult, but the right method depends on the condition of the finish and how much paint you need to remove.
With proper tools and preparation, you can strip the surface safely without damaging the wood underneath.
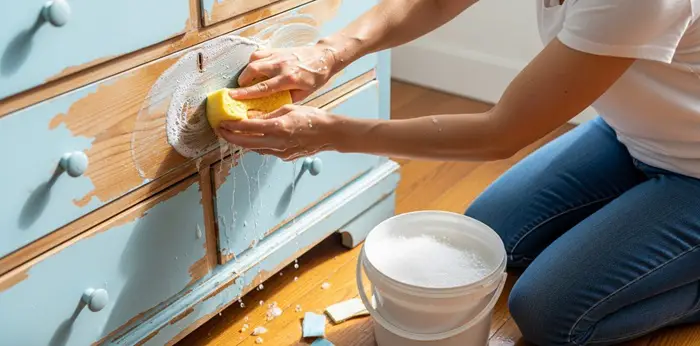
Method 1 – Water & Soap
Because chalk paint is water-based, it can be softened and dissolved using warm, soapy water—especially if it has been applied within the last 24–48 hours.
Step 1. Spread drop cloths over the floor and nearby furniture to catch drips and loosened paint. If you’re working indoors, open windows or switch on a fan to maintain proper airflow.
Step 2. Fill a bucket with comfortably warm (not hot) water and add a few drops of dish soap or mild detergent. Stir gently to create a light, soapy solution.
Step 3. Dip a sponge or soft cloth into the solution and apply it generously to the chalk-painted area. Allow the moisture to sit on the surface for about 5–10 minutes so the paint can soften and loosen.
Step 4. Using light pressure, scrub the surface in small circular motions. When working on wood, follow the direction of the grain to minimize the risk of scratches or surface damage.
Step 5. Wipe the area with clean water to remove residue. For stubborn spots, repeat the soaking and scrubbing process until the paint lifts away in soft layers.
Remember that this approach is ideal for single-coat applications on unwaxed surfaces and works particularly well on non-porous materials like glass.
However, once chalk paint has fully cured or has been sealed with wax, water alone will not be effective, and a stronger removal method may be required.
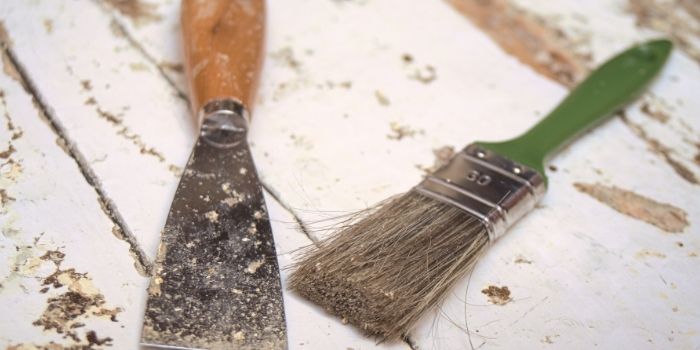
Method 2 – Chalk Paint Stripper
Paint stripping is one of the best ways to get the old chalk paint off wood surfaces.
To get the job done, here is what you need to do…
Step 1. Put all of the tools together that you will need.
This includes protective clothing and eyewear, plastic sheeting to lay under the furniture you’re working on, along with the eco-friendly paint stripper and paintbrush for application.
Step 2. Apply a generous coat of eco-friendly paint stripper (soy gel paint removers or citrus-based paint removers are safe to use) to the furniture using a paintbrush.
Follow the waiting time suggested by the manufacturer on the container of the paint stripper.
Generally speaking, you should let the paint stripper sit for half an hour to an hour.
Step 3. The chalk paint will, by now, be a little creased and fluffy.
You can now use a scraper or putty knife to lift as much of the paint away as you can. Do so using steady but gentle pressure.
Step 4. Dip the scrubber pad in a soap mixture and then scrub off any remaining stubborn paint.
You can strip any remnants from that using a scrubber pad, soapy water, or steel wool. Wipe it down with a damp cloth and repeat the process as needed.
Step 5. After the furniture has completely dried for 24 hours, sand it down using fine-grit sandpaper.
This will ensure there is no more chalk paint on the wood and will smooth out the paint marks left from scrubbing. Remove any dust with a damp cloth.
If you aren’t sure what kind of finish to use, add a minimum of three coats of Danish oil to the wood using a lint-free cloth.
This will protect it from stains while also showing the natural tones of the wood.
Precautions:
- Choose an eco-friendly paint thinner when possible.
- Protect surfaces to prevent damage caused by splashing paint remover or splatters.
- Work in a well-ventilated area and wear protective gear to limit exposure to chemicals.
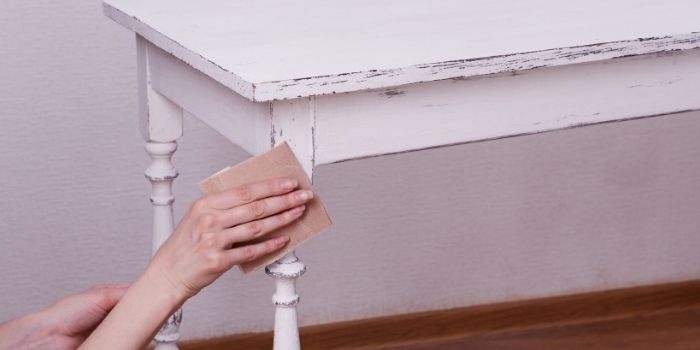
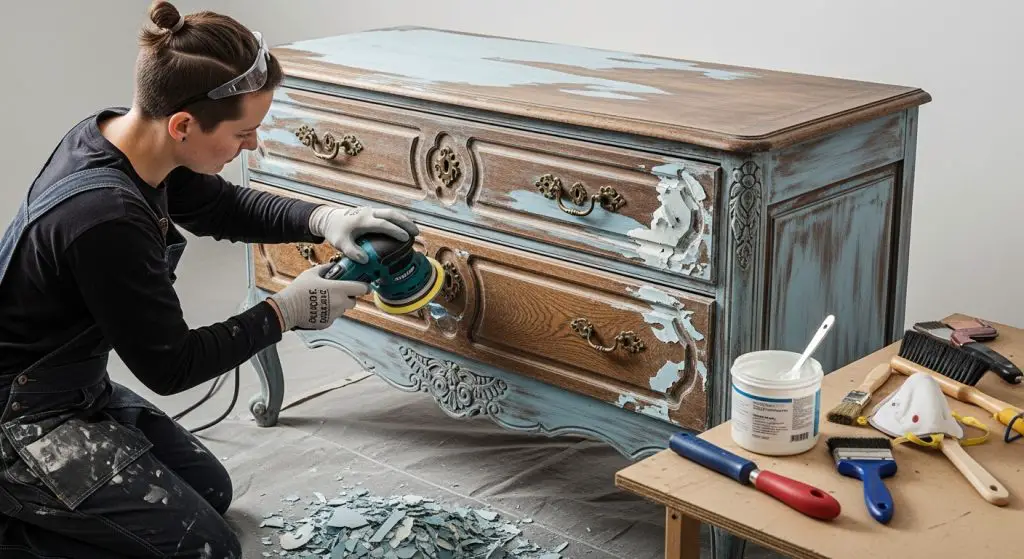
Method 3 – Sanding the Chalk Painted Furniture
Sanding is an easy and natural way to get rid of chalk paint on wood, but it can be time-demanding. Here is how to sand both small and large wood projects…
Step 1. Gather your tools. Once everything is assembled, you can put on your protective gear and double-check that the room is well-ventilated.
Now is also the time to remove any items on the floor that could get in your way.
Step 2. Place some turpentine in a container and then dunk a cloth into it. Rub the surface you want to sand with the moistened cloth.
This will help remove any wax from the wood before sanding. Remove as much as possible and allow the surface to dry completely.
Step 3. Ready an electric sander by adding coarse-grit sandpaper. This will help you get into the thicker layers of chalk paint.
Be sure you sand along the grain. As you sand, you can vacuum at the same time to limit the dust collected.
Step 4. Replace the old sandpaper with new pieces, if needed, to complete the sanding process.
Step 5. Swap out the coarse grit for increasingly finer grits as you work.
Use finer grit sandpaper on the old paint layers that are thicker, as this will more swiftly begin to show the wood below.
If the power sander can’t get to the paint in the crevices, it’s okay; just try to sand off as much as possible.
Step 6. Vacuum away any loose dust from the sanding and then wipe the wood down with a damp cloth.
Step 7. Use a handheld sander to scrape any stubborn paint from the wood. You could also use a scrubber or wire brush with soapy water for the same effect.
Step 8. Wipe down the wood using a damp cloth to show any remaining areas with chalk paint after each scrub. Repeat this until you are happy with the results.
Step 9. Use another finger-grit sandpaper for sanding down the whole piece of wood after it has dried.
During this time, you will work to get a smoother and more even wood surface.
Step 10. Remove paint debris by wiping the wood down with a wet towel.
Then, use a clean, dry paper towel to remove moisture and excess water. Allow the wood to air dry. Then, clean your tools and workspace.
Step 11. Finish the wood however you like. You could also apply Danish oil to the wood in the meantime to keep it moisturized.
Precautions:
Sanding will expose you to a lot of dust. You should:
- Seal off any items you don’t want the dust to cover.
- Wear protective clothing and eyewear, if desired.
- Replace sandpaper as often as possible since it will quickly get clogged.
- Be sure the area is well-ventilated.
Method 4 – Using the Solvent to Remove Chalk Paint
Much like sanding, using household solvents like vinegar is another labor-intensive method of stripping away chalk paint from wood.
You can also use white spirits or mineral spirits for this method, but it must be used carefully.
Step 1. Mix equal parts of white vinegar and water in a sprayer bottle.
Step 2. Spray this solution on the surface and wait for 15-20 minutes to loosen the paint.
Step 3. Scrub away the paint using a scrubbing sponge, doing one section at a time.
Step 4. Wipe down the scrubbed area using a wet cloth to show the rest of the remaining paint.
Step 5. If there is more stubborn paint to remove, scrub it using mineral spirits and some steel wool. This is a much stronger solution to dissolve the paint.
Step 6. Finally, wipe off the wood surface using a cloth dipped in plain water. And let the entire wooden surface air dry.
Method 5 – Using the Heat Gun On Chalk Painted Wood
Using a heat gun is a good way to remove paint from your old wood furniture without using any chemicals. This will help you avoid contact with toxic dust, and the potentially toxic fumes that paint strippers generate.
This is a good approach for use on both thin and thick layers of chalk paint. If you lack a heat gun, a heavy-duty hair dryer may do the trick.
Step 1. Place the heat gun approximately eight to ten inches above the wood, holding it at a 45-degree angle.
Work on a small section at a time until the paint starts to wrinkle.
Step 2. Use a metal putty knife to gently scrape away the paint after it starts to wrinkle.
Scrape following the wood grain to avoid gouging the wood.
Step 3. Repeat this process for every part of the wood that has chalk paint to remove as much paint as you can.
Step 4. Remove excess stubborn paint on the wood by sanding it down.
This will also help you get an even and smooth wood surface. You can scrub the remaining dry chalk paint from the wood using soapy water or mineral spirits.
Step 5. Wipe away any of the dust and chalk paint residues using a damp cloth. Let the wood air dry completely before you move on.
Step 6. Finish the wood any way you like. If you don’t know what to use, just apply a few coats of Danish oil to the wood.
Step 7. Get rid of extra paint and debris and clean up the work area.
Precautions:
- Wear goggles or a face shield to protect your eyes.
- Wear heat-proof protective gloves, ideally made from leather.
- Keep a fire extinguisher nearby for safety.
- Try not to heat the paint for a long time; this could burn the wood.
Why You May Need to Remove Chalk Paint from Wood?
You may need to remove chalk paint from wood for several practical — and sometimes unavoidable — reasons.
1- Peeling, Cracking, or Failing Paint
One of the most common reasons to remove chalk paint from wood is visible surface failure. If the paint begins to peel, crack, chip, or flake, it’s usually a sign that the surface underneath wasn’t stable or properly prepared.
Chalk paint adheres well, but it still depends on a solid base. When applied over old paint that was already lifting or deteriorating, it won’t bond correctly.
Painting over a failing layer rarely fixes the issue — it simply traps the problem underneath. The result is poor adhesion, uneven texture, and a finish that continues to break down.
In this situation, stripping the chalk paint back to a sound surface is the only way to achieve a durable, professional-looking result.
2- Damaged or Deteriorating Varnish
Chalk paint is typically sealed with wax or a clear protective topcoat.
Over time, that varnish layer can crack, yellow, become cloudy, or start separating from the painted surface — especially on high-traffic furniture like tables and cabinets.
When the protective layer fails, it not only affects appearance but also reduces durability.
If the varnish is significantly damaged, applying another coat on top may not solve the underlying issue. Removing the chalk paint and its old sealer allows you to refinish the wood properly, ensuring better adhesion and a smoother, longer-lasting finish.
3- Incompatible Products or Surface Conditions
Another reason for removal is product incompatibility. For example, applying chalk paint directly over polyurethane varnish without sanding or priming can lead to adhesion problems because polyurethane creates a slick, non-porous surface.
Similarly, mixing oil-based and water-based coatings without proper preparation can cause bubbling, lifting, or poor curing.
When coatings are chemically or mechanically incompatible, the finish may fail prematurely.
In such cases, removing the chalk paint and starting with the correct preparation steps ensures the new finish bonds properly and performs as expected.
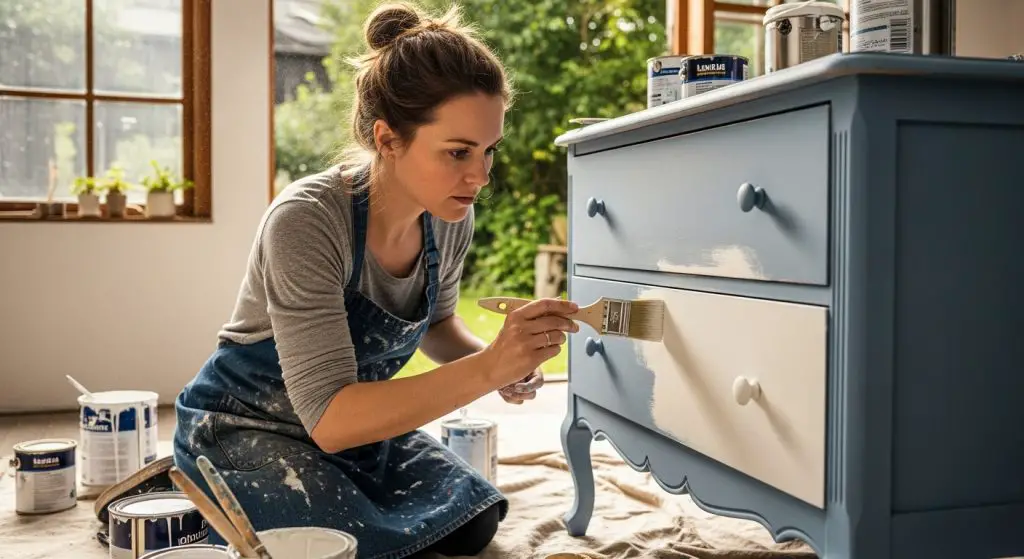
Can I Paint Over Old Chalk-Painted Wood Instead of Removing It?
Yes, you can paint over chalk paint instead of removing it — but whether you should depends entirely on the condition of the existing finish.
Chalk paint is known for its matte texture and strong adhesion, which makes it a surprisingly good base for repainting.
If the current coat is smooth, well-bonded, clean, and free from wax buildup or peeling, you can often paint directly over it with minimal preparation.
In many cases, a light sanding and thorough cleaning are enough to create a stable surface for a fresh coat. This makes repainting faster, less messy, and far more convenient than stripping everything back to bare wood.
However, problems arise when the original chalk paint layer is unstable. If it’s peeling, cracking, heavily waxed, stained, or uneven, painting over it can simply trap those flaws underneath.
The new paint will only be as strong as the layer beneath it. Wax is especially problematic — it creates a barrier that prevents proper adhesion unless removed or sealed with a compatible primer.
Similarly, thick, heavily textured finishes can show through the new paint, affecting the final look.
The key rule is simple: if the existing surface is solid, clean, and properly prepared, painting over chalk paint is perfectly acceptable. If not, removal is the smarter long-term solution.
| Pros of Painting Over Chalk Paint | Cons of Painting Over Chalk Paint |
|---|---|
| Saves time and labor compared to stripping | Won’t fix peeling, cracking, or uneven surfaces |
| Less mess and fewer chemicals required | Wax residue can cause adhesion failure |
| Good adhesion if surface is stable | Texture or brush strokes may show through |
| Ideal for color changes or quick updates | Thick paint buildup over time can look heavy |
| Minimal prep if unwaxed and clean | May reduce long-term durability if base is weak |
In short, repainting over chalk paint works well for cosmetic updates and solid finishes.
But if you’re aiming for a flawless, long-lasting result — especially on high-use furniture — assessing the condition of the existing layer first will save you headaches later.
When You Might Need Professional Chalk Paint Removal – How Much Does it Cost?
There are plenty of DIY-friendly ways to strip chalk paint, but sometimes calling a professional is the smarter — and safer — move.
Large surfaces
You may need professional chalk paint removal when the surface is large, heavily layered, intricately detailed, or historically valuable.
For example, antique furniture with carvings, veneer, or delicate trim can be easily damaged by aggressive sanding or harsh chemical strippers.
In these cases, professionals use controlled stripping techniques and specialized tools to protect the underlying wood.
Multiple coatings
Another situation where hiring help makes sense is when multiple coatings are involved. If the piece has chalk paint layered over oil-based paints, polyurethane, or unknown finishes, removal becomes more complex.
Chemical compatibility issues can cause clogging, gumming, or uneven stripping. Professionals know how to test layers and choose the correct solvent or method.
This is particularly helpful when removing Annie Sloan paint from furniture that has been sealed with wax and aged over time, as wax buildup can complicate the stripping process.
Specialty surfaces
You might also need professional assistance for specialty surfaces.
For example, attempting to remove chalkboard paint from walls can turn into a dusty, time-consuming project, especially if the paint was applied in multiple thick coats.
Similarly, if you need to remove spray chalk paint from large exterior surfaces or commercial spaces, professionals often use power sanding systems or eco-friendly chemical removers that speed up the process while minimizing damage and airborne dust.
Health and safety
Health and safety concerns are another important factor. Heavy sanding creates fine dust particles that require proper ventilation and protective equipment.
Chemical strippers may contain strong solvents that should be handled carefully. If you’re working indoors without proper airflow, or if the project involves lead-based paint underneath older layers, professional removal is strongly recommended.
Cost of professional chalk paint removal
As for cost, professional chalk paint removal typically ranges between $3 to $10 per square foot, depending on the size of the project, the number of layers, surface condition, and local labor rates.
Small furniture pieces may cost anywhere from $150 to $500, while large cabinetry projects or full wall paint removal can run into the $1,000+ range. Intricate antiques or restoration-grade work may cost more due to the time and skill required.
In Conclusion
Of the many different methods discussed to remove chalk paint from wooden surfaces, many consider the paint strippers to be the best option, as it is the most potent solution and therefore seems to work more efficiently.
Any of the options will work fine, however, and all of them will require a little bit of elbow grease to get the job done.
Whatever method you choose, it is most important that you take the necessary precautionary steps to protect yourself from chemicals, fumes, and dust.
Share the post "5 DIY Ways to Remove Chalk Paint from Wood Furniture"

We are constantly finding new ways to update our home exteriors. If you are a bit tight on budget, renovating Read more

Cypress wood has been used for thousands of years in shipbuilding, so it is well-known for its water-resistance properties. Due Read more

We all know - Heat is the enemy of wood. When you place a hot item on a wooden surface Read more

If you are looking to upgrade your dining room but are on a budget, then painting your oak table and Read more

Hi, I am Mark Garner a professional carpenter, woodworker, and DIY painter. I live in the small city of Peoria, Arizona as a semi-retired woodworker. I have started this blog with a simple motive to help you with my wood experience in this sector. If you like to know more about what I love doing and how it all got started, you can check more about me here.