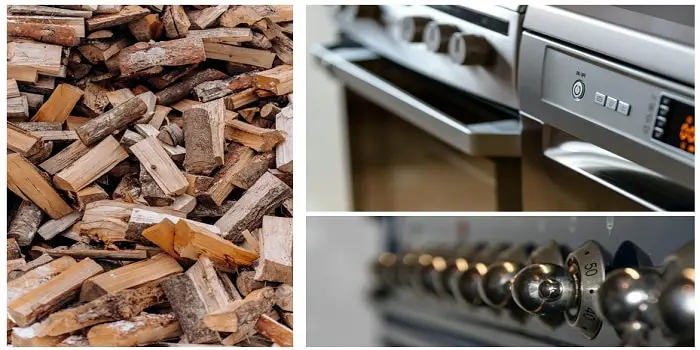
Whether you’re drying out some damp lumber for a weekend woodworking project or prepping sola wood flowers for your latest Pinterest-worthy craft, you’ve probably had this thought: Can I just pop this wood in the oven?
Short answer? Yes, you can.
Longer answer? Yes, but only under the right conditions.
In general, if you’ve got small, damp, unfinished wood pieces—like thin slices, offcuts, or soggy craft materials the oven can help speed up the drying process, especially when you don’t want to wait weeks for nature to do its slow thing.
Just set your oven to a low temperature (think 200°F/90°C or lower), keep an eye on things, and don’t walk away like you’ve just started baking cookies. Wood burns faster than you think, and nobody wants a kitchen full of smoke and regrets.
However, keep in mind that if your wood is finished, antique, or held together with glue (like plywood or laminated boards), the oven is a big no-no. Also, if you have some painted pieces of woodcraft, toss them in the kitchen oven only if you’ve used heat-resistant paint.
High heat can do all sorts of mischief—warping, cracking, scorching the surface, or even melting the glue and turning your lovely piece into a sad stack of splinters and regrets.
Why Dry Wood in the Kitchen Oven?
Here’s why oven-drying wood isn’t just smart—it’s genius:
- Dries quickly and evenly (yes, even those sneaky edges)
- Preps firewood faster than you can say brrr
- Evicts bugs and molds like a tiny heated eviction notice
- Stops rot and swelling before it starts
- Perfect for preserving wooden “cookies” from your Christmas tree (adorable and functional)
- Reduces the risk of warping and cracks from uneven drying
Personally, I use it to get my firewood winter-ready—because nothing says cozy like a toasty room and wood that burns like it means it.
Bonus: Dried wood burns hotter, longer, and with less smoke—saving your eyes and your time.

How to Dry Your Wood Pieces in the Oven?
Keep in mind that while it’s entirely OK to dry the pieces of moist wood in your typical kitchen oven, putting the wood that is already dried in an oven can scorch and burn it hard.
So, if you are trying to dry out your moistened timber, follow these steps carefully…
Step 1-Prepare your oven
Start by preparing the oven racks so that it fits your wood piece. Your goal should be to keep enough space/air around the wood piece to move.
After setting the racks, switch the oven on for preheating, keep the temperature 200 to 220 degrees F (or 94° to 104°C).
If your oven comes with a convection fan, switch that on too. After about 10-15 minutes, check the temperature.
Step 2-Put the wood inside
Place the pieces of wood (like dampish or wettish wooden toys) on the rack in such a way that no two pieces touch each other. Also, while keeping, ensure that no pieces of wood should fall through the rack spaces.
Just in case you are drying large-sized firewood in the oven for burning purposes, you should first cut the wood into smaller sizes using a firewood splitter.
Step 3- Allow the wood to dry
When you have placed the wood pieces securely into the oven, let them dry for about 50 to 60 minutes. Depending on how wet or moistened the wood is, it can take anywhere from 30-60 minutes to dry.
Larger pieces of wood can take more time to dry than smaller pieces in a microwave. So, make sure that you keep checking the wood every 10 minutes interval.
Step 4- Check the wood for moisture
You can tell if your wood is dried by inspecting the wood for color and weight change. The dried wood should become lighter in color and lesser in weight (due to removed moisture/water).
If you want to get a bit more technical (and accurate), grab a moisture meter. It’ll tell you exactly how wet your wood was and how dry it has become after keeping it in the oven. If your wood still shows some signs of moisture, put it back in the oven for some more time and repeat the drying process.
Step 5- Allow the wood to cool and get dried
After you have baked the wood and are satisfied with its moisture content, remove the pieces from the oven using oven mitts. Place them securely in a dry space to cool down – making sure there are no chances of hot wood catching fire.
After the wood slices have completely cooled down, you can again check for the moisture content to repeat the process if required. Ensure you do not bake or dry wood slices too much in the gas oven, or else they will show signs of cracking or contraction.

Safety Precautions to Take When Drying Wood in an Oven
Using your normal kitchen oven for drying firewood needs proper care and attention – if you are not careful, wood can burn inside.
A few safety precautions you should keep in mind are:
- Test the wood drying process with a few sample pieces first.
- Never leave wood unattended in the oven. Keep a close eye on it the entire time it’s baking otherwise, you might end up drying more than just the wood.
- Always use oven mittens when removing the wood from the oven to prevent accidental burning.
- If you notice any smoke during the task, switch off your oven immediately to check what and why it has precisely happened.
- If there are any flames emitted, immediately use a fire extinguisher before it gets severe and out of control.
Above all, if you need to heat or dry a very large quantity of wood for firewood, carpentry tasks, or wood carving, seeking out the help of an industrial kiln is a better option.
After getting baked and dried, make sure you store the wood right for use in the future. If not stored well, it may again attract more moisture.
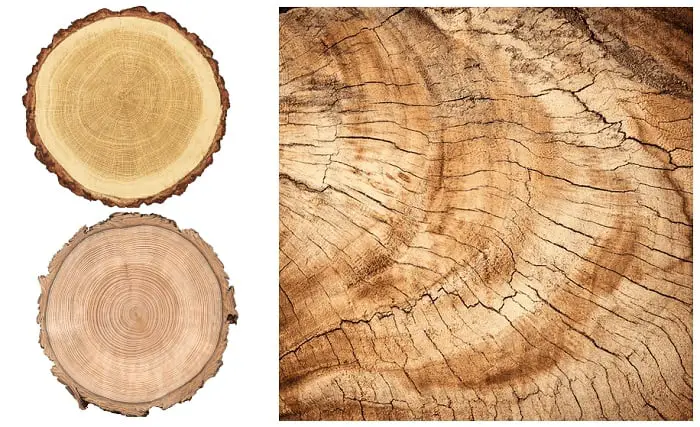
Few Other Methods to Dry the Wood Cookies without Cracking
Wood slices (also called wood discs, tree cookies, or wood cookies) are popular for everything from festive crafts to rustic home décor. For many, it’s tradition to save a slice from the Christmas tree as a keepsake. For others, it’s just good ol’ crafty fun.
But here’s the catch: drying these beauties without turning them into cracked-up messes is tricky. As moisture leaves the wood (especially in the oven), it can shrink, split, or warp like a sad pancake.
If you need to successfully dry the wood discs and avoid the cracks from forming, you can use a salt paste or treat the wood cookie with a sealant and stabilizing solution.
Below is a step-by-step process for using both these methods.
Using Salt for Drying Wood Cookies
Salt is known to be a natural drying agent that can speed up the process of removing moisture from the wood. And the good thing is it does it without getting any wood shrinkage.
All you need is to follow these easy steps to form a salt paste and use it for wood drying:
- In a clean bucket, fill a gallon of fresh water
- Slowly add about 2 pounds (or 1 kg) of table salt to it
- Stir the mixture well to get a uniform solution without any salt crystals
- After you have prepared the solution, let it sit for about 3-4 hours.
- Then add a cup of cornstarch and mix well to form a thick paste, if required you can add more water
- Next, you will need to add two egg whites to this mixture, mix it well into the paste
- Now brush this paste (using a paintbrush) to evenly spread onto the wood slice in the form of a thin layer
- Brush the other side of the slice as well and allow the wood to soak the paste for some time
- Finally, keep the wood slice (covered with salt paste) in an open, warm location to let the wood dry
- As the salt paste absorbs the moisture out of the wood, it makes the wood dry slowly without forming any cracks
Depending on how much moisture is present in the wood cookies and how thick they are, it may take around 7 to 30 days to get the wood completely dried and used for crafting. Once the slice gets dried, you may notice the faded color in the center of the wood.
Using a Sealant or a Stabilizing Solution
Depending on how fresh and air-dried your wood slice is, there are different solutions you can use for this drying method.
- Use denatured alcohol or wood alcohol for soaking the wood slices that are less than an inch thick
- Use Pentacryl wood stabilizer for soaking the wood if your wood slice is still fresh and hasn’t dried much
- Use wood sealers (such as wood juice or Anchorseal) for soaking the wood if it’s already dried for a few days after it was cut
In a pinch, you can also use linseed or teak oil to soak wood if you do not have the above sealants available.
After you have picked the right solution for soaking wood, follow these steps:
- In stainless steel, fiberglass, or plastic container (do not use other metals), place a couple of wood slices at the bottom
- Wear rubber gloves to protect your hands, and then fill the container halfway with the preferred solution
- Cover this container with plastic wrap and let the solution soak into the wood to work for around 24 hours
- Do not disturb or uncover the container in between, as it can evaporate the solution or affect the penetration into the wood
- After a day, remove the soaked wood slices from the container and allow it to dry
Final thoughts
Wood warping and cracking can occur if there is moisture in different parts of the wood and you use the incorrect method to dry it.
Though you can use your kitchen oven to dry pieces/slices of wood evenly, this isn’t the only recommended method.
Particularly if you are concerned about the antique wood piece you have and do not want to risk getting the cracks or splits, you may better skip the oven-baking and try other methods I have mentioned above.

Wooden pallets are found highly useful in industries that involve packaging and distributing goods. Packing the goods in these wooden Read more

Timber and aluminium windows are the two most popular options when it comes to choosing window frames for your home. Read more

The old saying that the better you prepare, the more likely you are to succeed applies to painting and any Read more

Bleaching agents are among the most overlooked alternatives when homeowners need to clean their old wood furniture, floors, or decking Read more

Hi, I am Mark Garner a professional carpenter, woodworker, and DIY painter. I live in the small city of Peoria, Arizona as a semi-retired woodworker. I have started this blog with a simple motive to help you with my wood experience in this sector. If you like to know more about what I love doing and how it all got started, you can check more about me here.