The art of wood carving is all about adding shapes, patterns, and designs – by altering the form of the wood itself.
From whittling to projects involving large pieces of wood, wood carving is as much a profession as it is a hobby.
However, to be a proficient woodcarver, you will need patience, attention to detail, dedication, and perseverance to finish the project.
You will also need to identify the best wood for the project you have in mind, along with using the proper wood carving tools for your needs.
While you will gain experience by carving the wood slowly, as a beginner you can start out with a few wood varieties along with the set of right tools for the job that will get you on your way.
Best Carving Wood for Beginners
If you are looking to create carvings from wood, you will need to choose the right type of wood for the job.
This means doing the research necessary to find wood that is soft enough to carve, hard enough to keep its shape, and durable enough to last a long time. This can be challenging, depending on your goals.
For the most part, if you are looking to create beautiful carvings that do not require a lot of effort, then softer woods such as pine or basswood may be the best choice.
What follows are the different types of woods that may be best suited to your needs.
1- Aspen
Aspen wood is one of the favorites for woodworkers because it’s among the easiest woods to work with.
The wood is relatively soft and affordable, and it comes with straight grains that will offer very little resistance to carving tools.
Aspen wood is also a great option for carving due to the fact that it’s non-resinous. This means it does not have knots that often make the wood difficult to carve.
2- Basswood
If there is the easiest wood that’s perfect for those who are just starting out in the carving hobby, I would say basswood may fit the bill.
It is a soft, forgiving wood that takes less effort to carve with a hand.
Plus, it will not tear up your tools in the process. It also helps that it stains well, so you can show off the finished project.
While it is better to carve along the grain, you can also carve against the grain when using basswood.
This type of wood is also well-suited for getting fine details and creating plates and utensils such as spoons, plates, bowls, and other kitchenware.
3- Black Walnut
If you are looking for a plank/block of harder wood for carving projects, then black walnut may be the answer.
The rich color and beautiful grain make black walnut a popular choice. This is especially true for experienced woodcarvers.
Black walnut is quite beautiful, but it is also hard enough to strain your tools along with your muscles.
This means that you will need to sharpen your tools regularly to keep the strain of carving to a minimum.
4- Butternut
If you are looking for an attractive wood that is easy to carve, butternut may be a perfect choice.
It’s inexpensive and has few defects, which makes it a perfect wood for some carving projects.
Plus, it is great for beginners, and the results can be quite beautiful. If you are on a budget and just getting started, butternut may be for you.
5- Cherry
Cherry is yet another ideal wood for carving, which more experienced woodcarvers often use for creating commercial decorative items.
The wood is a compromise between softwood and hardwood, and it’s a great option to start if you desire to carve and sell your decorative pieces.
Cherry is versatile, stain-resistant, and produces negligible odor when carving.
When dried, it takes a sturdy stable form which remains as it is for a very long time. And the best thing is you can carve with it both along or across the grain.
6- Mahogany
The reddish-brown texture of mahogany makes it a popular choice with woodcarvers.
Because of the straight wood grains, they can be used for a wide variety of wood carving projects.
Despite being a member of the hardwood family, it can be carved relatively easily, at least compared to other hardwoods.
You can use either hand or power tools in your carving efforts.
7- Oak
Even stronger than black walnut is oak. For its durability, few kinds of wood can outdo oak.
This is the main reason why red oak is used for creating furniture. It’s also beautiful, has a stark grain, and has a vibrant color that is so appealing.
However, oak is also quite hard and will require sharp tools to carve accurately and with as little effort as possible.
White oak, in particular can be very difficult to work with and can also damage your carving tools if you don’t know how to handle it properly.
8- Pine
If you cannot get your hands on basswood, pine is an equally good carving wood.
Although pine is mostly used for lumber, it is quite good for carving outdoor signs and patterns as well.
It holds shapes quite well. It is also easy to shape and fashion with fine details using power tools like Dremel.
Pine is also readily available. And it can be stained, so it will last a long time.
9- Poplar
Poplar wood (yellow poplar or tulip poplar) is a hardwood species that is ideal for beginners as it’s widely available and is not priced very high.
It’s among the softest wood in hardwood, making it a good option for beginner-level woodcarvers.
With that said, if you are an intermediate-level woodcarver looking for the best wood for carving, it’s not the best choice for you – you should better choose something like basswood, Butternut, OAK, and Black Walnut.
10- Yellow Cedar
Cedar is one of the favorites for woodworkers due to its aroma, insect-repellant, and weather-resistance properties.
Yellow cedar is specifically a good timber option for carving projects because it comes with a nice straight wood grain along with a medium to fine texture that matures with age into a stunning art piece.
Moreover, the wood comes with an ideal density that allows it to take both hand and power carving tools equally well.
Choosing the Wood for Carving Projects
Despite all the suggestions, it does help to know which types of wood are perfect for getting started.
Because each wood has its own characteristics, it can be difficult to choose between seemingly similar types.
The truth is that many different kinds of wood may be perfect for getting started, even the hardwoods such as oak or walnut.
To find what works for you, it’s best, to begin with what you want.
a) Be Safe
First and foremost, you should employ safety in every wood carving effort. This starts by using wood that is non-toxic.
This is not only true when carving but also for woods that will be used to handle food, such as forks, bowls, spoons, and the like.
Be sure the wood you use does not contain any toxic elements.
For whittling, the best woods to start with include basswood, oak, and pine. They are not only safe but unlikely to cause an allergic reaction.
b) Cleanliness
Check the wood to ensure that it is whole, clean, and usable. You do not want to use wood that has rot, pests, or other unwanted items inside.
Be sure to inspect the wood before you make the purchase. Otherwise, you might wind up wasting hours carving a piece of wood that turns out to be unusable.
c) Your Purpose
In other words, what the finished product will be used for. This means that you should match the wood with the results.
For example, if you are making utensils such as a cutlery set, then you will want wood that is water-resistant.
The cutlery you create should be strong, durable, and not warp when exposed to water or other liquids.
However, if you are whittling a project, then the type of wood may not matter at all.
If the purpose of the project is not dependent on the type of wood, then go for a type that is easiest for you to carve.
d) Your Skill Set
If you are just starting out, then you should select from one of the softwoods that are available.
Softwood is easier to carve and shape compared to hardwood. This means it will be less frustrating and more productive.
Plus, you will not wear out your tools as quickly when carving softwood.
Hardwoods (Beech, Buckeye, and Tupelo) can be rough on hand tools, so you will need to sharpen them more often or work with power tools.
Plus, softwoods tend not to cause as much slippage compared to hardwoods. This means a reduced chance of injuries.
It’s always better to start with softwood as a beginner and then switch over to hardwoods once you gain some experience.
However, if you still need to use hardwood or your project requires so, you should always be careful.
e) Wood Scent and Finish
You should also consider wood that has a nice scent, such as pine. They work well when selling wood carvings at trade shows.
And finally, how the wood is finished will make a considerable difference in quality. Maple, for example, is quite beautiful and perfect for experienced carvers.
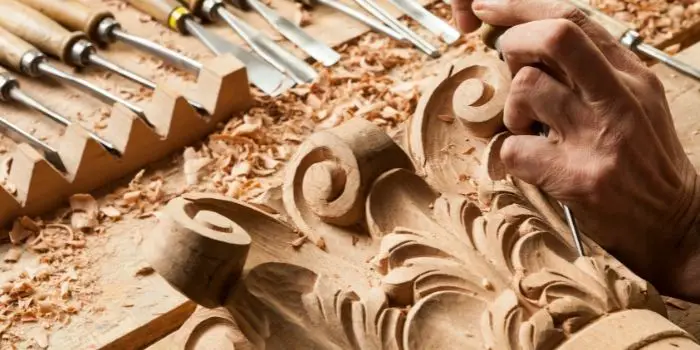
What Wood Carving Tools Will You Require?
Fortunately, a series of basic tools are common to most wood carving projects, both for beginners and professionals.
Plus, such tools can be purchased together in sets that normally consist of 12 or 24 different pieces.
It is tempting to spend a considerable amount of money at first but keep in mind that when you are just starting out, you may not take up carving as a hobby.
So, it’s best to get good, reliable tools at an affordable price. A basic set is all you need to get started.
As you gain skill and proficiency in wood carving, you can purchase even more tool types to do different jobs.
What follows are the basic tools (but very important) you need for wood carving. It’s not that you will all of them at once. But getting hold of at least some of these will help you get started.
1- Carvery’s Mallet
This is a simple tool used to drive chisels and gouges into the wood. It tends to be hardwood, although modern variations may use plastic.
The mallet is also rounded to allow for better ergonomics. It is arguably the most recognizable tool used in wood carving and the only one that will never touch wood itself.
2- Carving Knives
Carving knives come in different shapes and sizes.
The purpose of the carving knife is to shape wooden pieces, usually those small enough to fit into your hand.
However, there are different sizes and shapes of blades that will determine the type of carving you can perform.
Carving knives are so versatile that they are used for a wide variety of work. From creating a pattern to doing an entire sculpture, the versatility of the carving knife is considerable.
Of course, the extent to which the carving knife will be practical depends on the size and type of wood that is being used.
Plus, cutting yourself while using the knife is possible, so a pair of gloves and other protection is warranted.
Depending on the type of project, you may need to get different types of carving knives which include:
Bench Knife: The bench knife is one of the most common variations found in carving knives. So popular that it deserves its category.
This is a specialized knife that looks something like a scalpel with a blade that is less than one inch in length.
It is primarily used for detailed cutting where precision is needed. The larger grip lets you easily handle the knife, so you can create unique designs.
Sloyd Knife: This is a unique carving knife that is designed primarily to whittle wood.
The blade is just slightly shorter than the handle, so you can whittle with precision. Perfect for scrap wood or other small pieces you want to hand carve or whittle into shape.
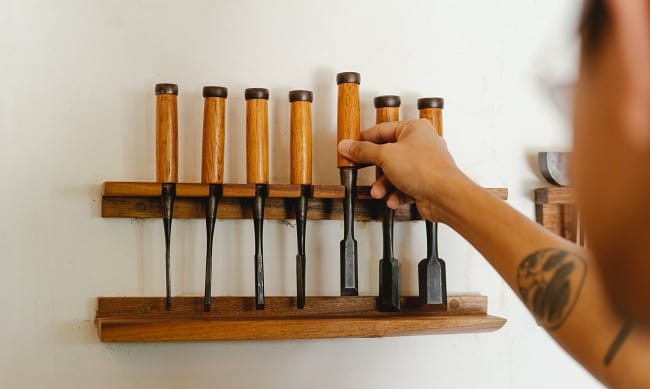
3- Chisel
The chisel is a necessary carving tool that comes in different shapes and sizes, but the purpose is the same.
One end of the chisel is a sharp blade, while the other is blunt so a mallet can strike it. This allows you to drive the blade through the wood.
While much of the penetrating force of the chisel comes from being struck by the mallet, the blade does need to be sharp for the chisel to be effective.
The different types of chisels let you perform different cuts into the wood.
From paring to mortise to beveled edge bench chisels, this is a substantial tool essential for carving wood.
Fishtail: This is a chisel or a gouge with a thin, light blade with a tip wider than the tool’s shaft.
The appearance of the blade gives the fishtail its name.
It lets you carve out a wider area while maintaining the same handle size as other chisels.
Skew: This is a type of chisel that is bevel-edged and has an angled cutting tip.
In other words, the tip has a point that enters the wood first before the rest of the chisel follows.
This tool is also called a corner chisel which describes the type of blade being used.
4- Coping Saw
A small, hand-held saw that is quite versatile, the coping saw is used to cut intricate shapes.
The name is derived from its use in connecting two joints when doing trim work.
However, the versatility of the coping saw means that when you need to cut wood, especially small cuts to break them apart, the coping saw is often the go-to tool for the job.
5- Gouges
Sometimes mistaken for a chisel, the gouge has a curved cutting edge instead of a straight one.
A gouge is used to cut shallow to deep curves into the wood.
The creation of curved edges and channels in the wood is essential for many woodworkers.
The gouge scoops out the wood to form a curved edge.
Long Bent Tool: This is a special type of gouge that bends upward along its length, hence the name.
When you need to do some relief carving, the long-bent tool is the one to use.
Short Bent Tool: This can be a gouge, chisel, or V-tool that shapes recesses in the wood or is used in the corners of a pattern.
The difference between this and the long-bent tool is that the blade remains straight but does have an end that is curved and deep.
V-Tool: Instead of the familiar U-shape seen with many gouges, the V-shape or V-tool is a common type used by many woodworkers.
This is an essential tool for certain applications, thanks to its small cutting edge.
This allows for greater detail in the work and the creation of certain types of designs or shapes.
Veiner: The name may not be familiar to some, but the Veiner tool is one of the most common types of gouges.
This is a tool that has a U-shaped cutting edge to create deep, round hollows in the wood.
It is part of the gouge family but is distinctive enough to be an essential part of any woodworker’s kits.
The Veiner is used for detail work and, thanks to the small diameter of the blade, can create unique shapes in the wood.
If you are putting together a woodworking kit, then the Veiner is an essential part of it.
6- Riffler
This is a filing tool that is doubled-ended, meaning that the grip is between the two edges that file the wood.
The riffler is used to get into difficult places that a typical file may not see.
If you have oddly shaped channels, cuts, or depressions that need to be filed, chances are the riffler will be the tool needed to make them smooth.
Depending on the style you want to employ, you will most likely need this tool for engraving or carving the wood.
7- Electric Tools
There are electric or powered versions of some of the tools listed.
However, you should start with the manual tools first so you can get a basic idea of how they work.
If you limit the size and scope of your projects, you can work your way up to the point where purchasing electric tools makes sense.
Some of the more common electric tools include chain saws, reciprocating chisel holders, rotary tools, angle grinders, and scroll saws.
It is true that some electric tools can make the work go faster. But the point when you begin is to learn how the manual tools work.
This is especially true for detailed work, which requires hand precision.
Once you start becoming more fluent in the use of manual tools, you can pick up the electric tools that do the same job but reduce the time needed to get it done.
How To Start Wood Carving – 5 Easy Tips for Beginners
As a beginner in wood carving, you must be wondering how to start wood carving.
Do not worry; I will help you with the five tips that have helped me a lot in wood carving. I hope this will be helpful for you too!
1. Get some Wood Carving Ideas
The first and foremost thing when you’re starting in wood carving, it’s essential to have some ideas of what you want to carve.
There are many sources of inspiration for wood carving projects, such as nature, architecture, or everyday objects.
As a beginner, I would recommend choosing some simple classic designs rather than something too complicated. Once you get the hang of it, you can move on to more challenging designs.
Here are a few excellent wood carving ideas that are easy and fast to learn:
- Whittling a bunny
- Whittling a Flower
- Carving a spoon
- Carved wooded heart
- Carving an owl, a cat, or a dog
- Carving a whiskey barrel or a bowl
You can even get your kids engaged in these wood carving ideas, and they will surely love to learn it.
Once you have an idea of what you want to carve, you can start planning your project.
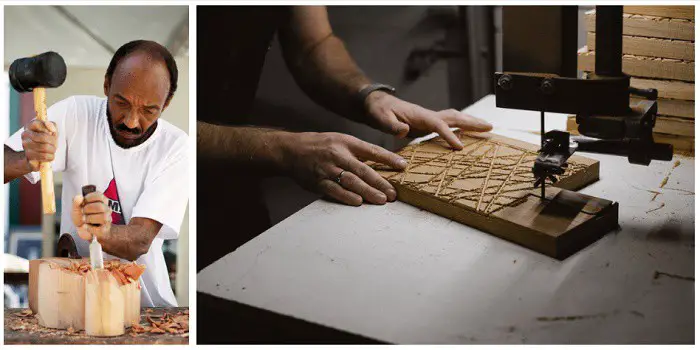
2. Setup Your Workbench for Carving
Next, it’s important to have a comfortable and well-organized workbench.
You don’t need to invest in some fancy-looking expensive bench. A sturdy plywood board bench in your garage or shed will do the task.
This will help you stay focused and efficient when working on your projects. Make sure to have all the necessary tools within reach, as well as a good light source.
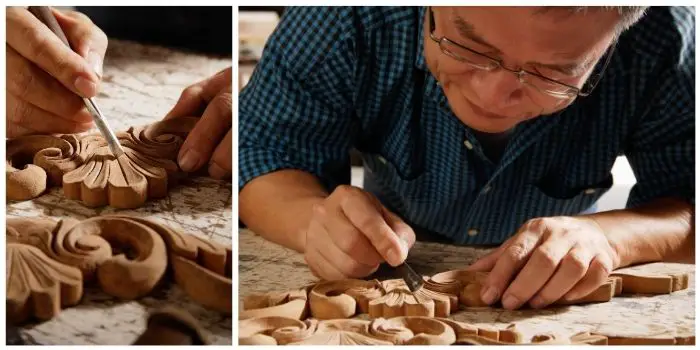
3. Learn to Use Wood Carving Tools
One of the crucial things when starting out in wood carving is to learn how to use the tools properly. And I can’t stress this enough, but please be careful when using the tools.
There are many different types of carving tools, and each one has a specific purpose.
It’s important to learn how you use them correctly in order to avoid injury and get the best results.
For beginners in carving, there are many online tutorials and books that can help you learn about the different types of wood carving tools and how to use them.
4. Sketch the Design Before You Start
Another important tip when starting out in wood carving is to sketch the design of your project before you start carving.
On a piece of paper and a pencil, sketch the 2D design of the model you have in mind. Note down the measurements and take additional notes of what parts will be carved out.
This is a crucial step because it will help you plan the carving process and avoid making mistakes.
This will help you visualize your carving project and plan the steps ahead for converting a 2D design into a 3D model.
Overall it makes sure that the final product is what you want.
5. Hold the Wood Firmly & Carve Along the Grain
Finally, when you’re ready to start carving, it’s important to hold the wood firmly and carve along the grain.
Carving against the grain can cause the wood to split or crack, so it’s essential to be careful.
Use some clamps on your workbench to hold the wood piece or a block. And take time to learn the techniques, and do not fear your mistakes. It’s always better to learn from your mistakes.
I hope these tips will be helpful for you as you start your journey in wood carving!
FAQs
Do you need to soften wood for carving?
Not always, but if you are using hardwood or one of the harder softwoods for carving, you might need to soften it for better workability.
There are different methods that can be tried; these include:
- Treat the woodblock with denatured alcohol
- Spray some WD-40 or alcohol-water solution on the wood
- Dip the block of wood in cold or boiling water to bend and carve
Where can I buy wood and tools for carving?
Different wood varieties along with tools for carving, can be purchased easily from your nearby hardware stores.
If you want, you can also get them online at your favorite stores like Amazon, Lowe’s, and Home Depot.
They all sell toolsets and wood blocks in various sizes and quantities.
Hardwoods vs. softwoods: what’s better for carving?
Although hardwoods and softwoods are both used by carvers almost equally, they both come with their own set of advantages and disadvantages.
Based on your specific requirements, weigh the pros and cons of each and then decide what is better for your project.
| Hardwood for carving | Softwood for carving |
|---|---|
| High density | Low density |
| Resistant to fire and decay | Resistant to insects |
| Easy to maintain but difficult to cut | Easy to cut |
| Expensive | Affordable |
Final Thoughts
Now that you have the right wood and basic tools for carving, you can start carving wood into most of the desired shapes you want.
This toolset provides the platform needed to take on different jobs, create different shapes, and get you going on your carving adventures.
The numerous types of tools needed to carve wood may seem substantial at first, but it is really just the first step.
A basic kit will take you a long way, but you will need to get more specialized tools if you are carving certain shapes into the wood.
Build up your experience with the right wood type and basic kit of woodworking tools for carving, and then expand it from there as you see fit.
Share the post "What’s the Best Wood for Carving? [How to Get Started]"

The wooden worktop is best suited for your kitchen no matter whether you want to get a traditional or a Read more

Used for many centuries, wood is strong, durable, and relatively easy to shape, which makes it the perfect choice for Read more

Usually called names like medium density fiberboards, and particleboards are both commonly found in the construction of homes and furniture Read more
Baltic birch is considered to be hardwood because it’s entirely made of birch plies and layers (that are hardwood and Read more

Hi, I am Mark Garner a professional carpenter, woodworker, and DIY painter. I live in the small city of Peoria, Arizona as a semi-retired woodworker. I have started this blog with a simple motive to help you with my wood experience in this sector. If you like to know more about what I love doing and how it all got started, you can check more about me here.