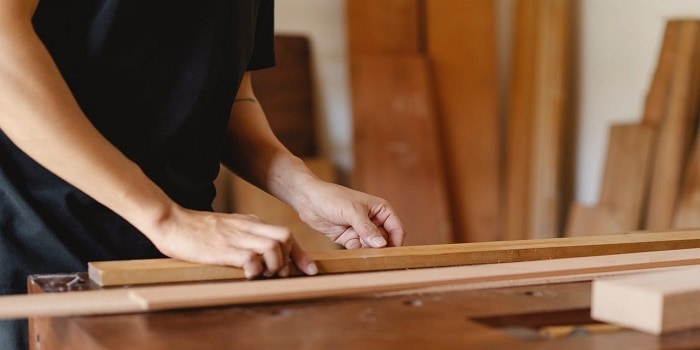
Your table saw workstation likely has a vast number of cutting tools to choose from including the hacksaw, jigsaw, and table saw itself.
However, for cutting a 2×4 lumber for the project, we will focus on using the circular saw.
You may think, why the circular saw instead of the others?
Simply put, the other saws are too slow in their operation and do not carry the cutting prowess of a circular saw.
There have been a great many impactful inventions that have shifted the ease with which humans can perform particular tasks, but there are a select few that sit above the rest.
It is fair to rank the circular saw somewhere in the top echelon of those inventions.
It might be noisy, but the circular saw makes cuts fast, cleanly, and with great precision.
So, if you are working on a project that requires cutting 2X4s, look to the circular saw to be your best tool for the job.
Cutting 2X4 with Circular Saw
The phrase “with great power comes great responsibility” line might be richly held in comic lore, but it holds true for saws as well.
With a circular saw, it is important to make the cuts after planning, preparation, and measurements because one wrong cut could lead to the ruining of the material and the compromising of a project.
If you have ever messed up a 2X4 cut with a circular saw, you surely understand how instantly detrimental it could be.
To save your next project from costly mistakes, let’s review some information about circular saws and how we can use them to effectively cut 2X4s.
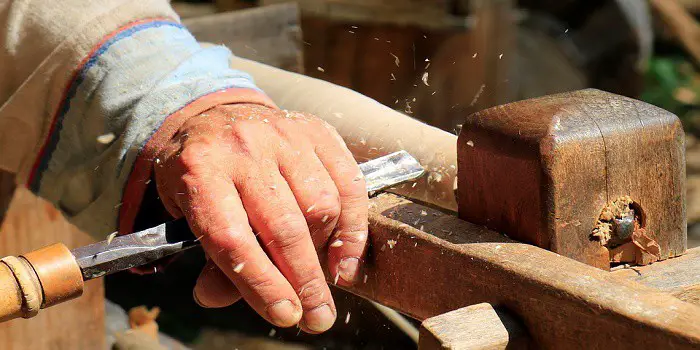
What do You Need to Cut 2X4 with a Circular Saw?
There are a few essentials that you will need to begin your 2X4 cutting project with a circular saw.
First, is the circular saw itself, adorned with a good circular saw blade.
The blade must be sharp to be effective, so you will also need a circular blade saw sharpener in case your blade is blunt.
To safeguard your workbench, you will want a Teflon sheet in the area where the 2X4 will lay, some hold clamps to keep the piece stationary (a must for precision cuts), as well as a sawhorse to place your materials on during the cutting.
Always remember that you are dealing with a saw which can be a dangerous tool when used incorrectly.
It can be messy and detrimental in some ways even when it is used accordingly, so it is important to gear up with safety equipment as well.
You will need a few essential safety tools before starting your cutting project. These include:
- Goggles to safeguard your eyes from flying wood shards and sawdust
- Mask to prevent you from inhaling sawdust
- Noise-reducing headphones/earmuffs to safeguard your eardrums from the high level of noise from the circular saw
- Woodwork gloves to protect your fingers from the sharp blade and splintered wood
- Appropriate clothing is essential, as you do not want to wear anything that could get caught in the saw, on the wood, or on any other piece of equipment. Avoiding loose-fitting clothes is highly recommended.
Once, you are ready with all the tools, you can now follow these easy steps…
Step 1 – Check the Equipment
Before starting a cutting project that you are looking to not screw up, it is important to verify that the equipment you are using is optimally prepared for the job.
Before starting any type of cutting, once the blade equipment is set up, it is important to review how functional it is.
If it is not, the wood can be damaged and unusable for the intended project.
By examining the equipment beforehand, the likelihood of a quality result can be assured.
All parts of a circular blade are important, but certain parts are critical to its operation, while the saw will still function without others.
Most importantly one must confirm the saw’s power source.
Whether it is receiving power via cable or if it runs off a battery, the circular saw will not run without power.
In the case of a battery, it is important to check the battery level before operating and charging it if it happens to be a bit low.
Having the saw cease to function due to battery drain in the middle of a project will cause financial losses, delays, and aggravation.
Another essential component to check is the lower blade guard.
To verify that it is in working order, the user should keenly observe its motion as it is lowered down and then released.
If it snaps right back into its upright position without snags or hitches, then the blade guard is in good shape. If it is not, the lower blade will need to be looked into.
The teeth on the blade can dull at varying intervals.
This depends on the type of material they are subjected to cutting, as well as how often the blade is put to use.
Regardless of those factors, it is always good practice to examine the blade teeth for cracks, chips, or dull points on its teeth.
If any are found, sharpening the blade is recommended to ensure the most optimal performance.

Step 2 – Prepare the Blade
Once all of the parts are confirmed to be in working order, the blade needs to be set.
This will determine how deep the circular saw blade will be cutting. One should never set a blade with the assumption that one will get the cut just right.
Assumptions like this are based on lazy-cutting practices that result in undesirable outcomes.
If a saw is set too deep it can create serious safety concerns aside from imperfect cutting jobs.
The saw can get damaged during a cut that is too deep and begins to stick.
This is especially problematic with the blade guard kicking the saw back up.
Additionally, the blade is more exposed.
Lower exposure results in more precise cuts, so taking the time to set the blade greatly increases the chances of a great cut.
When the saw is ready to set, the unplugged blade guard should be pulled back.
As the 2X4 is positioned on the cutting surface, the blade should be moved to about a quarter of the way underneath the 2X4’s base.
The cutting material should never be more than half an inch beneath the blade.
Step 3 – Support the Wood
To support the wood, users require clamps to hold the wood down.
Some users who are not familiar with circular saw operations often make the mistake of holding the wood on two sides while cutting, but the clamp should only be positioned to hold the wood down on one end.
The most important part is to have firm control of the saw.
One hand will hold the 2X4 in place, while the other controls the descending blade for the cut.
This will help the cutter to have firm control of the saw without allowing it to overpower them.
The saw will exhibit resistance as it cuts, so you will need to make sure the 2X4 is stationary and the saw is under your control.
Step 4 – Position the Wood
Of course, the 2X4 may need to be cut in multiple places, so you will likely need to reset the wood’s position on the sawhorse.
When shifting the wood over, make certain that the portion that is to be cut is hanging off the side of the sawhorse without resistance, while the other portion is tightly secure in the cutting space.
You certainly do not want it moving around on you.
You can alternatively use clamps to hold down one side of the wood while cutting the opposite end.
Ensure that nothing is underneath the part that will be cut and that it has a designated and safe area to land on after being cut from the rest of the 2X4.
Step 5 – Marking the Straight Cut
You probably have heard the expression “measure twice, cut once.”
If you haven’t before, you have now, and it is one of the best pieces of advice any woodcutter can get.
Invalid measurements result in faulty cuts and wasted money on now useless materials.
Make sure that you measure exactly where the lumber is to be cut and mark the location with a pencil.
This will be the mark that you will then measure the circular saw against, lining the 2X4 directly over the mark, and lining it up accordingly.
To assure a straight line, you can utilize a protractor and miter squares.
Step 6 – Making the Straight Cut
Human beings make errors, so mistakes are sometimes unavoidable.
However, even the most experienced woodcutter can have trouble with the circular saw.
For all its precision, its power can shift the wood out of place if it is not firmly in place.
In a scenario where the blade cuts just shy of the mark, the material can still be salvaged.
To mitigate such undesirable events, it is important to keep a few strategies in mind.
These techniques will help to reduce the chances of a crooked cut and costly cutting errors.
Line up the wood under the saw while the saw is powered off and slowly descend it on a marked 2X4 piece which is in a secure and immobilized position on the cutting work area.
As you bring the saw blade down, do your best to make sure that it sits directly on the pencil mark you made after measuring.
When you are comfortable with the positioning, power up the circular saw and bring it down in the same place, cutting the same area.
You can use a miter square on the cutting line as well by lining it up next to the pencil mark.
When you bring the saw down, make sure it cuts right next to the miter square.
This is also an effective method of using a circular saw to make straight cuts.

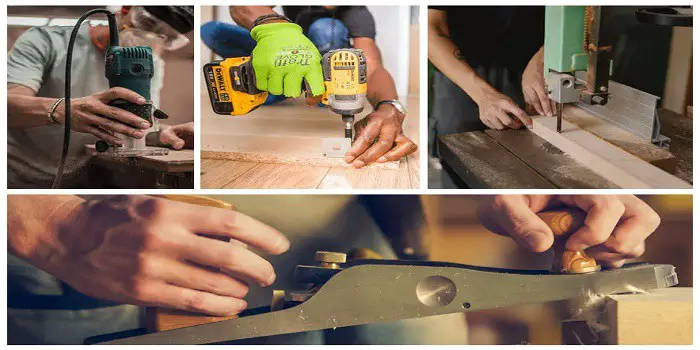
How to Choose the Best Circular Saw for Cutting?
If you are looking at circular saws, you will need to look for certain features to ensure you are getting what you need.
What follows are the most common factors you need to assess to find the right circular saw for your workshop or profession.
a) Blade Types & Changing
The blade is what makes your circular saw work, so you will need to purchase the right blade that fits the saw.
This starts with the diameter of the blade which must fit within the design parameters of the saw itself.
The next step is the arbor size which is the center hole where the saw blade is mounted.
Finally, you should buy a blade that has an RPM rating higher than the saw itself and not less.
Next is how the blades themselves are changed out from the saw.
Ideally, you should purchase a circular saw that has a spindle lock. This is a secure lock that makes blade changing simple and fast.
Once you have accounted for that, the next step is looking for the number of teeth the blade features.
A higher number of teeth can cut materials smoother but takes more time. Fewer teeth will cut materials faster but leave a rougher edge.
b) Cord or No Cord
Each has its advantages. A corded circular saw tends to be larger, and more powerful and is most often used for larger jobs.
A cordless saw tends to be smaller, although it may weigh the same or more than a larger corded saw because of the battery.
However, a cordless saw is better for cutting smaller boards as you do not have to worry about power.
If you are cutting mostly larger material, then get a corded saw.
For smaller materials that you occasionally cut or when you have no outlet available, then a cordless saw is a good choice.
c) Depth & Bevel Adjustments
With circular saws, you can adjust the bevel and depth of the saw with levers.
There are also levers for the blade guard as well.
Generally speaking, the bigger the lever, the easier it will be to make the right adjustments.
Small levers can be difficult to reach and properly adjust.
The scale used for both depth and bevel adjustments should be easy to read as well.
Be sure to choose a circular saw with scales that are engraved or cast into the saw and not a sticker that can come off rather easily.
d) Ergonomics
The comfort of using the circular saw is not something to be overlooked.
The best types of circular saws are small enough to easily use while being large enough to comfortably handle.
You should be able to confidently grip the saw with one hand and push it through the material to get the type of cut you want.
A good rubber grip on the handle is an obvious start, but it also should be shaped to fit your hand.
This means putting as little strain as possible on the muscles and the wrist when in operation.
A reduction of vibration is also a big plus as this puts less strain on the joints in your hand and wrist.
e) Precision
You need your circular saw to cut straight and true time after time.
This means having a good, solid, and reliable blade.
Keep in mind that the best blades are not necessarily the most expensive ones.
Be sure to try out the blade once you have purchased it to see if it works.
If it does not, then return it and buy another one that is of even better quality.
Another factor to consider is that the more teeth there are in a circular saw blade, the smoother the cut will be.
So, pay attention when it comes to quality and the number of saw teeth.
f) Safety & Size
These go together as a properly sized circular saw for your needs actually improving the safety factor considerably.
This means you need to pick up the circular saw before you buy it and hold it in your hands.
If it is too small or unwieldy, then you should choose another, larger size that is more ergonomically designed for your hands.
The safety features you should look for on all circular saws start with the position of the blade and the overall visibility of the cuts you are going to make.
The more you can see, the safer you will be. Other considerations include the following.
- Sturdy Base or Shoe Crafted from Quality Materials
- Proper Cutting Depth for Blade
- Integrated Dust Blowing System
- Spindle Locks for Switching Blades Safely
Now that you have all the basics, you can make the best-informed decision about which type of circular saw to purchase.
Just keep in mind that you are not looking for the best overall, just the best type that fits your needs like cutting 2×4 lumber.
Final Thoughts
A circular saw is a powerful and effective cutting machine, achieving precision cuts when used accordingly and kept up to optimal condition.
While there is a learning curve to its utilization, once you get the hang of it, it will speed up and improve any future cutting projects you may be dealing with.
As with anything, the more practice you put into woodcutting with a circular saw, the better you will get.
Polishing these cutting skills will allow you to successfully proceed with many woodworking projects, as well as assist others with theirs.
You can even teach someone else the simple but effective techniques of cutting with a circular saw and pass the knowledge on from there.

One of the best ways to clean your yard of twigs, leaves, and tree branches after a storm is to Read more
Whether you have been working with wood all your life or just getting started, having the proper tools is a Read more
It’s possible to only use hand or manual tools when woodworking, but then it becomes a slower process. For certain Read more

If you have never used this, steel wool is a collection of very thin steel wires bundled together in the Read more

Hi, I am Mark Garner a professional carpenter, woodworker, and DIY painter. I live in the small city of Peoria, Arizona as a semi-retired woodworker. I have started this blog with a simple motive to help you with my wood experience in this sector. If you like to know more about what I love doing and how it all got started, you can check more about me here.