
Let’s be honest: most modern furniture polishes are essentially just scented silicone in a spray bottle.
They give you ten minutes of shine and a lifetime of “greasy film syndrome.”
If you’re tired of treating your heirloom oak table like a cheap dashboard, it’s time to go old school—and I mean centuries-old school.
Enter beeswax for woodworking. It’s the gold standard for a reason.
It doesn’t just sit on top of the wood like a plastic wrap; it nourishes the fibers, smells like a summer meadow, and provides a depth of luster that no aerosol can ever replicate.
Whether you’re a seasoned carpenter or someone who just bought a thrifted credenza that looks a bit “thirsty,” crafting a traditional beeswax furniture polish recipe is the ultimate DIY flex.
It’s chemistry, it’s craft, and it’s surprisingly satisfying.
In this guide, we’re going deep into the molecular level of waxes, the mechanics of wood absorption, and a recipe so reliable it would make a Victorian cabinetmaker weep with joy.
Homemade Beeswax Wood Finish Recipe
To make your own beeswax polish, you need to understand the “Solvent-to-Solid” ratio.
Too much wax, and you’re buffing until your arms fall off; too much oil, and your table stays tacky for a week. We’re aiming for a “soft butter” consistency.
What you need:
Glass Jars: For storage.
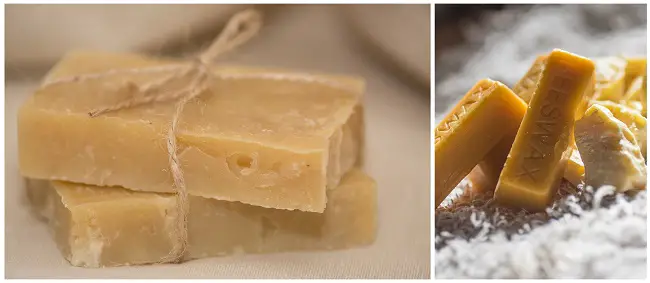
1 part 100% natural beeswax for wood: Use cosmetic-grade yellow beeswax pellets. They melt faster and retain that rich, honeyed aroma.
3 parts Food-Grade Mineral Oil or Fractionated Coconut Oil: These are “non-drying” oils that stay stable. If you want a finish that hardens (cures) over time, swap this for Pure Tung Oil or Boiled Linseed Oil (BLO).
Double Boiler: Never melt wax over a direct flame. Beeswax has a flashpoint of approximately 204°C (400°F). We don’t want a kitchen fire; we want a polish.
Step-by-step process:
To make your own beeswax polish with a professional-grade consistency, follow these refined steps.
We are aiming for a homogenous colloidal suspension—or, in layman’s terms, a buttery cream that doesn’t separate.
Step 1. Weighing and Ratios
Don’t eyeball it. For a consistent traditional beeswax furniture polish recipe, use a digital kitchen scale.
A standard “soft paste” ratio is 1:3 (1 part wax to 3 parts food-grade mineral oil by weight).
If you prefer a harder “puck” of wax for heavy wood seasoning, move toward a 1:2 ratio. Weigh your beeswax pellets first, then calculate your oil volume accordingly.
Step 2. The Controlled Melt
Place your 100% natural beeswax for wood into the top basin of a double boiler.
Fill the bottom pan with enough water to create steam, but not so much that the top bowl touches the water. Bring the water to a gentle simmer.
Note: Beeswax has a melting point of approximately 62°C to 64°C.
Keep a thermometer handy; you want to melt the wax steadily without overheating it, which can degrade the natural esters and mute that beautiful honey scent.
Step 3. Temperature Matching (The Pro Secret)
Before adding your oil to the wax, slightly warm the oil in a separate container (or near the stove).
If you pour cold oil into 65°C wax, the wax will “shock” and form tiny, hard granules.
Pre-warming the oil ensures the finishing wood with beeswax process results in a perfectly smooth paste without any gritty bits.
Step 4. The Infusion & Emulsion
Slowly pour your warmed oil into the liquid wax. Stir constantly with a clean wooden skewer or a stainless steel spatula.
You are looking for a uniform, golden, translucent liquid. If the mixture turns cloudy, the temperature has dropped too far—simply keep it over the steam for another minute until it clears back up.
Step 5. The “Scent-sation” Integration
Remove the bowl from the heat source once the mixture is clear. This is when you add your essential oils to beeswax for household polishing.
Why should you wait?
Essential oils are volatile; if you add them while the mixture is boiling, the scent (and the beneficial properties) will literally evaporate into the air.
Add 10–15 drops of citrus or cedarwood oil and give it one final, thorough stir.
Step 6. The Precision Pour
Carefully transfer the liquid into clean, wide-mouth glass jars. Avoid plastic containers, as the residual heat from the wax can cause some plastics to leach chemicals.
Fill the jars to about 5mm below the rim to allow for slight contraction as the wax cools.
Tip: If you see any bubbles on the surface, a quick pass with a lighter or heat gun will pop them for a “factory-smooth” finish.
Step 7. The Curing Phase
Leave the jars undisturbed on a level surface.
Do not put them in the fridge to speed things up; rapid cooling can cause the wax to crack or pull away from the sides of the jar.
Let it set at room temperature for at least 3 to 5 hours.
You’ll watch it transform from a dark amber “oil” look into a creamy, opaque, ivory-colored balm that’s ready for applying beeswax on wood.

Will a DIY Beeswax Polish Protect Wood Furniture?
The short answer? Yes, but it depends on what you’re protecting it from.
Finishing wood with beeswax creates a sacrificial barrier. In the world of wood seasoning, beeswax acts as a hydrophobic (water-fearing) layer.
Because beeswax is composed of various fatty acid esters and long-chain alcohols, it is naturally resistant to moisture.
What it DOES:
1- Moisture Regulation: It prevents wood from drying out and cracking in low-humidity environments (like a heated home in winter).
2- The “Shield” Effect: It provides a resilient barrier against water stains, pesky white heat rings, and airborne pollutants that would otherwise penetrate the raw wood grain.
3- Minor Abrasion Resistance: It fills in micro-scratches, making the surface feel smooth to the touch.
4- Luster Enhancement: It changes the way light refracts off the wood cells, creating a “soft-focus” glow rather than a harsh, plastic shine.
What it DOESN’T:
1- Heat Protection: Don’t put a boiling tea kettle on a waxed surface. Beeswax melts at low temperatures.
2- Heavy Solvent Resistance: Spilled alcohol (like a stray Martini) will eat through a wax finish quickly.
Pro Tip: If you need a more durable finish for a high-traffic dining table, consider this your “top coat” over a drying oil like Tung oil.
The oil seals the wood, and the bee wax for furniture provides the silky tactile experience.
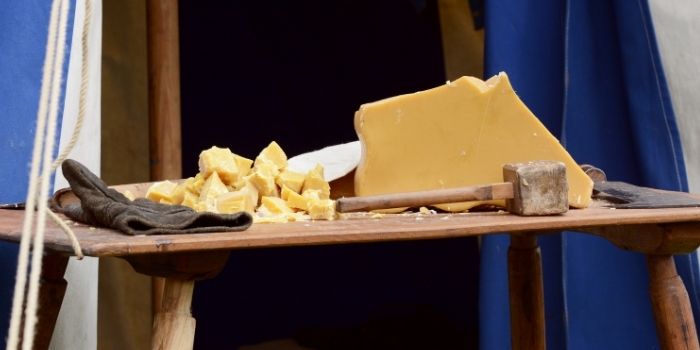
The Great Wax Showdown: Which is Best for Wood?
Keep in mind that not all wood waxes are created equal.
Depending on your project, you might want to blend your 100% natural beeswax for furniture with other plant-based waxes to tweak the hardness.
| Wax Type | Hardness (Melting Point) | Source | Best For… |
| Beeswax | Low (~63°C) | Honeycombs | High-end furniture, ease of use, scent. |
| Carnauba | High (~82°C) | Palm Leaves | Providing a “hard” shell and high-gloss shine. |
| Candelilla | Medium (~70°C) | Desert Shrubs | Vegan alternative to beeswax; slightly more brittle. |
| Rice Bran | High (~77°C) | Rice Husks | Paper coating and a very smooth, non-tacky finish. |
Why Beeswax Wins for DIY?
While Carnauba is “stronger,” it is incredibly difficult to work with in its pure form—it’s as hard as a rock.
Beeswax is the “Goldilocks” of waxes: it’s soft enough to apply by hand but durable enough to provide a beeswax as a wood finish that lasts for months.
How to Apply Beeswax Finish on Wood Furniture Correctly?
Applying beeswax to wood is more of a workout than a chore. If you aren’t breaking a slight sweat, you’re doing it wrong.
Step 1. Preparation (The “Clean Slate” Phase)
You cannot wax over dust. Use a slightly damp microfiber cloth to remove any debris.
If the piece has years of old “supermarket spray” buildup, wipe it down with a dilute solution of white vinegar and water first.
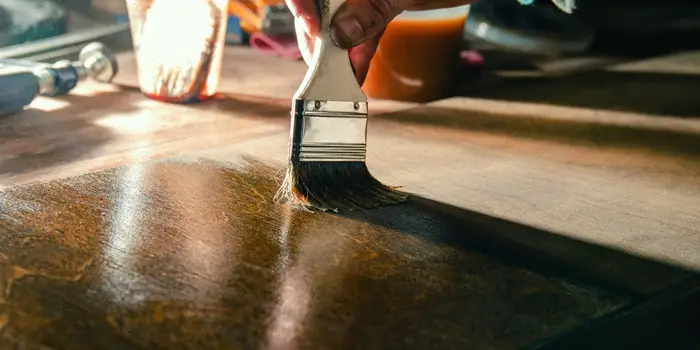
Step 2. The Application
Use a lint-free cotton rag (an old T-shirt is perfect). Scoop a small, marble-sized amount of the wood finishing wax.
Work in small circular motions, rubbing with the grain. You want to “drive” the wax into the pores.
Step 3. The “Hazing” Wait
This is where most people fail. You must let the wax sit for 15 to 20 minutes.
This allows the solvents (the oils) to carry the wax into the wood fibers. The surface should look slightly dull or hazy.
Step 4. The Buff (The Magic Moment)
Take a clean, dry cloth and buff vigorously.
You are using friction to heat the wax slightly, leveling it out into a microscopic, flat plane. This is what creates the shine.
Can I use this on food-contact surfaces like cutting boards?
Homemade beeswax furniture polish recipes are some of the safest finishes on the planet.
As long as you use food-grade mineral oil as your carrier, you can safely use them for polishing and finishing the surfaces, like cutting boards.
What is the Best Beeswax Furniture Polish Available on the Market?
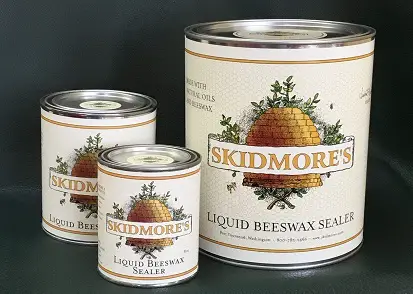
Skidmore’s beeswax furniture polish is one of the best high-quality wood treatments that can be utilized for finishing interior design projects like (dresser units, dressing tables, console tables, etc.) made of wood.
The thing I like most about Skidmore’s liquid beeswax wood finish is it’s extremely simple to apply, which creates a lovely, smooth shine that isn’t overly glossy.
IMO, it’s a wonderful solution for anyone who wishes to completely restore the wood while retaining some of the inherent beauty of untreated wood in their completed work.
It’s also ideal for anyone looking for a great finish that isn’t so shiny that looking at it hurts the eyes.
Skidmore’s beeswax sealer is a combination of natural oils and beeswax. It is a blend of beeswax and natural oil that creates a soft-to-the-touch finish with a warm glow.
Here are some of the reasons why you should try this product.
- The formula is organic, safe, and non-toxic
- Created to bring back the detailing of the woodwork
- It improves the wood’s grain and also restores its hue
- Enhances the inherent characteristics of wood
With numerous wood treatments available, Skidmore’s Liquid Beeswax Wood Finish is a clear winner as its non-toxic and provides magnificent results.
Though it’s accessible from various stores, purchasing from Amazon is the simplest process to get your hands on one of these. It’s also reasonably priced, and shipment is prompt.
What are the Disadvantages of Using a Homemade Beeswax Finish on Wood?
While we all love the “organic glow” and the therapeutic scent of a traditional beeswax furniture polish recipe, it’s only fair to talk about the trade-offs.
If beeswax were a perfect, bulletproof shield, we wouldn’t have invented polyurethane.
Here are the primary disadvantages you should consider before finishing wood with beeswax:
1. Low Thermal Resistance (The “Melting” Problem)
The most significant technical drawback of bee wax for wood is its low melting point, which typically sits between 62°C and 64°C. This makes it a poor choice for surfaces that encounter heat.
If you set a hot coffee mug or a plate of steaming food directly on a waxed surface, the wax will soften or liquefy, often leaving behind a permanent white “heat ring” or a dull spot where the finish was disrupted.
Because it never truly “cures” into a hard plastic-like shell, it remains a soft, thermoplastic substance.
In very warm climates or homes without air conditioning, a heavily waxed piece of furniture can even feel slightly “tacky” or sticky to the touch as the ambient temperature rises toward the wax’s softening point.
2. Limited Structural Protection
From a structural standpoint, beeswax is a “breathable” finish. While this is great for allowing wood to move, it doesn’t provide much “impact resistance.”
If you drop a heavy object on a waxed table or a dresser in the bedroom, the wood fibers will dent just as easily as if they were raw.
It doesn’t add any structural rigidity to the surface cells the way a penetrating epoxy or a hard-curing film finish would.
3. Sensitivity to Solvents and Chemicals
Beeswax as a wood finish offers almost zero protection against solvents.
Common household spills—like high-proof alcohol (hand sanitizer or cocktails), nail polish remover, or even strong alkaline cleaners—will dissolve the wax layer instantly.
This leaves the underlying wood vulnerable to deep staining within seconds of a spill.
Unlike a hard varnish that you can scrub, a waxed surface requires “sacrificial maintenance.”
If you spill something, you aren’t just cleaning the surface; you are often removing the finish itself.
This makes it a high-maintenance choice for kitchen islands, bar tops, or any area where “happy hour” accidents are likely to occur.
4. Dust Attraction and “Build-Up” Issues
While applying beeswax on wood initially creates a smooth, anti-static surface, over time, the soft nature of the wax can actually trap dust and pet hair.
If you apply fresh layers of wood finishing wax too frequently without properly buffing or cleaning the previous layer, you can create a “grime sandwich.”
This accumulation leads to a muddy, darkened appearance that hides the natural beauty of the wood grain.
Eventually, you’ll have to perform a “deep strip” using mineral spirits to remove the old, dirty wax and start over, which is a significantly more labor-intensive process than a simple dusting.
Related FAQs:
Can you put polyurethane over beeswax?
Technically, you should avoid applying polyurethane or other synthetic wood varnishes directly over a waxed surface.
Beeswax is naturally hydrophobic and “greasy” at a molecular level, which prevents film-forming finishes from bonding correctly.
If you try it, the polyurethane will likely peel, crack, or fish-eye within days.
To transition to a hard-coat finish, you must entirely strip the wax layer first to ensure the wood fibers are clean and porous enough for the new topcoat to adhere.
How often should I use traditional beeswax polish?
For most heirloom pieces, a fresh application every 6 to 12 months is the sweet spot.
You’ll know it’s time when the wood starts to look “thirsty” or the signature silky feel turns slightly draggy.
Over-applying wax can lead to a sticky, dull buildup that actually traps dust.
Between these deep conditioning sessions, a simple buff with a dry, lint-free cloth is usually enough to reactivate the existing wax and restore the glow.
How do I remove old beeswax if I want to paint the piece later?
To prep a waxed surface for a fresh coat of paint, you need to dissolve the wax barrier using mineral spirits or naphtha.
Soak a clean rag in the solvent and rub the wood vigorously, changing to a fresh area of the cloth frequently to avoid just spreading the melted wax around.
Once the surface feels “squeaky” clean and no longer slippery, give it a light sanding with 220-grit sandpaper to ensure your new paint has a perfect mechanical bond.
Final Thoughts
There is a tactile soulfulness to traditional beeswax furniture polish that modern chemicals just can’t touch.
By choosing a DIY approach, you aren’t just cleaning your home; you’re participating in a centuries-old tradition of stewardship.
You’re treating your furniture as a living thing, honoring the timber, and—let’s be honest—making your house smell incredible in the process.
Now that you’ve got the technical specs and the recipe, your furniture is officially out of excuses. Grab some jars, find some local wax, and start the glow-up.
Share the post "DIY Beeswax Polish (Quick Recipe for Wood Furniture)"

We are constantly finding new ways to update our home exteriors. If you are a bit tight on budget, renovating Read more

Cypress wood has been used for thousands of years in shipbuilding, so it is well-known for its water-resistance properties. Due Read more

We all know - Heat is the enemy of wood. When you place a hot item on a wooden surface Read more

If you are looking to upgrade your dining room but are on a budget, then painting your oak table and Read more

Hi, I am Mark Garner a professional carpenter, woodworker, and DIY painter. I live in the small city of Peoria, Arizona as a semi-retired woodworker. I have started this blog with a simple motive to help you with my wood experience in this sector. If you like to know more about what I love doing and how it all got started, you can check more about me here.