There comes a time when your laminate kitchen cabinets no longer have that like-new appeal. But that does not mean you have to rip them down and put up new ones.
There are moisture-resistant alternatives that allow you to paint your laminate cabinets.
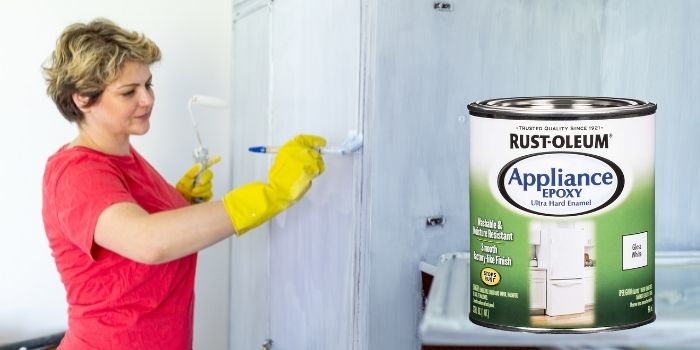
As the name suggests, appliance epoxy is used to paint appliances such as dishwashers, washers, dryers, refrigerators, laundry machines, and the like.
However, it cannot be used on items that either generate or are exposed to heat, such as the interior of ovens or stovetops.
Because of what it is mainly used for, many people think they cannot paint wood with appliance epoxy. But actually, you can if you follow the steps right.
You can even apply high-gloss epoxy appliance paint to the cabinet surface without worrying about it peeling away.
Applying Appliance Epoxy Paint on Cabinets
When applying appliance epoxy color, the first step is to prepare the kitchen cabinets by removing all items from the inside.
This will prevent any of the primers or paint from touching your items.
If there are any drawers, you’ll also want to remove them.
Next, take the drawers off the hinges and then remove the hinges from the cabinets. Store the hinges and remove the doorknobs and pulls to store them separately.
Step 1 – Clean the cabinets
Take the doors and drawers to a well-ventilated room such as a garage or if it is a nice day, take them outside.
Put on a respirator over your mouth and nose. Then, put on some chemical-resistant gloves.
You’ll want to use some old rags to remove the dust and dirt to wipe down the surfaces.
Add some xylol or xylene solvent to remove the grime and grease that might be stuck on the surfaces.
Follow this with soap and water, and then rinse to remove any residue. Wipe the surfaces of the doors and drawers with a dry towel.
Once dry, use some 150-grit sandpaper to go over the surfaces again. You’ll want to wipe down the cabinets with the solvent again and let them dry.
As a word of warning, be sure that the rags you used with the solvent are fully dry before you throw them away.
Once dry, seal the rags in a plastic bag before disposing of them.
Step 2 – Prime the cabinetry
Now the cabinet surfaces are ready for the primer.
Although applying primer isn’t necessary for appliance epoxy paints, you should add the primer to the sanded laminate surface so the paint will stick properly. Plus, it gives a smoother finish.
A water-based primer designed for maximum adhesion is the right choice. To apply the primer, use a polyester paintbrush.
At least two hours after you’ve applied the primer coat, sand the surface with 220-grit sandpaper.
Then wipe the surfaces to remove dust and apply a second coat of primer.
This time, let the primer fully dry over two to three days. This will ensure that the primer dries fully before you add the paint.
Step 3 – Apply epoxy paint to wood cabinets
Polyester-flagged-sash brushes are the perfect choice to apply epoxy enamel paint. This type of brush will ensure that you get a smooth finish.
It will also provide a high-gloss finish to match your appliances. Use even strokes to apply the paint to the surface lightly.
Once you apply the first coat, let the cabinets dry for at least 24 hours.
Although epoxy appliance paint will dry to the touch in 2 to 4 hours, it will take up to 24 hours for the paint to fully dry and cure.
Look over the cabinets after they have dried, and add a second coat if needed.
Once done, you must wait at least three days before replacing the cabinets’ doors and drawers.
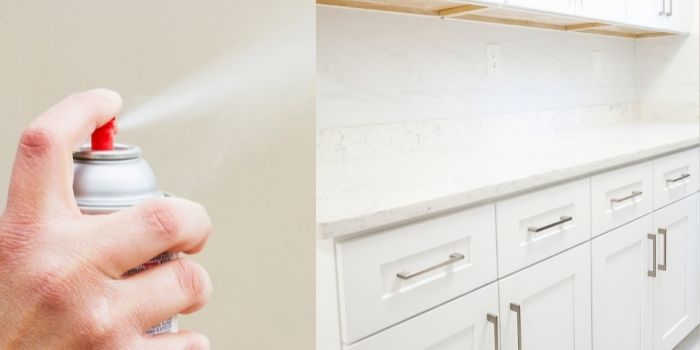
Pros and Cons of Using Epoxy Spray Paints
In recent years epoxy spray paints for appliances have become more popular than those applied with a brush.
This spray paint uses a hardener and quickly turns it into resin, creating a durable waterproof surface.
This type of paint’s advantage is its resilience to stains, grime, grease, and even chemical household cleaners.
It can also adhere to different materials (like wood, plastic, metals, etc.), making it well-suited for many projects.
Not only for wooden cabinets, windows, and doors, but cabinet hardware such as doors, knobs, and hinges can also be coated with appliance epoxy paints of your choice.
However, for best results, it is recommended that you follow the manufacturer’s instructions and clean the surface well before spraying.
A Few Drawbacks
Although using appliance epoxy paints (both spray and brush-on) is straightforward, and you do not want to follow complex instructions, they have a few disadvantages when applying them to porous surfaces like wood.
Some of these cons might negate this finish’s benefits, so you should be aware of them before you choose your finish.
- Epoxy paints used on appliances can smell strong because of the ingredients they have
- They require more preparation and will need far more drying time than other paints
- Epoxy appliance paint finishes are often temporary on wood and are not as strong because of the properties of wood to expand and contract
- Lastly, using epoxy paints on wooden surfaces like floors can turn them extremely slippery, which can be dangerous for wet areas like bathrooms and kitchen
Which Appliance Epoxy Paint is Best to Choose?
I have worked with Rust-Oleum® Specialty Appliance Epoxy, and it worked great. It’s ultra-hard and comes with moisture-resistance properties as well.
You can check Krylon appliance epoxy enamel if you want to try another product.
Both these options are readily available in stores such as Home Depot and Amazon. And comes at a very affordable price.
Remember that these are specifically formulated for indoor surfaces and should not be used for outdoor purposes like on decks or fences.
The cost of epoxy appliance paint can vary depending on the brand and type you choose, as well as the size of your appliance. Typically, it costs between $10 and $30 per can.
To get the best price, shop around and compare prices from different retailers. Additionally, many online retailers offer discounts or special deals. So be sure to check them out.
What to Consider when Buying Appliance Epoxy Spray Paint?
Before you run out and purchase this type of epoxy spray paint, there are a few things you need to know about this product.
a) Types:
There are different types of epoxy paint, so you will need to match the type with the materials that will be painted.
Of the many different colors and types, there are two basic types: All Weather epoxy and Appliance epoxy spray paints.
You can choose either for smaller projects as they both work well on most materials.
The all-weather paint is suitable for wooden surfaces such as cabinet doors, indoor stools, boats, bar tops, and more.
And the appliance paint is specifically well-suited for painting appliances.
If you purchase true epoxy paint, it has two separate parts that require mixing.
This means you will need a hardener, a resin, and a proper tool or device to mix them when ready.
You can find such items at your local hardware store that stocks paint and supplies.
b) Quantity:
You’ll want to purchase enough paint to do the job, but not too much, as what you have left over may never be used.
Even though it does cost more, it is better than the alternative of not having enough.
c) The Right Color:
You may be overwhelmed by the number of available color choices.
To help you with this, you may purchase a few cans and then test the paint by applying it to scrap material.
This will let you see what the paint looks like when thoroughly dried.
Be sure to use scrap wood or metal, whatever material closely matches the surface that you will eventually paint.
Once you have decided on the color, purchase the appropriate amount of paint.
Final Thoughts
While epoxy appliance spray paints are usually designed for metal appliances, you can also use them for indoor wood surfaces like cabinets, cupboards, countertops, floors, etc.
Make sure you choose a good product and follow the correct application process. When you purchase, the best place to start is by reading the paint sealer can.
On the can, you’ll find special instructions on how to prep the surface, how to mix the epoxy, and how many coats are recommended.

Hi, I am Mark Garner a professional carpenter, woodworker, and DIY painter. I live in the small city of Peoria, Arizona as a semi-retired woodworker. I have started this blog with a simple motive to help you with my wood experience in this sector. If you like to know more about what I love doing and how it all got started, you can check more about me here.

