Polyurethane is one of those finishes that separates a “pretty good” woodworking project from a truly professional-looking one.
Whether you’re sealing a hardwood floor, finishing a dining table, or protecting a custom cabinet, polyurethane adds durability, depth, and that rich, protective sheen we all want.
But here’s the thing: even the best polyurethane can look mediocre if applied with the wrong tool.
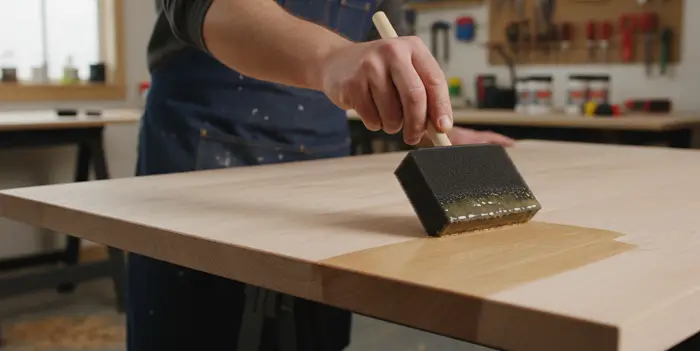
Many DIYers reach for a foam brush because it’s inexpensive, disposable, and widely available. It seems simple enough—dip, brush, done.
But if you’ve ever dealt with bubbles, streaks, or uneven coats, there’s a good chance the foam brush was part of the problem.
Let’s take a closer, technical look at the 7 drawbacks of applying polyurethane with a foam brush, and then we’ll explore what tools actually work better.
Can You Apply Polyurethane with a Foam Brush?
Yes, you can use a foam brush for polyurethane application. But just because you can doesn’t mean you always should.
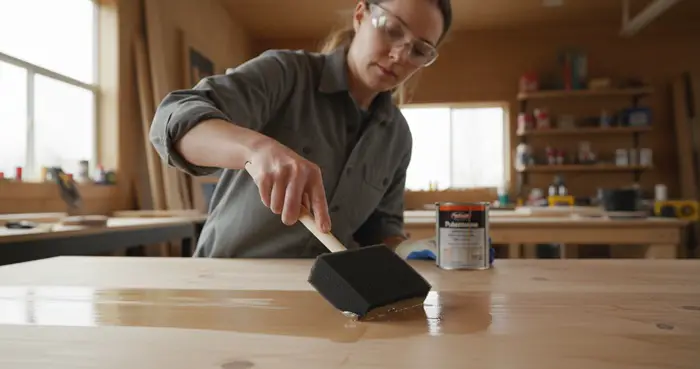
Foam brushes shine when working on small, flat surfaces, offering a smooth, disposable option for touch-ups, tight corners, and quick fixes.
However, when it comes to larger projects, these have a bad habit of turning into villains. They often leave behind air bubbles, streaks, and the kind of unpredictable drying results that make you want to reconsider all your life choices.
Their tendency to absorb too much or too little finish means that controlling your coat thickness becomes frustratingly inconsistent. One moment you’re laying down a silky layer; the next, you’re dragging half-dried polyurethane across the surface.
So, it’s good to save foam brushes for the “small stuff.” They’re excellent sidekicks when you need them, but don’t hand them the lead role in your masterpiece.
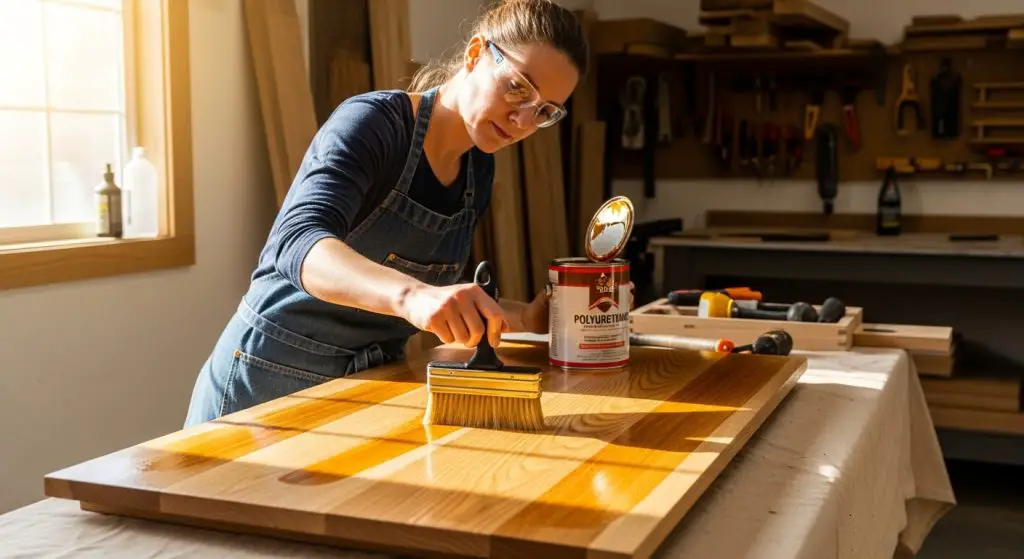
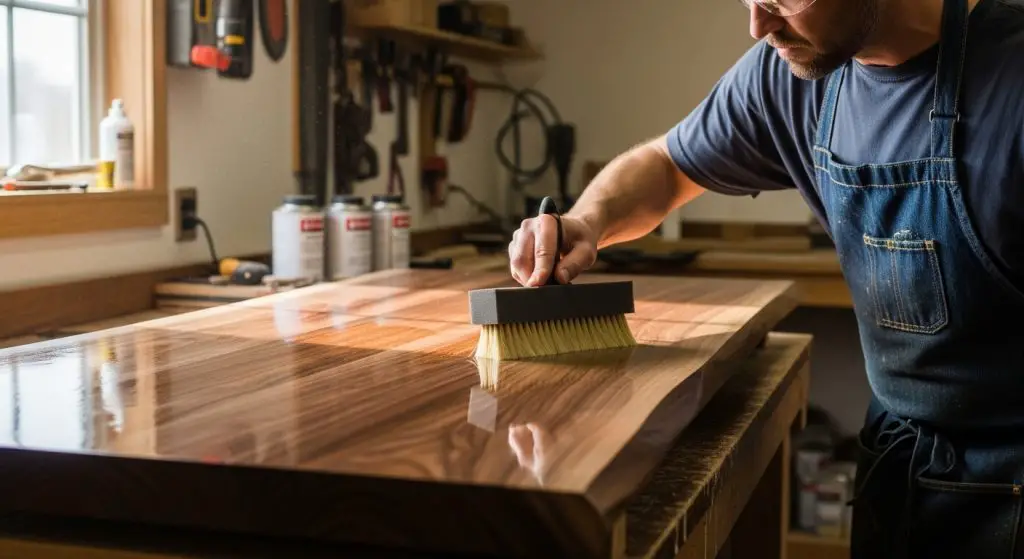
When it’s time for the big stage — like an entire table or a hardwood floor — trust a proper bristle or synthetic brush to carry the show.
7 Drawbacks of Applying Polyurethane with a Foam Brush
Foam brushes may seem like the easiest, most budget-friendly option on the shelf—but when it comes to polyurethane, convenience can come at a cost.
Before you dip that foam applicator into your finish, it’s worth understanding the technical and practical downsides that can affect your final results.
1. Air Bubble Formation
One of the most common problems when using a foam brush for polyurethane is air bubbles.
Foam is porous by nature. When you press it into the surface and drag it across wet polyurethane, it compresses and releases air. That air gets trapped in the finish.
With oil-based polyurethane (which has a longer open time), bubbles may rise and pop.
But with fast-drying water-based formulas, bubbles often dry in place—leaving tiny craters or cloudy spots.
Technically speaking:
- Foam structure = air pockets
- Pressure = air displacement
- Result = microbubbles trapped in film
If you’ve ever had to sand between coats just to remove bubble marks, this is likely why.
2. Streaking and Uneven Film Thickness
Polyurethane performs best when applied in a consistent, even film thickness. That’s difficult to achieve with foam.
Unlike bristle brushes, foam lacks filament structure. There’s no “flow control” in the bristles to distribute the finish gradually.
Instead, foam releases finish unevenly—sometimes flooding, sometimes dragging dry.
The results are visible streaks, lap marks, uneven sheen and areas with different thickness levels. This inconsistency can affect both appearance and durability.
3. Limited Load Capacity
Foam brushes simply don’t hold as much product as quality bristle brushes.
A good natural bristle brush for polyurethane has split tips (called flagged bristles).
These help hold and distribute more finish evenly. Foam, by contrast, absorbs product but doesn’t distribute it efficiently.
So what happens?
- More frequent dipping
- Increased chance of lap lines
- Higher risk of contamination from repeated can exposure
This makes foam brushes inefficient for large surfaces like tabletops or doors.
4. Poor Performance on Oil-Based Polyurethane
Oil-based polyurethane is thicker and more viscous than water-based formulas. It requires a brush that can:
- Flex under resistance
- Lay down heavier coats
- Maintain smooth stroke control
Foam brushes tend to drag through thicker oil-based poly. Instead of flowing, the finish may bunch up or create ridges.
That’s why professionals almost always prefer a natural bristle brush for polyurethane when working with oil-based products. Natural bristles are more compatible with oil solvents and maintain structure during application.
5. Foam Degradation During Application
Foam may break down—especially with solvent-based finishes.
Oil-based polyurethane contains mineral spirits and other solvents that can soften low-quality foam. Over time, the foam edge may:
- Fray
- Tear
- Shed small particles
Those particles can get embedded in your finish—requiring sanding and re-coating.
Even some of the so-called best foam brushes for varnish struggle under prolonged solvent exposure.
6. Weak Edge Definition and Corner Control
When finishing detailed trim, corners, or profile edges, control matters.
Bristle brushes provide tactile feedback. You can feel resistance, adjust pressure, and feather edges cleanly.
Foam, however, compresses unpredictably, lacks stiffness for tight corners, and can overload edges with excess finish.
This often results in:
- Thick buildup along edges
- Drips forming underneath surfaces
- Excess sanding between coats
7. Disposable Nature = Hidden Cost
Foam brushes are marketed as disposable—and that’s true.
But if you’re applying 3–4 coats of polyurethane (as recommended for durability), you may go through multiple brushes.
Quality bristle brushes, on the other hand:
- Can be cleaned and reused
- Maintain performance across projects
- Deliver more consistent results
If you’re serious about achieving the best brush for polyurethane application, long-term performance matters more than short-term convenience.
Oil-Based Poly vs Water-Based Poly – What Brushes to Use?
Unlike foam brushes, rollers, and sprayers, I think bristle brushes are great for applying poly on a wooden table, even if your feathering skills aren’t perfect.
Besides minimizing the bubbles, brushes give you better control over how much finish you apply, thanks to the closer hand-to-surface feel — something rollers and lambswool applicators can’t quite match.
Another bonus is that picking a good brush is usually easier than finding the perfect roller.
While ideally you’d use specific brushes for oil- or water-based poly, a good multipurpose brush can save the day (and your budget) when needed.
What Brush to Use for Oil-Based Poly?
A natural bristle brush made of animal hair is the best choice for applying oil-based polyurethane finish on wood surfaces.
Natural bristles have a superpower: they soak up oil-based poly like a sponge at a pool party.
They hold more finish and release it smoothly and evenly, gliding across the surface and leaving behind a beautiful, professional-looking coat that synthetic brushes can only dream of achieving.
Their natural texture makes it easier to avoid annoying brush marks and get that glassy, flawless finish you’re aiming for.
The only downside of natural bristle brushes for wipe-on poly finishes is that they are slightly more expensive. But you should think of it as an investment, like paying extra for good coffee or premium tools.
Sure, you could go cheap, but why risk your masterpiece for the price of a few extra bucks?
What Brush to Use for Water-Based Poly?
When you’re working with water-based polyurethane, you’ll want to swap out the animal hair and pick up something a little more… synthetic.
Enter the Wooster angle brush with nylon bristles — your new best ally for a smooth, professional finish.
Why synthetic nylon, you ask? Because water and natural bristles do not go together very well.
Natural brushes tend to soak up water-based finishes like a thirsty camel, leaving you with a gloopy mess.
Nylon bristles, on the other hand, keep their cool (and their shape), picking up just the right amount of product for a clean, even coat.
Plus, the angled design makes it super easy to sneak into those annoying corners and tricky spots that flat brushes simply can’t handle.
And here’s the cherry on top: they’re cheaper. Yup, not only are these brushes easier on your project, they’re easier on your wallet too.
Better yet, their versatility means you’re not buying a one-trick pony — you can whip them out again for painting walls, staining furniture, or tackling random DIY adventures around the house.
Tips for Choosing the Right Brush for Polyurethane Application
Let’s make this practical.
Choosing the best brush for applying polyurethane isn’t about grabbing the most expensive option—it’s about matching the brush to your product, project, and technique.
Here are five key considerations to help you get a smoother, more professional finish.
1. Choose the Right Bristle Type
The type of polyurethane you’re using should directly determine your brush choice.
Oil-based polyurethane works best with a natural bristle brush because natural fibers hold and release thicker finishes more evenly.
Water-based polyurethane, on the other hand, pairs better with synthetic bristles (nylon or polyester), which resist water absorption and maintain stiffness.
Foam brushes may seem convenient, but they’re best avoided on large or highly visible surfaces where finish quality truly matters.
2. Select the Proper Brush Width
Brush size impacts both efficiency and finish quality. A 2 to 2.5-inch brush works well for trim, narrow boards, and smaller pieces.
For larger surfaces like tabletops, doors, or cabinets, a 3 to 4-inch brush allows you to cover more area with fewer strokes.
Fewer strokes mean fewer lap marks and a more uniform film thickness—something polyurethane needs for proper leveling and durability.
3. Pay Attention to Bristle Quality
Not all brushes are created equal. High-quality brushes typically feature flagged (split) tips that help distribute finish smoothly and minimize brush marks.
Look for dense bristle packing, a secure ferrule that doesn’t wiggle, and minimal shedding.
A cheap brush might save a few dollars upfront, but loose bristles stuck in your finish can cost you extra sanding time—and frustration.
4. Match the Brush to Your Project Size
Project scale matters. Foam brushes may be acceptable for small craft items, quick touch-ups, or applying very thin seal coats.
However, for larger furniture pieces, cabinetry, or flooring, investing in a quality bristle brush makes a noticeable difference.
Bigger projects demand consistency, and the right tool ensures even coverage across the entire surface.
5. Focus on Application Technique
Even the best brush for polyurethane application won’t deliver flawless results without proper technique.
Always stir polyurethane gently—never shake it, as that introduces bubbles. Apply thin, even coats, brush with the grain, and avoid over-brushing once the finish begins to set.
Light sanding between coats (220–320 grit) improves adhesion and smoothness.
Polyurethane is designed to self-level, but only if you allow it to settle without excessive manipulation.
Can You Reuse Polyurethane Brushes (Steps for Cleaning and Storing)
Absolutely — and given how much you’ve likely spent on polyurethane and the gear that comes with it, it’s only fair to want some return on your investment.
The good news is that while polyurethane itself, along with rags, sandpaper, mineral spirits, and tack cloths, usually fall into the “one-and-done” club, your paintbrush doesn’t have to.
With a little care (and a bit of elbow grease), you can reuse your polyurethane brush multiple times.
Of course, there are a few ground rules. If the bristles are still in good shape, feel free to press that brush back into action, whether for water-based or oil-based jobs.
The real secret to long brush life lies in meticulous cleaning and proper storage after every single use. So, let’s proceed with how to do that properly…
Cleaning Oil-Based Polyurethane from Your Brush
Cleaning and reusing the brush with oil-based polyurethane is usually made feasible when you use mineral spirits.
But remember, when the polyurethane is dried on the bristles, you will need a bit more elbow grease, and there’s no guarantee you will be able to clean them 100%.
However, it takes only a few minutes if you clean the brush when it’s still moist.
Things you will require for the brush clean-up:
- 3-4 cups
- Dish soap
- Running water
- Nylon scrub brush
- Pair of latex gloves
- Mineral spirits or paint thinner
Here is how you can clean an oil-based polyurethane brush:
Step 1- Pour Mineral Spirits and Dip the Brush
First, add enough mineral spirits (paint thinner or even turpentine) into three to four cups placed on the floor. Pour enough quantity into each cup so that you can easily submerge the dirty brush up to the ferrule.
Start by submerging the poly brush into the first cup to get all the bristles covered with solvent.
Stir the brush in the cup from side to side, bending over from one side to the other so that the mineral spirit can flow between the bristles.
Step 2- Dip the Brush into Other Cups
Move the brush to other cups when the mineral spirits in the first cup darken to brown. Be patient and repeat the brush dipping process with all three cups.
Continue until the color does not alter when the brush is swished in the cleaning solution.
You may need to go through this process four or five times before it’s ready for the next phase. So if necessary, add more mineral spirit cups.
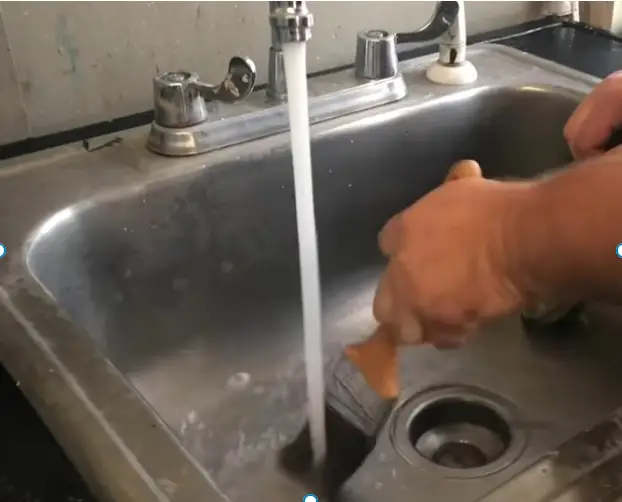
Step 3- Wash and Scrub the Brush under Running Water
When the mineral spirits manage to take all the polyurethane off the brush, you will need to give the bristles a thorough wash under running water.
Apply some dish soap and scrub the bristles gently with your fingers. Run your fingers in between the bristles, then press the bristles against your palm to clean them as best you can.
Bear in mind that the first time you try to lather your brush with dish soap, it probably won’t work too well because there are still traces of mineral spirits in the brush, and you need to get rid of them all.
So, keep rinsing and repeating until you finally see a clear, generous lather from the brush with just the right amount of soap.
Step 4- Scrub Lightly with a Nylon Brush
Next, place the partially cleaned poly brush at the bottom of your sink and rinse it with water to clean off any soap residue.
Then use a nylon brush to scrub it gently; this will help clean between the bristles more effectively than your hand and fingers can with less pressure. If you find that the bristles are still filthy, simply repeat the procedure until the brush is completely oil-free.
This step is especially helpful if the brush is heavily coated with oil-based polyurethane.
Step 5- Drying the Brushes Naturally
After all the cleaning is done, it’s time to dry the brushes – either let them air dry on their own or use a hair dryer set on low heat.
Don’t try to speed up the drying process by using a higher heat setting, as this can damage the bristles. It’s best to let them dry overnight by hanging them in your workshop so that they are completely ready for their next use.
Steps for Cleaning Water-Based Polyurethane Brushes
Synthetic brushes are considerably easier to clean when you have used them for applying water-based poly finish.
The process is pretty much the same as for oil-based polyurethane, only that you will use water instead of mineral spirits.
Things you will need:
- 3-4 cups
- Dish soap
- Running water
- Nylon scrub brush
- Pair of latex gloves
- Fresh, clean water
Here’s how you should clean water-based polyurethane off the brush…
Step 1- Pour Water and Dip the Brush
Start by pouring some water into three to four cups. Dip the brush in the first cup filled with water. Making sure that all bristles are fully submerged, let it sit there for a few minutes.
Step 2- Move to Other Cups and Repeat
After a few minutes have passed, you will see the water getting dirty and changing its color, take the brush out of the first cup and dip it into the second cup.
Let it sit for a few minutes before moving to the third cup. Repeat the process until the water in all three-four cups is dirty.
Step 3- Time to Scrub with Dish Soap
After you have moved the brush through all the cups, scrub it with a nylon scrub brush and some dish soap. Keep on scrubbing the brush until all polyurethane is gone away and only clean bristles are left behind.
Step 4- Rinse the Brush Under Running Water
To rinse your brush turn on the faucet and hold the brush under running water. Let all the soap suds rinse off the brush. If necessary, repeat Step 3 to get your brush squeaky clean.
Step 5- Let the Brush Dry
After you have rinsed the brush, shake off any excess water and let the brush dry by laying it on a towel. Or you can speed up the drying process by hanging it outside in the shade.
Do not expose the brush to direct sunlight or heat, as this can damage the nylon bristles of your synthetic brush.
Storing Polyurethane Brushes After Cleaning – for Reuse
The best way to store your cleaned brush (for future use) is by hanging it upside down by the bristles.
Use a hanger or simply nail a small piece of wood to the wall in your workshop and hang the brush on that. Make sure that the bristles are not touching anything, as this can damage them.
Another way to store a paintbrush is by wrapping it in a clean cloth and then placing it in an airtight container – use an old coffee can or mason jar for this.
Again, ensure that the bristles are not touching the sides or the bottom of the container, as this will tend to damage them.
If you want, you can also keep the cleaned and dried brushes in a cupboard package. Do not store them with other things like paint cans or other tools, as this can damage the bristles if they get rubbed.
Final Thoughts
Polyurethane has one job: protect your work and make it look exceptional. But even the highest-quality finish can fall short if it’s applied with the wrong tool.
The brush you choose isn’t just an accessory—it directly affects leveling, clarity, film thickness, and long-term durability.
Foam brushes are convenient, inexpensive, and easy to toss when you’re done. That simplicity is appealing.
But the trade-offs—air bubbles, inconsistent coverage, foam breakdown, limited control, and repeat purchases—often outweigh the initial savings. What seems like a shortcut at the start can quietly compromise the final result.
If you’re aiming for a smooth, durable, professional-grade finish, selecting the right brush, like a bristle brush, deserves as much attention as selecting the right polyurethane formula. The right combination improves flow, reduces sanding between coats, and enhances the final sheen.
Share the post "7 Drawbacks of Applying Polyurethane with Foam Brush"

We are constantly finding new ways to update our home exteriors. If you are a bit tight on budget, renovating Read more

Cypress wood has been used for thousands of years in shipbuilding, so it is well-known for its water-resistance properties. Due Read more

We all know - Heat is the enemy of wood. When you place a hot item on a wooden surface Read more

If you are looking to upgrade your dining room but are on a budget, then painting your oak table and Read more

Hi, I am Mark Garner a professional carpenter, woodworker, and DIY painter. I live in the small city of Peoria, Arizona as a semi-retired woodworker. I have started this blog with a simple motive to help you with my wood experience in this sector. If you like to know more about what I love doing and how it all got started, you can check more about me here.