Cherry is an excellent timber option used worldwide in a wide variety of applications. Be it furniture, cabinetry, veneer, or flooring, cherry is a beautiful timber to work with.
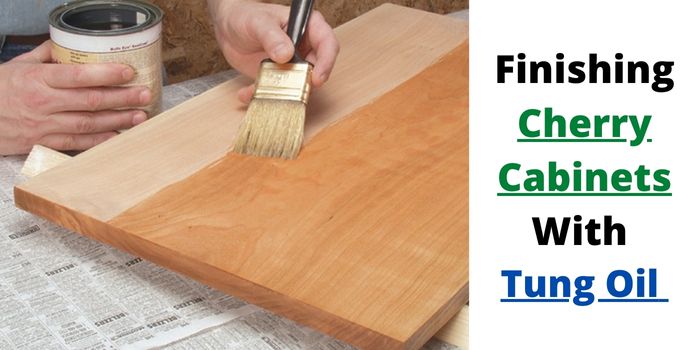
The beauty can further be enhanced, and the wood is protected using an oil finish such as tung oil.
But can you use tung oil on cherry? Is it the only best finish available for cherry? Will tung oil darken or lighten your wood? And how can you use the oil on wood safely?
Here we will be discussing all that in much more detail. So, let’s get into them right away…
Can Tung Oil Be Used On Cherry Wood?
Tung oil is derived from the seeds of the Tung tree and has been used as a wood finish for centuries, dating back to early China and Japan.
Since tung oil is a natural product that has been used for centuries to protect the wood from the elements, its excellent properties make it perfect for use on cherry cabinets and other furniture items made of cherry.
Tung oil is also a kind of food-safe finish, which is a bonus if you are looking to use it in the kitchen.
What does tung oil do to cherry wood?
The oil penetrates can deep into the wood grain, providing long-lasting protection against water, UV rays, and other elements that can damage and rot the wood.
It also brings out the natural beauty of the wood grain and gives it a nice luster along with a most desirable reddish cherry wood hue.
The best thing is that a coat of tung oil won’t interfere with cherry wood’s natural darkening process, which gives it that unique reddish hue, making it one of the best finishes for cherry wood.
However, one thing you need to remember is that the tung oil finish on cherry can take a while to dry, cure, and harden.
But once it does, the protection you get will be just incredible and unmatched.
Mistakes to Avoid When Applying Tung Oil to Cherry Wood
While tung oil does a good job of finishing and protecting cherry wood, there are certain things you need to be cautious of.
If you don’t, there can be complications that can ruin your hard work.
1- Not Cleaning and Preparing the Wood
Sometimes People make the mistake of not cleaning the wood before applying tung oil or any other finish, for that matter. This can be due to negligence or the need to complete the project quickly.
But not cleaning the wood can cause problems like finishing issues, bad odor, and even health hazards.
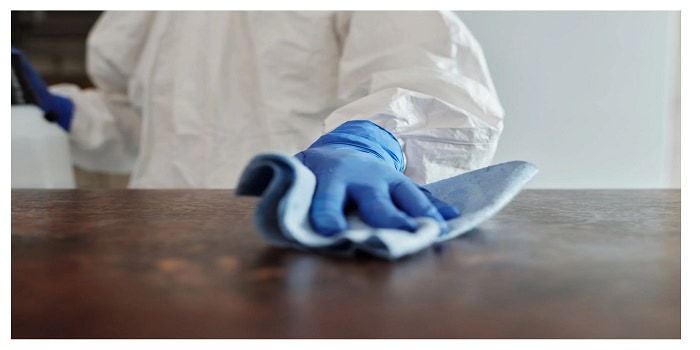
So, the first and most important thing you need to do is ensure that your wood is free of all dirt, dust, and debris and it is clean.
2- Not Using the Pure Tung Oil
There are different products available in the market that claim to be tung oil. But most of them are a mix of tung oil and other synthetic chemicals.
It is important to ensure that you use pure tung oil to finish your cherry woodworking project for the best results.
Otherwise, you may not get the desired coloration. It may even discolor or damage your wood permanently.
I think it’s a good idea to use pure tung oil with a honey-hued finish (with amber tint) for the best finish on the cherry.
If, however, you admire darker and richer coffee colors, you may go with dark, raw tung oil, but that’s not pure tung oil.
3- Using the Oil on Wood Surfaces That are in High Use
Tung oil is great for finishing and protecting cherry wood surfaces that are not in high use. But if you are planning to use it on surfaces like countertops or tabletops, then you need to be extra careful.
The reason is that tung oil can take a long time to dry and cure. And during this time, the oil can be easily damaged or removed by water or other liquids.
Even when it’s dried and cured, tung oil is not good for wear-and-tear resistance. It’s only for a good finish and moisture resistance.
So, if you are planning to use tung oil on surfaces that are in high use, then make sure to apply a coat of polyurethane or lacquer over it for added protection.
4- Applying Only a Single Coat Very Fast
I agree that it can be a tedious process. But you should get the truth.
If you want your cherry woodworking project to last for a long time, make sure to apply at least four coats of tung oil patiently.
If you can go the extra mile, try coating the cherry with 5-6 thin layers of tung oil, and I bet you will not regret it.
A single coat will provide some protection, but it won’t be enough. And your woodworking project won’t look good, either. It’s worth taking the time to apply 2-3 coats for the best results.
5- Not Allowing the Tung Oil to Dry and Cure Properly
Tung oil will require 20 to 30 minutes to get soaked properly. And it can take a while to dry and cure.
People often apply the next coat of tung oil without allowing the previous one to dry and cure properly.
This can cause the tung oil to remain tacky and not cure properly, which can eventually lead to a sticky mess. It is important to allow the tung oil to dry and cure properly between each coat.
For best results, give each layer enough time to dry between coats. This should be at least 24 hours before you add extra coats on top.
6- Not Using Tung Oil in Well-Ventilated Areas
Tung oil has a relatively strong odor than few other wood finishes. The mild smell may also last for a few days after it is applied.
So, if you are prone to allergies, make sure to use tung oil in well-ventilated areas. And if possible, wear a mask to avoid inhaling the fumes.

Is Tru-Oil the Same as Tung Oil?
It is not just another oil finish like Tung, linseed, danish, or teak oils. Instead, it’s a specialized class of oil finishes that are known as “polymerized tung oils.”
Tru oil is typically a product that’s made from a blend of tung oil, linseed oil, varnish, and mineral paint thinners.
The key difference between pure tung oil and Tru-oil is in the finishing they give after the application.
While tung oil gets soaked deeply into the wood to let you experience the natural feel of the wood, Tru oil works more on the surface level to provide a harder, more varnish-like finish.
Basically, if you want to get a high gloss polished appearance, Tru-oil is the way to go.
But if you are more into giving your cherry wood floors, cabinets, or furniture that natural satin look, tung oil from reputed brands like Minwax, Hope, Real Milk Paint, and Waterlox should be your finishing choice.
With Tru-oil, you will, however, need to apply more than 10-12 coats (sometimes over 15) to get an even finish and good shine.
What to Do If the Tung Oil Finish is Not Drying?
I understand mistakes happen. But if your tung oil finish is not drying or has dried unevenly and looked tacky, here’s what you can do:
Tip 1- Check temperature & humidity
First, check the temperature of the room where you are applying the oil. Usually, tung oil dries best in warm conditions with good airflow.
If the temperature is fine, check if the wood is too dry. In such cases, you can wipe off the excess oil with a clean cloth and then let it dry for a period.
Tip 2- Remove or dilute the oil finish
If the temperature and humidity levels are fine, and the wood is also not too dry, then it might be the quality of the oil you have used.
In that case, you may need to remove the layer and start over with a reputed brand.
You can also try diluting the thick sticky tung oil layer on the wood surface with mineral spirits (turpentine or paint thinner) to make the gummy blemishes lighter and help the oil finish dry faster.
Tip 3- Try using a wood restorer solution
Applying a little bit of wood restoration to the tung oil finish can also help and is much easier. You just need to rub the wood restorer solution onto the oil finish using fine steel wool.
While the solution will work to penetrate the wood and enhance the finish quality, steel wool will help in blending and evening out the appearance.
If everything fails, you can use a wood cleaner like Murphy’s Oil Soap to clean off the tacky residue and prep the wood for re-finishing.
Can Epoxy Be Applied Over a Tung Oil Wood Finish?
As I mentioned before, tung oil is not a very good sealer for day-to-day wear and tear. It protects the wood – but it doesn’t work to seal the wood surfaces as well.
Also, the tung oil finish on the wood isn’t waterproof. It only offers good moisture resistance by making the wood water resistant.
And that’s where finishes such as epoxy come into the picture.
A clear coat of epoxy resin will bring out that charm and a fascinating natural look of wood grain like no other sealer can. Plus, it creates a waterproof, durable seal on top of the tung oil coat.
But before you go about applying epoxy resin over your tung oil finish, make sure that the tung oil has cured properly.
If you apply epoxy resin over an uncured tung oil finish, the two finishes may react with each other and create a sticky mess.
So, the bottom line is – you can apply epoxy (or any other drying oil such as Linseed and Danish oil) over a tung oil finish but make sure that the tung oil has cured properly beforehand on your cherry wood furniture or floors.
Do not use non-drying oils such as mineral oil over tung oil.
Also, for those who are new, it’s essential to know that when we are talking about drying and curing the finishes, they are both different, and it takes different times.
Drying is the process where the liquid oil evaporates and leaves only the solid film of oil behind.
On the other hand, it is the process where the oil polymerizes (or cross-links) to form a harder and more durable film. It can take around 2-3 weeks for a tung oil finish to cure properly.
Share the post "Finishing Cherry Cabinets with Tung Oil [Mistakes to Avoid]"

Hi, I am Mark Garner a professional carpenter, woodworker, and DIY painter. I live in the small city of Peoria, Arizona as a semi-retired woodworker. I have started this blog with a simple motive to help you with my wood experience in this sector. If you like to know more about what I love doing and how it all got started, you can check more about me here.


