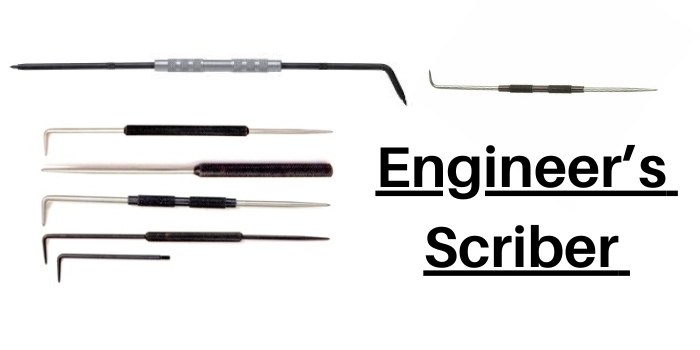
Originally called a scribe, the engineer’s scriber is a tool used to mark guidelines onto workpieces before they are machined.
The name scriber comes from the Latin, Scriba, which refers to a person who would inscribe, engrave, or mark documents and items.
The sharp point of the engineer’s scriber is normally made from a very hard substance, such as a tool or hardened steel, and sometimes even diamonds.
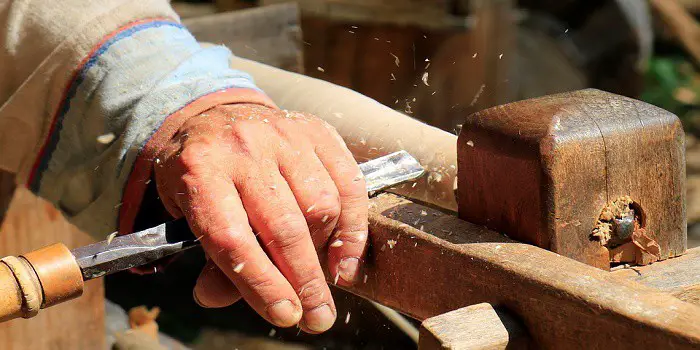
This makes it different compared to a carpenter’s scriber which is only designed to mark lines on softer materials such as wood.
Engineer’s scribers are also quite similar to each other and look mostly like pens while a carpenter’s scriber can take on different forms.
Different Types of Engineer’s Scribers
Although quite similar in shape, there are four basic types of engineer scribers. Each one has a particular task that it can perform.
1- Double-Ender
As the name implies, this is a scriber with a straight tip on one end and a curved or angled tip on the other.
The angled tip allows for marks to be made inside holes or on the underside of ridges.
2- Knife Edge Scriber
This scriber has a straight point on one end and a flat blade edge on the other. This scriber is used for marking materials like plastic, wood, and the like.
They are also called scoring, marking, and layout knives, although most variations will not have a scriber point on one end.
3- Pocket and Machinist Scriber
A pocket scriber is a small scriber that has a replaceable tip, and hexagonal head, and is roughly 4” in length.
Machinist Scriber is generally a longer version of the pocket scriber. They are normally 6” to 8” long and have a clip so they can be carried in a shirt pocket.
What are These Scribers Made From?
The scriber itself is usually made from tool steel so that it will hold up over time.
However, the tip which does the marking may be crafted from four different materials.
Hardened Steel:
This is standard steel that has been hardened using a heat treatment.
Tool Steel:
Tool steel differs from standard steel in that it consists of a group of alloys that make them harder, more scratch-resistant, and quite durable. The hardness is such that it will make a mark on standard steel materials.
It should be noted that there is considerable confusion about whether hardened steel or tool steel is actually harder.
Because of the variations, it’s impossible to say which one is consistently harder, so both are a good choice.
Tungsten Carbide:
This is half tungsten, half carbide compound that is quite hard.
There are several different methods used to create the compound, but a common feature is that either nickel or cobalt is added to increase the durability and toughness of the tip.
The result is that the hardness of the tip is akin to that of a ruby or sapphire.
Diamond Tipped:
The tip itself has a small, industrial diamond to provide extra hardness.
Since diamonds are the hardest known substance, the tip can make its mark on materials that are harder than steel, such as tungsten carbide. Because of their hardness, they can stay sharp for a long time.
However, the downside is that once a diamond-tipped engineer’s scriber goes dull, it cannot be sharpened and instead must be replaced.
How to Use an Engineer’s Scriber Correctly?
To get the job done precisely, in addition to the engineer’s scriber, you will need a number of other materials and tools as well.
This includes the following.
- Small & Soft Bristled Brushes
- Engineer’s Rule & Square
- Template, Clamps, & Engineer’s Dividers
You’ll also need Engineer’s marking ink, sometimes called engineer’s blue to show the contrast between the mark and the material.
The first step is to clean the surface with the soft bristle brush, then use the small brush and apply the engineer’s marking ink.
Let it dry for a few minutes and the material is now ready for marking.
Hold the engineer’s scriber as you would a pen. Angle the scriber at 45 degrees and place it against the edge of the engineer’s square, template, or a simple ruler.
You may also use a template and clamps if you are marking curved lines.
When you are ready, move the engineer’s scribe in the same direction as the angle. You will need to make a thin, smooth line for the best results.
You can use the ruler and square to accurately mark the position of the line.
Once you have finished and are ready to move on to other pieces, you can clean away the marking ink using methylated spirits or a solvent cleaner designed for use with an engineer’s marking ink.
The Benefit of Using Engineer’s Scribers Over Other Similar Tools
The engineer’s scriber is used to mark many types of materials, but it is most commonly used to mark metal as it has advantages over other tools and devices that can also create marks.
The main advantage of the engineer’s scriber is that the mark it makes cannot be smudged, smeared, or rubbed off compared to a pencil, pen, or marker.
This means that the workpiece can be marked in one place and transported to another without worrying about whether the mark will stay in place.
Another advantage is that the scriber makes a thinner line compared to most other marking tools. This makes the line more accurate.
Plus, marking ink can be added to make the line created more visible to the naked eye.
However, the biggest disadvantage is that once the engineer’s scriber is used, the line it creates can be difficult to remove.
Because the line is scratched into the material, it will require grinding or polishing to remove. This means that before the line is created, accuracy is a must in terms of getting precise measurements.
How to Sharpen Your Engineer’s Scriber – Tips for Care and Maintenance
To sharpen your engineer’s scriber, you will need to purchase a couple of items to do the job right. The first is an aluminum oxide oilstone or whetstone.
Such whetstones have two sides. A coarse grit side for the first part of the sharpening, then a fine grit side to create the sharp point.
Next is cutting fluid. This is used if you purchase an oilstone. If you purchase a whetstone, then you will simply need some water.
Now you are ready to sharpen your engineer’s scriber.
1- Wet the Stone
You will either need to add the cutting fluid to the oilstone or water to the whetstone.
A whetstone will require about 10 minutes of soaking before it becomes saturated enough for use.
2- Position the Scriber
You will need to hold the scriber at a 30 to a 60-degree angle with the point on the stone.
Closer to 30 degrees is preferable as it will make the tip even sharper. Start with the coarse grit side.
3- Move Back and Forth
You will need to rub the tip of the scriber across the surface of the stone.
As you move it, twist the scriber as you hold it between your forefinger and thumb. To prevent creating a groove in the stone, move the scriber to a new part of the surface.
One tip is to keep the scriber tip parallel to the length of the stone and not the width. This may seem counterintuitive at first, but that is the way the stone is created.
If you do, the sharpening lines found on the tip will run in the wrong direction. The result will be that the scriber becomes more likely to break.
Once you have run the scriber several times on the coarse side, repeat on the fine side of the whetstone. This will provide a sharp tip for your engineer’s scriber.
Scriber Maintenance
When it comes to caring for & maintaining your scriber, the first tip is to keep the engineer’s scriber away from your other tools.
Store it separately and protect the tip so that it does not impact any other surface. You can do this by providing a solid case for your scriber. This will help keep the tip from encountering other hard surfaces.
Replacement Tips: The replacement tips usually come in a plastic tube. Keep them in the tube until they are needed.
Removable Tip: If you have an engineer’s scriber with a removable tip that uses a locking screw chuck, you can reverse the tip and recess it into the handle itself.
This makes the scriber easier to store as you do not need a case.
Plastic Cap: If the tip is not removable, you can always use a plastic cap over the tip to help keep it sharp.
Oil the Body: Keep the scriber in a cool, dry place. Every so often, wipe the body of the scriber and add some oil. This will prevent any oxidation from forming.
With the right maintenance, the body of the scribe may last for a very long time with the proper maintenance. The tip of an engineer’s scriber may last for some time, although the ones made from hardened tool steel will wear out the fastest.
Final Thoughts
Today, pencils, pens, and other marking tools are available, but the engineer’s scriber is still a popular choice for many today.
The engineer’s scriber is one of the simplest tools, designed to create a scratch or mark into the material before it is cut.
The scriber is made from materials strong enough to hold up over time and continue to make marks or scribes into wood, plastic, metal, and more.
Share the post "What is an Engineer’s Scriber – Different Types with Uses"

One of the best ways to clean your yard of twigs, leaves, and tree branches after a storm is to Read more
Whether you have been working with wood all your life or just getting started, having the proper tools is a Read more
It’s possible to only use hand or manual tools when woodworking, but then it becomes a slower process. For certain Read more

If you have never used this, steel wool is a collection of very thin steel wires bundled together in the Read more

Hi, I am Mark Garner a professional carpenter, woodworker, and DIY painter. I live in the small city of Peoria, Arizona as a semi-retired woodworker. I have started this blog with a simple motive to help you with my wood experience in this sector. If you like to know more about what I love doing and how it all got started, you can check more about me here.