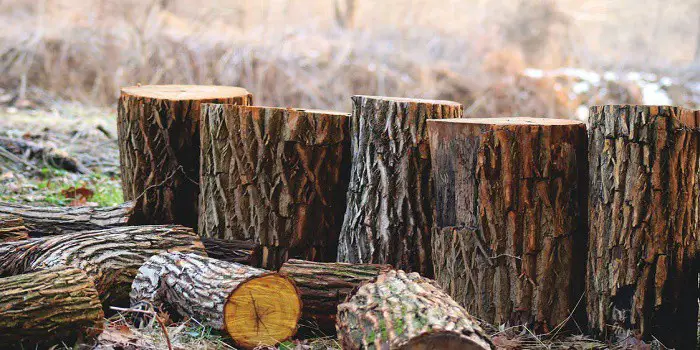
Green wood (or green timber) is freshly cut wood that has been cut from the forest and is used straight away for construction without allowing it to dry or season.
This type of wood is still wet or saturated with a moisture content of more than 19%.
While this is beneficial for certain projects, it’s also the biggest downside for green wood.
Firstly, it is always prone to splitting, warping, and getting cracks as it dries and shrinks. Secondly, it can be challenging to paint or stain because if you paint it, it can cause discoloration and gaps after drying.
If you want to transform green wood into a heirloom rather than a collection of very expensive kindling, you have to learn how to negotiate with the drying process.
So, here is how to keep your timber in one piece while it learns to live without its roots.
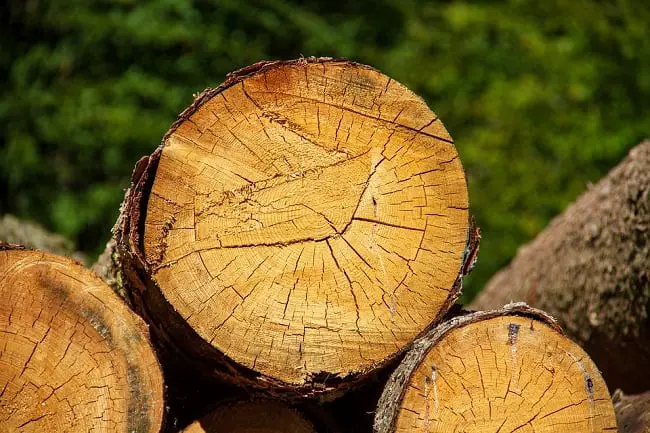
Why Does Green Timber Split and Crack?
Before we fix it, we must understand the physics, particularly the “why” behind the crack.
Greenwood, enriched in moisture content (MC), always tries to balance the MC with changes in external temperature, humidity, and other environmental conditions.
This is done by moving the moisture from the inner core towards the outer layer and opening sides – as they get dried in the air due to evaporation faster.
Since wood dries three times faster from the end grain than from the sides, it creates a massive tension imbalance: the ends shrink while the middle stays swollen, leading to those dreaded radial cracks.
The regular drying of wood and the process of maintaining the equilibrium negatively also affect the entire greenwood, which results in cracks, gaps, and splits on the wood surface.
While it’s the irreversible nature of wood to develop cracks with time, if you can seal the surface to maintain and balance the moisture of the wood, you can keep your greenwood protected from getting cracks.
3 Ways to Keep Green Wood from Splitting
If you have some freshly cut green wood you are planning to use in a couple of days, taking good care of it and storing it well is important.
If not, the pieces can get cracked and becomes hard to use or even completely unusable.
What follows are the different methods by which you can keep your green wood safe without the risk of splitting or cracking.
TIP 1. Use Sealant
Sealing the open ends of fresh logs with proper sealer is a good way to prevent the wood from cracking.
For this very purpose, you can use a product like ANCHORSEAL which is one of the best commercial sealants for greenwood in the market.
A good sealant material for green-wood is made of plant-based polymers and is pretty safe to use, irrespective of what type/variety of wood you have.
This will make it difficult for external elements like heat, rain, and UV rays to get in direct contact with wood which will ultimately decrease the chances of shrinkage.
To apply the sealant, follow these steps:
- With a cloth, clean the dust particles and debris from the wood surface
- Then, with a brush or a sprayer, apply the sealant evenly on all the parts of wood
- For wood logs thicker than 24 inches and/or 60 cm in diameter, consider applying at least 2 coats of sealant
Alternatively, you can pour ANCHORSEAL sealant into a big-sized tub or container.
Then dip the logs into it, remove them, and allow them to dry.
This way, you can store your wood for over a few weeks without worrying about cracking.
Note: Before trying the above steps, read the instructions provided on the treatment sealant.
Also, check whether the wood you are trying to seal is suitable for that specific sealant.

TIP 2. Use Paintable Wax
Applying a DIY wax is another cheap and effective way to protect your green-wood from drying, cracking, or splitting.
To prepare and use wax, follow these easy steps…
- Place around 1 pound (16 oz) of wax candles in a plastic bag
- With the help of a hammer, break the candles into very small pieces
- In a preheated saucepan, place all these candle pieces
- Keep on heating the pan until all the candles melt completely
- Now, in a canning jar, pour around 4 oz of paint thinner; make sure you keep the jar away from fire
- Add melted wax into the thinner and shake the jar gently to make a blended wax mixture
This homemade wax sealer for green wood can now be coated on the open ends of the wood using a brush.
If needed, consider applying multiple thinner layers of wax sealant instead of one single thick layer.
TIP 3. Apply Boiled Linseed Oil
Applying linseed oil to green-wood slabs and logs is also an easy way to guard your wood against cracks and splits.
Here are the steps you need to follow…
- With sandpaper, sand the open end of the wood surface lightly in the direction of the wood fibers
- Clean the sanded dust using a piece of dry cloth
- With a brush, apply boiled linseed oil on the sanded surface and place it in an open area and allow it to dry
- Remember not to place the wood in direct sunlight as it can be harsh on the oiled wood and cause damage.
Once dried, you can safely store them for future projects like woodturning.
If you are storing the green lumber (freshly cut boards or pallets) for a few months, consider applying fungus treatment on the open sides of the wood.
This will protect the surface from getting any molds or mildews.
Can You Dry Fresh Cedar Wood Without Cracking?
Yes, you can absolutely dry fresh cedar without it splitting into a mess of “checks” and cracks, but it requires patience and a bit of strategy.
Cedar is naturally more stable than many hardwoods, but still, the wood cracks because the exterior dries and shrinks faster than the internal moisture can escape.
To keep your antique cedar pristine, follow these essential steps:
- Seal the Ends: This is the most critical step. Moisture escapes from the end grain ten times faster than through the faces. Apply a dedicated end-grain sealer or even a thick coat of latex paint to the ends of the boards immediately after cutting.
- Control the Environment: Avoid direct sunlight or high-wind areas, which “flash dry” the wood. A cool, shaded area with consistent airflow (like a shed or garage) is ideal.
- Stick and Stack: Stack your boards off the ground. Place thin strips of wood (stickers) every 12–18 inches between layers to ensure air circulates around all four sides of every board.
- Add Weight: Place heavy scrap wood or cinder blocks on top of the stack to prevent warping or “cupping” as the fibers tighten.
Drying Timeframes: The general rule of thumb for air-drying cedar is one year per inch of thickness. However, cedar is relatively porous, so in ideal conditions, a standard 1-inch board (4/4 lumber) might be ready in 6 to 9 months.
If you are using the wood for outdoor projects like a fence or raised bed, you can often get away with a moisture content of 15–20%, which may take only a few months.
For indoor furniture, you really want it down to 6–8%, which usually requires a kiln or a very long stint in a climate-controlled room.
Tip: If you are working on smaller cedar projects—like spoons, bowls, or small craft blanks—you can also use a microwave to speed up the process significantly.
This method bypasses the months of waiting by using bursts of heat to drive moisture out from the center of the wood.
Few Other Tips to Prevent Green Wood from Cracking
Although working with green wood is refreshing and can make you feel more alive, it can be very disheartening if you find that the piece of wood you need to work on is already cracked.
Thankfully, there are a few techniques and strategies which can stop your wood from cracking.
a). Use the wood as soon as possible
Greenwood is very soft and flexible. So, keeping it for a long time and delaying your project is not a good idea.
With that in mind, if you are planning for a carving or woodturning project (or any other construction work for that matter), it’s good to start as soon as possible.
Using your green wood right away will not only prevent it from splitting but also will make your work easier.
Unlike dried wood, you can easily cut, shape, or carve wood that is still soft and rich in moisture.
b). Try to keep the green lumber wet
Inner areas of the wood will remain wet for a long due to the ingrained water content.
But due to outer evaporation area will dry quickly to cause shrinkage and cracks.
If you need to work on a greenwood project anytime soon, it’s important that you keep the wood wet and soft from the outside by controlling its moisture.
- With some water in a sprayer bottle, spray the surface of the wood piece you are carving or working on
- Then cover it with a plastic bag or sheet to keep the wood dampened
- Your logs or wood pieces in this condition will automatically balance the moisture content by moving the inside moisture of the wood toward the outside layer as it dries.
Especially if you are taking a break for 2-3 days, it’s essential to use this method to keep the wood moisturized.
However, remember that you should not leave the wood covered with plastic for too long as it can grow mold.
c). Pick your green-wood wisely after research
IMO, it’s best to harvest your wood locally – when you want to saw them into usable boards or something like firewood.
That way, you will most likely know how the wood will respond to the change in climate and other external conditions.
But, if you are buying unfinished natural wood slices or slabs for your project, it’s essential to look for the one that serves your specific purposes well.
In your local lumber mill, check for high-grade, green solid wood species that do not get twisted or cracked very easily.
Although these pieces may cost you more but are worth your investment.
Things You Should Avoid When Sealing the Green Wood
While specialized end-grain sealers are the gold standard, many common household products are actually detrimental to green wood because they either trap too much moisture or don’t block it enough.
Here are the specific products and sealers you should avoid:
1. Water-Based (Latex) Paints
This is the most common mistake. People often grab a leftover can of house paint to seal log ends.
Latex paint is designed to be “breathable” (microporous) to allow moisture to escape from your home’s walls. When applied to green wood, it allows water vapor to exit the end grain far too quickly, leading to the very cracks you’re trying to prevent.
You can only use it if you apply 4–5 heavy coats, but even then, it’s significantly less effective than wax.
2. Non-Drying Oils (Mineral Oil / Vegetable Oil)
Some woodworkers try to “soak” the wood in oil to keep it from cracking.
Mineral oil never cures (hardens). It simply stays “wet” inside the wood fibers, which can encourage mold growth and deep rot. It also makes the wood nearly impossible to finish or glue later because the oil will bleed out of the pores for years.
3. Plastic Wrap or “Shrink Wrap”
While wrapping a turned bowl in plastic for a night is fine, wrapping an entire green log is a recipe for disaster because total encasement in plastic creates a terrarium effect.
Without any airflow, the moisture trapped against the surface will cause “black mold” and fungal decay within days. It can also cause the wood to “sour” or ferment, leading to a foul smell and permanent staining.
4. Rubber Sealant or Liquid Rubber
While products like liquid rubber (e.g., Flex Seal) or rubberized undercoating create an incredibly tight moisture barrier, they usually fail when applied to green wood for a few specific reasons.
- Adhesion Failure: Most rubber sealants are designed to bond to dry, stable surfaces. Because the wood is “pushing” moisture out as it dries, the water vapor gets trapped under the rubber film, causing it to bubble, peel, or slide off within days.
- The “Glove” Effect: Rubber creates a non-breathable membrane. While you want to slow down drying, stopping it completely on the ends while the rest of the log is porous can create a massive internal pressure differential. This often leads to honeycombing (internal cracks you can’t see until you cut the wood open).
- The “Gunk” Factor: If you plan on eventually turning that wood on a lathe or running it through a planer/jointer, rubber sealant is a nightmare. It melts under the heat of a blade, gums up your sandpaper, and can stain the wood fibers deep into the grain, ruining your final finish.
Rubber sealants are also significantly more expensive per square foot than dedicated wax emulsions like Anchorseal. So, it’s better to avoid when your goal is to keep green wood from cracking.
Can I Apply Epoxy or Varnish to the Wood with Bark Still On?
It is OK to seal the end grain using epoxy or other clear varnishes like polyurethane.
But for sealing other parts and the bark of green lumber, you must be cautious. Because if the bark is not sturdy, the coating will be prone to chipping or falling off.
The best way to prevent that is by covering the entire slab (including the open sides and bark) with an epoxy coat. This will seal the wood better and prevent the bark from falling off easily.
Alternatively, you can use epoxy on the open sides and an oil finish on the rest of the item, including bark.
Many carvers and woodturners prefer to do this because they need to seal the end surfaces of the freshly cut wood more strongly than other parts.
If you prefer to paint or stain over greenwood, apply a coat of stain-blocking oil-based primer to the fresh bare wood before painting.
This will prevent the wood from getting discolored or spoiled when the tree oils seep out of the wood – which is a natural process for wood as it dries with time.
Other Related Questions
What is green wood used for?
Green lumber is used as such for timber frame construction, mainly in arid regions of the US like Arizona, Idaho, Montana, Wyoming, Colorado, Utah, California, etc., because the wood in these regions will tend to dry more quickly.
And by using fresh green wood rather than already dried lumber, the time it takes for drying can be extended.
Plus, the other key advantage of building with soft green wood is that it’s easier to split and cut than dry, brittle timber.
How to prevent green wood from shrinking in the sun?
The sun is the absolute enemy of green wood.
When you leave a fresh log in direct sunlight, you’re essentially putting it in a high-speed dehydrator, which creates massive internal stress, causing the exterior to shrink and snap long before the core even realizes it’s no longer a tree.
To prevent this, you need to treat your wood like a delicate houseplant: keep it in a cool, shaded spot with consistent humidity.
If you must store it outdoors, keep it off the ground to prevent rot, but cover it with a breathable tarp or a heavy layer of wood shavings.
The goal isn’t to stop the drying entirely, but to force the moisture to exit at a “leisurely stroll” rather than a “sprint.”
Can I use green lumber for burning firewood?
No, I would not recommend that because there can be a problem burning the unseasoned green wood in chimneys.
If you use wet wood as firewood, the released water vapor gets combined with other gases and can go up the chimney.
This will condense over your chimney top and, with time, build a creosote substance like hard tar, which is very difficult to clean.
Final thoughts
Green lumber is easy and, at the same time, exhilarating if you know how to keep them from splitting.
It will help your job get done fast and save you from the hassle of repairing and fixing the cracked wood slabs later.
Hopefully, you will find the above strategies useful the next time you want to store your green wood in your home or workplace.
Share the post "How to Keep Green-Wood from Splitting and Cracking?"
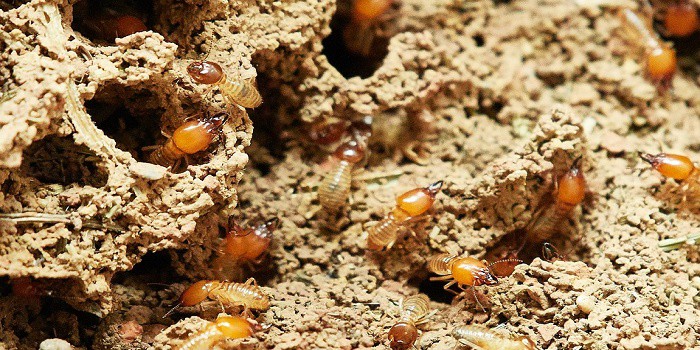
Termites are recognized as one of the most troublesome pests all over the world. They are small and numerous and Read more

Our bedroom is a special place where we find relaxation and refresh after a hard day of toil - the Read more

Let’s be honest: buying a sofa is a bit like dating. In the beginning, it’s all about the looks. You Read more

Wooden furniture, trims, doors, and windows are so long-lasting that you can easily repair and reuse them even after they Read more

Hi, I am Mark Garner a professional carpenter, woodworker, and DIY painter. I live in the small city of Peoria, Arizona as a semi-retired woodworker. I have started this blog with a simple motive to help you with my wood experience in this sector. If you like to know more about what I love doing and how it all got started, you can check more about me here.