Homemade epoxy tables are becoming one of the more popular DIY home projects.
They are made from epoxy resin that sits between wooden planks. The planks will normally retain their natural edges.
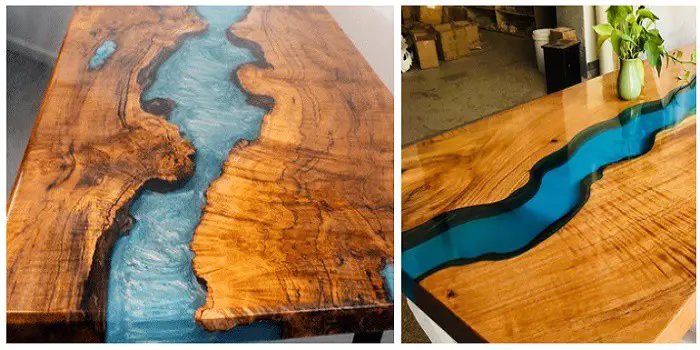
The tables themselves can be quite beautiful because the resin epoxy will make the surface look like a flowing stream or river.
The popularity of the epoxy river tables comes not only from their remarkable appearance but also because they look quite modern and will last a long time under normal use conditions.
If you are looking for an inexpensive centerpiece for your dining room, den, or other room, then an epoxy river table is a good place to start.
The contrast of the wood and epoxy is what helps make this type of table so appealing.
Plus, it has a neutral style that fits in with most home décor. That means whether you prefer an old, traditional look or modern appearance, an epoxy river table will probably work for your needs.
This is because you can change the color and appearance to your liking. It also helps that creating the table is inexpensive.
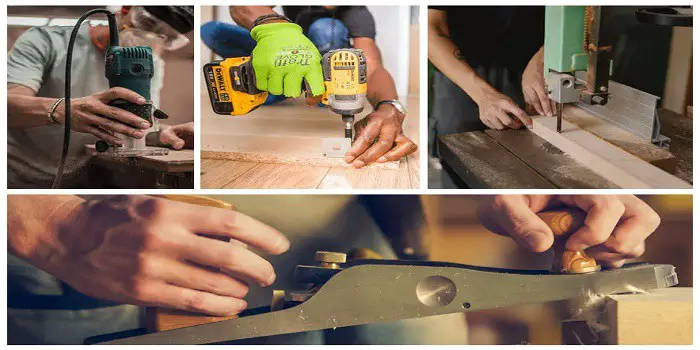
Essential Tools for Epoxy River Table Project
You will need a good sander, chisel, saw, and paint bucket with a stick.
You can add more tools if you are making a larger table or want to add features beyond the basics.
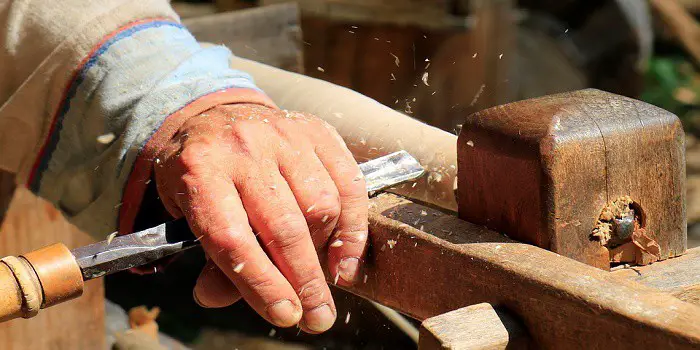
1- Chisel
This is the best tool to take away the bark from the edge of the wood. This assumes you are working with live edge slabs.
Otherwise, the shave tools are arguably better since it is smoother, faster, and is not prone to making as many mistakes when in use.
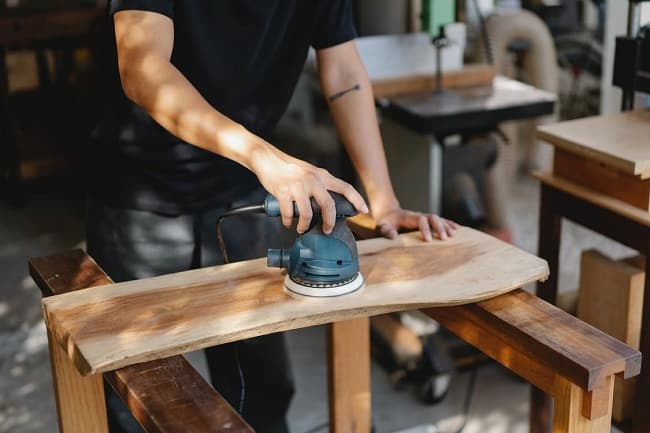
2- Sander
You should select a powered sander to get the best results – you dont need an expensive model, just one that does the job.
With it, you can sand down all the edges to create the look you want.
But just as importantly, if you are de-barking the slab, you will need to have a good sander to remove all the bark and get to the wood itself.
3- Saw
You could do things the old-fashioned way with a hand saw, but most people prefer a table or circular saw.
Circular saws are more portable and less expensive compared to a table saw, but a table saw will provide a more accurate cut depending on the length of your table.
4- Screwdriver
You can use the screwdriver during large pours and assist in making the mold as tight as possible.
In addition, clamps are recommended as the best way to hold screw boards together. They can also hold down the wood when you pour so that the bottom will not be covered.
You will also need mixing supplies for the epoxy. A paint bucket will work along with a stick or electric mixer.
But if you are only applying a small amount, then any type of disposable plastic or paper cup will do.
5- Epoxy Resin
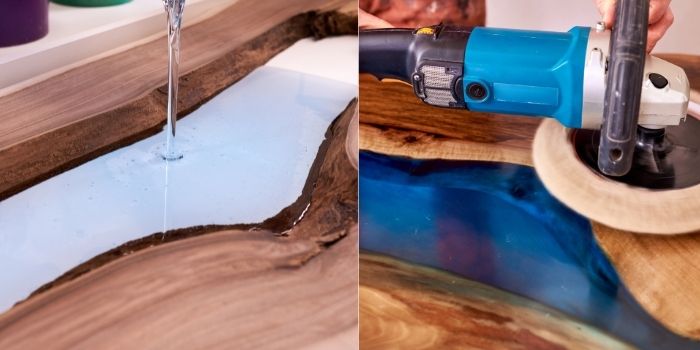
Now you are ready for the casting of the epoxy.
A few high-performance, crystal-clear epoxy coatings you can choose for river tables include:
- TotalBoat Epoxy Resin
- ECR EPOXY Resin Crystal Clear
- ProMarine Supplies Tabletop Epoxy
The resin will need to flow smoothly into the mold, so its viscosity level will need to be lower.
Casting resin is smooth enough to fill in all the areas evenly for better results.
However, since resins are clear, you will need to add a color pigment to get the river-like appearance for the table.
Once you have poured the resin into the mold, the rest pretty much takes care of itself.
You must allow the resin and epoxy enough time to set properly.
And then once removed, it can be sculpted by sanding away any rough areas that you do not want for your table.
And that is pretty much it.
But if you want, you can use additional tools to help make some of the processes go by faster.
This includes using specific items if the pours you are going to make are relatively small.
Plus, you can also have other tools to help craft the rest of the table properly as well.
This includes using different color combinations for the resin to create an even more exotic look.
What type of epoxy to use for deep pouring?
A thick pour will improve the quality and longevity of your colored river table, making sure the epoxy maintains its shine for a long.
So, for deep and thicker pours, there are a few specific varieties of resins available, which include:
- EcoPoxy FlowCast
- Upstart Epoxy Deep Pour
- Total Boat Thickset Deep Pour
Besides these, many other brands sell epoxy resin tool kits, but the above ones are the most reliable products that are readily available.
What kind of wood is best to use for making a river table?
Yew, Elm, Oak, or Black Walnut are among the best timber materials you can use for an epoxy resin table project.
Make sure these are flat pieces of live-edge wood and are properly air-dried (with a moisture level below 20%).
This will help you create a more stable and reliable project piece with a more natural finish – without any risk of wood movement, gaps, or cracks.
How Much Does it Cost to Make an Epoxy River Table?
This really varies depending on the size of the table, the materials you use, and how much time you’re willing to put into it.
For a small coffee or end table, you could expect to spend around $50-$225.
If you’re looking at making a desk, the cost would be roughly $200-$550. For a dining table, the cost would be around $500-$750.
Making your own homemade epoxy river table is definitely a cheaper option than buying one from a store, which can quickly run you $1000 or more.
Plus, it’s a fun project you can do with friends or family!
Keep In Mind When Making An Epoxy Resin River Table
If you are interested in creating an epoxy table, you will need the right ingredients and steps to make it happen – in addition to the right tools.
This all starts with having enough workspace available to create your desired table.
Make sure it is well-ventilated, and if you can do the work outside, such as in your driveway, all the better.
However, you will want to avoid windy conditions along with any rain or precipitation that might spoil your project.
Choose a warm day with calm winds or work on the side of the house where the wind is blocked.
Just inside the garage with the door open is also ideal for most situations.
If you have a pickup truck, park it just in front to block any direct wind and to hold some of your tools.
You’ll want to keep everything nearby so it can be used when needed.
You will need some type of flat surface for your work, so a foldout table or old cabinet with a smooth top will work nicely.
Remember, all you need is a good, flat surface, so do not spend too much money.
In addition, you will need a piece of plywood that has tape to place the work, so the epoxy does not stick to your table or cabinet.
Final Thoughts
It does take a little patience and willingness to learn to create this type of table.
You may not get it right the first time, but with a bit of practice and effort, you can improve your technique and create the type of mold that gets the results.
Just keep in mind that you cannot fully control the outcome, but you can influence the color and basic shape.
However, all you need are the basic tools to create a beautiful epoxy river table.
It will not only be the talk of your family, friends, and guests, but it also does not cost that much to create.
Share the post "What Tools Do You Need to Make an Epoxy River Table?"

One of the best ways to clean your yard of twigs, leaves, and tree branches after a storm is to Read more
Whether you have been working with wood all your life or just getting started, having the proper tools is a Read more
It’s possible to only use hand or manual tools when woodworking, but then it becomes a slower process. For certain Read more
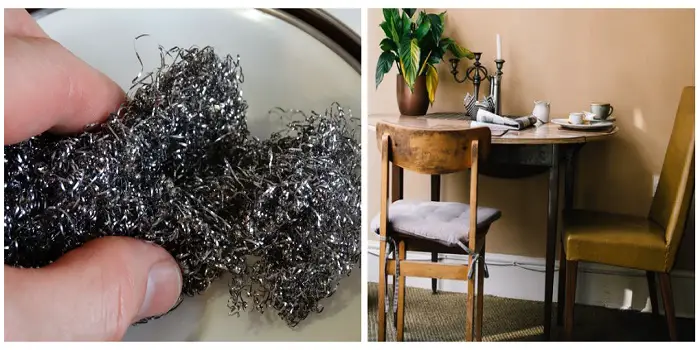
If you have never used this, steel wool is a collection of very thin steel wires bundled together in the Read more

Hi, I am Mark Garner a professional carpenter, woodworker, and DIY painter. I live in the small city of Peoria, Arizona as a semi-retired woodworker. I have started this blog with a simple motive to help you with my wood experience in this sector. If you like to know more about what I love doing and how it all got started, you can check more about me here.