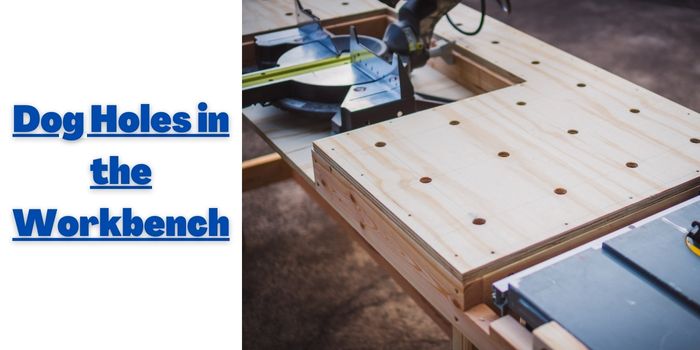
When looking at a typical workbench, you may see random holes drilled into the material. The holes are not randomly placed. Instead, they are known as dog holes.
The holes help woodworkers secure the pieces they are working on. In addition, they can be used like a vise when considerable pressure is needed.
Dog holes work and are simple to create and quite accessible without having to make purchases that add to your workbench.
But just exactly how do dog holes work, what are they used for, and should you put a few dog holes in your workbench?
What are Dog Holes?
If your workbench does not have room to place a standard vise, then a dog hole may work instead. A dog hole may be a square or round hole drilled into the workbench.
Dog holes are spaced two to three inches apart, with the holes themselves being about ¾” in diameter. Of course, this may vary depending on the size and structure of your workbench.
The dog holes are used to secure the bench dogs. Bench dogs are made from cherry, walnut, or mahogany and are used to secure the project in place.
The bench dogs are generally made from a medium to hardwoods to be strong enough to hold the work but pliable enough so as to not do any damage.
However, bench dogs may also be made of plastic or metal. Such materials may also have metal or wood springs to make them vertically adjustable.
How to Use Dog Holes in Workbench?
You place the bench dog into the dog hole. Now, place what you are working on against the bench. Holdfasts can be put into place for greater security.
Make any adjustments to the work as necessary before pressing the bench dog down to the level of the workbench, or remove it entirely if that is what you want to do.
The dog holes can be used for the holdfasts, which keep your work in one place, just like a standard vise.
Bench dogs and holdfasts often are used together to secure the work so it can be completed.
How to Add Dog Holes in the Workbench?
If you have decided that dog holes are the solution you want, adding them is a straightforward process.
It does take a little planning, but it can be done if you do the layout properly. If you can drill straight holes, then you can create dog holes.
The first step is to envision what type of work will be performed on the bench. This will let you know where to put the dog holes.
You can place them near the edge if you desire, but also in other areas as well. Having dog holes accessible on two sides of the bench is desirable as well.
1- Diagram: Draw out a diagram on a scrap piece of paper, then duplicate it on the workbench. It’s possible that you may have room for up to 20 holes or maybe only a few.
Whatever the case, work out the diagram on something separate, then transfer it to the workbench when you are ready.
2- Perpendicular: Dog holes must be perpendicular to the workbench top as much as possible. You should use a jig to guide the drilling so that you can maintain the greatest accuracy.
But remember that perfection may be hard to achieve. In fact, even if you do not get the dog holes placed at the perfect angle, as long as you are consistent, that will work.
3- Angled: If the dog holes are angled up to two or three degrees, that will work. In fact, you may want to do that depending on how you use the dog holes.
The top hole facing should be larger compared to the bottom part so you can wedge the bench dogs correctly.
4- Spacing: Proper spacing is important, so be sure to measure from the center to the center of the dog holes.
By spacing them three inches apart as per the center of each dog hole, you can place standard-size projects between the holes. Holdfasts can be used for larger projects.
5- Chamfer: One nifty trick is to chamfer the edges. Rounding the edge will allow the hole to function properly.
Plus, it will help to keep the holes from splintering or degrading over time. A little chamfer can go a long way toward keeping the dog holes intact.
Dog Hole Jig
Dog hole jigs can be simple or more complicated. This will depend on several factors.
There are those who want the jigs to be precise, while others are content with keeping things simple.
Many who create dog holes will simply use planks for alignment. But you can go further and utilize the jig.
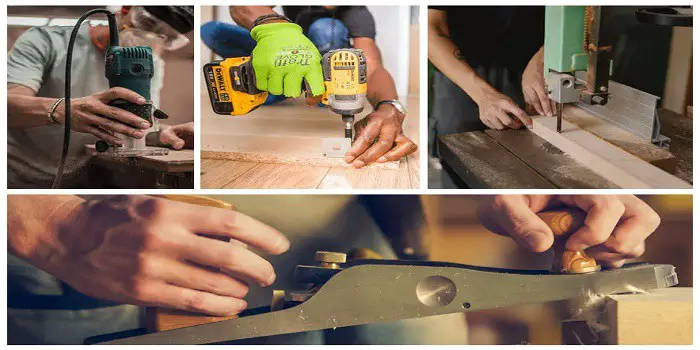
The jig you create will depend on the type of tool used to make the cuts. There are tools available to create dog holes for your workbench.
a) Drill Bit: The most obvious tool for drilling holes, the standard drill bit and drill, whether corded or battery-powered, provides you with a simple solution.
However, the downside is that handheld drills are not always that accurate. And the less accuracy means it will affect how perpendicular the dog holes you create will be.
b) Forstner Bits: Perhaps the most accurate of all bits, this is similar to the auger in that it has a center screw for alignment. But the overall bit offers more accuracy than all other common types of drill bits.
c) Auger Bit: This is a popular tool as well, thanks to the center screw that makes alignment easier and more accurate.
Add to this the extended length of the bit, and you have an auger bit that can easily go through most workbenches.
d) Planning Vise: This type of vise is perfect for guiding the placement of dog holes. Start by marking a few dog holes near the edge of your workbench.
In most cases, you should start by placing a dog hole two inches from the front edge of the bench. Then two inches to the right and the other two inches to the left of the original dog hole you made.
If you are right-handed, you will plane with a leftward motion, and vice versa for those who are left-handed.
Creating More Dog Holes
Once you have your initial dog holes completed, you’ll have to decide if adding any more is needed. You can use the top hole to create a row of dog holes across your bench. And then, you may add a few dog holes to the bottom of the bench.
If you have created a dog hole diagram, you can follow it to ensure accuracy in placing your dog holes.
Most people will settle with four or five dog holes, but you can add as many as the workbench will allow.
For those who need a vise but do not want to pay for one, dog holes are fast, easy to create, and will work for projects that require a vise.
Do Your Workbench Need Dog Holes in the First Place?
That’s a good question because there are some workbenches that have no use for dog holes. This will mostly come down to the type of work that you are doing.
After all, if you never need to secure your work, then you have no need for dog holes or a vise.
A vise is generally preferable since it is easy to use and can be removed and stored when necessary. But if you do not want to pay for a vise, dog holes may be the more cost-effective solution.
You will need to purchase bench dogs and drill the dog holes, but that may be well worth it.
However, it is quite understandable that many are not comfortable with drilling holes into a perfectly good workbench.
Such concerns are genuine, so you should account for all options before adding dog holes to your workbench.
- If you have limited space, that prevents getting a vise
- If you are on a tight budget
- If you want a vise that will not damage the wood
- And if you need to make precision cuts to your work
Then it is advisable to add dog holes to your workbench. Any of these factors are good enough to make the alterations needed.
However, if the workbench is not one you own, if you do not want to cut holes in your workbench, or if you do not use a vise all that often, then you should not add dog holes to the workbench.
So, it should be simple to decide whether dog holes are right for your needs.
What can be said about dog holes is that you can add as many as you need. Once in place, you can use them to place holdfasts and bench dogs where needed.
Plus, if you find that you do not need some or all of the dog holes, they are easy to fill back up using plugs or replacing that part of your workbench.
Share the post "What are Dog Holes in Workbench: What are They Used For?"

One of the best ways to clean your yard of twigs, leaves, and tree branches after a storm is to Read more
Whether you have been working with wood all your life or just getting started, having the proper tools is a Read more
It’s possible to only use hand or manual tools when woodworking, but then it becomes a slower process. For certain Read more
If you have never used this, steel wool is a collection of very thin steel wires bundled together in the Read more

Hi, I am Mark Garner a professional carpenter, woodworker, and DIY painter. I live in the small city of Peoria, Arizona as a semi-retired woodworker. I have started this blog with a simple motive to help you with my wood experience in this sector. If you like to know more about what I love doing and how it all got started, you can check more about me here.