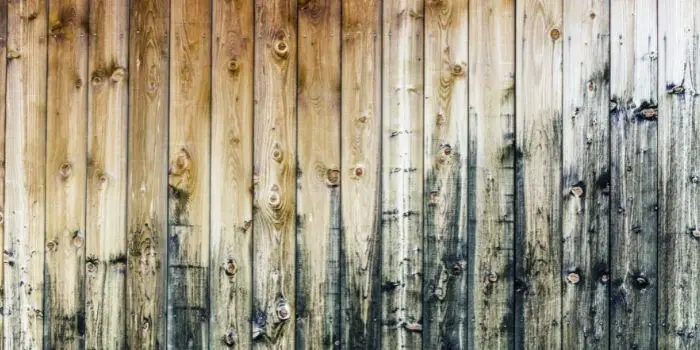
Soot buildup on wood surfaces is generally caused by incomplete combustion of fuel or the presence of air pollutants in your home. The incomplete combustion of fuels like wood, coal, oil, and gas can produce soot particles that settle onto nearby surfaces.
Air pollutants such as smoke from cooking, burning candles and incense, cigarettes, and aerosols can also leave soot deposits on wood surfaces.
Additionally, the presence of dust particles in your home’s air circulation system can lead to a buildup of soot.
If you live in an area with high levels of pollution and other airborne contaminants, it may be more difficult to keep soot from accumulating on your wood surfaces, such as furniture and flooring.
Steps to Remove Soot from Wood Surface
Damage caused to wood by soot requires that you clean it away as soon as possible.
But before you get started, you will want to stop the source of the soot if it is still present. Also, using the right products to lift the soot from the wood, remove any items that sat on or nearby the wood – so they do not get damaged.
However, keep in mind that even with the best soot removers, it’s going to take a little elbow grease on your part to get it done.
The first step is to identify whether the soot is powdery or oily in nature. This will help you choose the right product for its removal.
In general, the cleaning products you purchase should have a description of the type of soot that they can remove.
Step 1 – Vacuuming
You will want to vacuum up as much of the soot, dust, dirt, and debris from the area.
Although the vacuum will remove some of the soot, it is mostly to remove other particles that might scratch the wood when cleaning away the soot.
For soot or ash removal, you should use a HEPA filter vacuum with a hose attachment and start cleaning from the top down. This will prevent the soot from settling in an area that you have cleaned.
When vacuuming areas where soot is present, keep the hose away from the surface, so you do not rub in the soot.
That makes the soot harder to remove and may possibly scratch the wood.
If you are using a small vacuum, you will most likely need to empty the canister regularly. This will help keep the soot and other particles from overflowing and spreading throughout your home.
But if you are using a shop vac, then you should empty the canister at the beginning, and it should work fine.
Step 2 – Dry Clean
Start with a dry-cleaning sponge that is designed for soot.
As when you use the vacuum, start from the top down so the soot does not settle in one place.
For wood surfaces, work with the grain and not against it for the best results.
As the sponge becomes saturated with soot, you should raise it out and then let it dry.
This is why having several dry sponges can help speed up the process.
If you are using large sponges, then you can cut away the surface that has been saturated and keep working with the old sponge.
Melamine scrubbing sponges make for good alternatives if you cannot find any soot sponges. They need to be dry to work fully, but they are quite good.
You can also add just a little baking soda to soak up the soot stains.
Just sprinkle a small amount over the soot, let it soak up, then wipe clean with a damp sponge or cloth.
Step 3 – Wet Clean
If you are not enjoying much success with the dry cleaning method, then you will need to switch to wet cleaning.
You’ll want to use a minimal amount of water to keep the soot from spreading across the wood.
It’s important that the cleaner you are using has a degreasing agent, which should be mixed with warm water.
Use a soft or microfiber cloth to soak up the mixture, then ring it out as much as possible before using it.
The mixture should be mostly water to soot remover as the cloth or sponge will become dirty quickly.
Have a dry cloth or sponge handy to wipe away any excess solution, which will help keep it from spreading around the wood.
You’ll want to use a little force, but do not rub vigorously into the wood.
Otherwise, you will scratch the surface. Be sure to rub with the wood grain for the best results.
For the walls, start with the top-down approach, which will keep the soot from running over clean areas.
Step 4 – Use Polish or Refinisher
Using this method, a small soot stain can be removed fairly quickly.
Once it is cleaned away, you can add a little polish to make the wood shine again.
In most cases, the wood will need to be refinished, especially for larger soot stains.
If that is the case, you will need to sand the wood to remove any finish that still exists. The sanding will remove any remaining soot stains as well.
You may also employ chemical strippers to clear away the finish.
Once you have removed all the old finish, wipe down the wood with a damp cloth or rag to clean up the surface as much as possible.
Let it dry, and apply a coat of sealant to protect the wood and allow the base to coat the surface evenly.
You can choose from oil, water, or gel-based stains, so pick the one that works best for your needs.
It is possible that you may need to apply several coats to make the job complete. This is where you can use a brush-on or spray-on finish.
A brush-on finish lets you have more control over the amount that reaches the surface, but a spray-on finish is generally faster to apply.
In either case, follow the manufacturer’s instructions for the best application possible.

What Products and Chemicals to Use for Dissolving Soot?
To clean up the soot efficiently, it’s important that you have the right products on hand.
Especially if the fire was large or caused considerable damage, expect to use several types of products and proceed in a multi-step fashion to restore the interior of your home.
If the damage is considerable, you should decide whether to purchase commercial soot removers in bulk to save money.
1- Degreaser
If you have a household cleaner that has a degreaser, then this will work to remove the soot.
If the soot stain was the result of a kitchen or grease fire, then this type of cleaning product may work best.
Just be sure to purchase a degreaser that is not gritty, or you might scratch the surface.
Degreasers are best used on ceilings and walls, though they will work on wood, just not quite as well.
Create a solution with a degreaser mixed with warm water and use a microfiber cloth or soft sponge.
Do not rub too hard to avoid scratching the surface.
2- Melamine Scrubbing Sponges
These are similar to dry soot sponges but are more commonly known as dirt erasers.
They are primarily designed to remove marks and dirt from wooden surfaces, which is why they work so well on soot on kitchen cabinets or furniture.
Plus, you do not need to purchase any cleaning products as the sponges themselves are quite good at picking up soot, either wet or dry.
However, if you add a small amount of borax soap and baking soda mixed with a quarter cup of water, you can increase the effectiveness of the sponges considerably.
Be sure to wring out the sponge until it is damp before using it.
3- Oil-Based Wood Cleaner
You may see these fire soot cleaning products advertised as oil soaps. They are quite effective at cleaning both finished and unfinished wood.
Just follow the manufacturer’s instructions when diluting the product before applying it to a clean cloth or sponge.
Be sure not to allow the oil soap to soak into unfinished wood, as that may cause a stain to appear.
Plus, scrub along the wood grain, so you reduce the chances of scratching.
You can find oil soaps at most hardware and retail stores that carry wood cleaning products to be used for household wooden furniture.
4- Soot Sponges
Dry soot sponges are quite simple and effective in removing soot.
They work well on both walls and painted wood, such as the siding and trim around windows.
They do not contain any products themselves, but they work quite effectively at pulling the soot from the surface.
You will need to purchase soot chemical removers to maximize the effectiveness of the sponge.
This type of sponge is fairly inexpensive and widely available.
The downside is that the sponges will get dirty fairly quickly, so you will need to rinse them frequently.
This is why it is recommended that you purchase several, so you can switch them out when cleaning.
Also, some dry sponges can be cut to remove the soot, so you can use the fresh surface.
5- White Vinegar
It’s a most versatile cleaner not only to break down oily soot stains but also to remove nicotine stains in the smoker’s house.
Mix warm water and vinegar in a ratio of 1:3 to prepare a homemade soot remover solution.
Then using a soft sponge, wipe the woodwork, walls, or ceilings to get the black smoke soot off.
Be sure that you use only white vinegar cleaner and no other products like cider vinegar. They can leave their own stains on the surface.
Also, on wood surfaces, do not let the vinegar sit for too long. In most cases, white vinegar can dissolve the soot in only a few minutes.
Other than the above, a few more effective soot-cleaning products include dish detergent, baking soda, or a solution of ammonia and warm water.
Ammonia solution, in particular, works great for removing stubborn smoke soot from surfaces such as painted wood mantle, wood burner stoves, and concrete fireplace surround.
Make sure that you start with a small area first and judge the results before you clean all of it when using these products.
Final Thoughts
With a wide variety of soot removal products available on the market, it’s not very tough to clean soot off wood furniture, cabinets, floors, walls, or even metals such as stainless steel.
If your wood surfaces are covered with soot, you should try to clean them as soon as possible. Soot can be difficult to remove because it contains organic compounds that adhere to the surface of the wood. You may need to use special cleaning products designed specifically for removing soot from wood surfaces.
Be sure to work in a well-ventilated area, follow the manufacturer’s instructions and start by using a strong vacuum to remove loose particles.

Hi, I am Mark Garner a professional carpenter, woodworker, and DIY painter. I live in the small city of Peoria, Arizona as a semi-retired woodworker. I have started this blog with a simple motive to help you with my wood experience in this sector. If you like to know more about what I love doing and how it all got started, you can check more about me here.


