Stones like marble, granite, and quartz are timeless, trendy additions to your home.
In combination with wood, you can use these stones in so many places. And the best part if learning how to do it yourself is not that hard.
If you are thinking about building a beautiful piece of furniture or replacing your old wooden countertops with granite, then learning how to glue marble and wood together is an excellent place to start.
In this article, I will break down the process along with the basic materials you will need for your project. So, let’s go straight into them…
Gluing Marble to Wood – 5 Easy Steps
Attaching the marble piece (like a tabletop or a countertop) to a wooden base is not a complicated process.
But it does take some know-how and a little practice. If you are doing it for the first time, you can follow the steps and techniques below…
Step 1 – Get the marble
To start with attaching wood and a piece of granite, you will need a piece (or several pieces) of marble.
Remember, this is a material that can be pretty pricey. So, if you are not in a hurry and want to save a chunk of change, it is a good idea to wait for a deal.
You can frequent restaurants shutting down to inquire what they are doing with any marble pieces or old furniture they may have. You might get lucky and can buy it for a low cost there.
Your nearby hardware stores are another excellent place to get great deals on marble. These stores sometimes have sales to sell off old products to make way for new ones, which means you could save a good amount of money.
Once the marble piece is ready, it is a good idea to get it cleaned and polished.
Step 2 – Clean the surfaces
This may seem like a minor step; you may even be considering skipping it. But that would be an amateur mistake because ensuring that the wood and the marble are cleaned will make gluing them together much easier.
For cleaning your marble pieces, you want to be sure you have removed any loose debris, mud stains, grease stains, or sawdust.
A tack cloth is perfect for the cleaning job as it is made from a lint-free material, similar to gauze, and has a tacky coating on it to make removing dust and dirt easily.
You are going to save yourself a lot of frustration by being as thorough as possible.
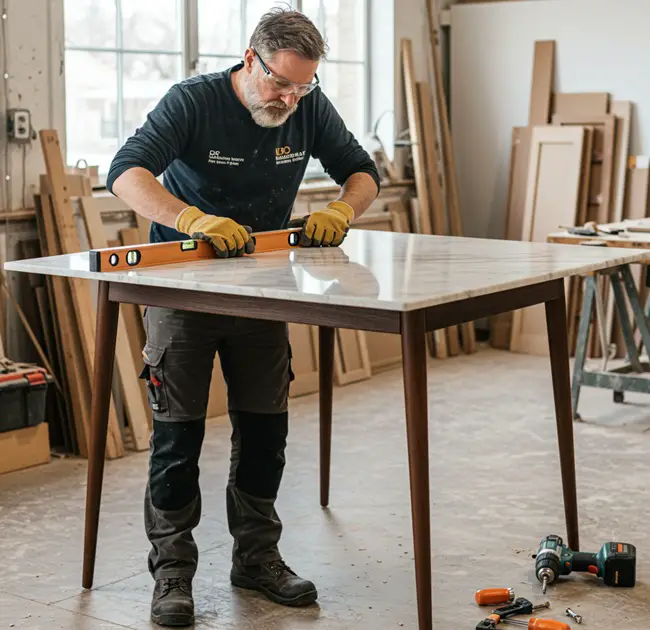
Step 3 – Check and perform a dry fit
Before you glue the stone, it’s good to ensure that the marble fits perfectly on top of the wood.
Neither of these materials is malleable, so they will not meld together, they must fit perfectly, or they will look sloppy.
You can use an orbital sander to smooth the surface of the wood and possibly trim the edges of the marble.
If you are not sure how to trim the marble, you may need to reach out to an expert to do that. Plus, if you need to sand the wood or cut the marble, don’t forget to clean them again.
Step 4 – Apply the adhesive to both surfaces
A high-quality silicone adhesive will work best to attach the marble or granite piece firmly to the wood and stay glued together for years.
For easiness, you can use a caulking gun to apply the adhesive and make sure you don’t apply a lot of adhesive at a place. Just apply the adhesive in spots all over the surface of the wood where you want to attach the marble piece.
Now affix the wood and marble together and wait for it to dry for a few hours.
Just in case you find that the alignment of the wood and marble is off, you can remove the two pieces, clear the adhesive with a putty knife, and start over. Make sure that you perform this step fast before the glue dries and the two pieces get attached.
If you do have to start over, also be sure that you are diligent in removing all of the glue to have a clean surface for a fresh start.
TIP: If the marble is too heavy, you might need metal angles for extra support. When attaching it to wooden cabinets or furniture, screws can help secure it firmly.
Step 5 – Finish the visible wood areas as desired
Once the adhesive is dried, it’s time to clean and paint all the visible wood areas to get a good protective finish.
- Wipe the wood with a clean cotton cloth making sure it’s free from dust particles.
- Next, apply two coats of wood primer and let it dry for a couple of hours.
- Then pick the latex or enamel paint to color your wood and let it dry completely.
- When you are done painting, apply a sealing wax to add a lovely gleam to the wood surfaces.
You can use a paintbrush to paint the wood, but some people prefer using a sprayer. It applies the paint more evenly with less effort on your part, and there are no bristles from the brush left behind on the wood.
If you want to apply another coat, use the tack cloth to clean the wood again before painting. This is important because you don’t want dust or dirt under the final paint layer.
It’s a personal preference as to what color you choose, but choosing a color that complements the marble is a good idea. For example, if you have selected a white marble, a darker color paint would make it pop and complement the marble beautifully.
Safety tips and warnings when gluing marble and wood together
- Always wear steel-toed boots when working with marble because it is a heavy material, and you don’t want to drop it on your toes with no protection.
- Wear your work gloves when using the adhesive to keep them off your hands.
- Also, wear your safety goggles when cutting and gluing the marble piece to the wood.
- Depending on the glue you are using, you may need to ensure that you are working in a well-ventilated area.
- Never ingest the glue, this may seem obvious, but it is worth saying.
What’s the Best Adhesive to Fix Marble to Wood?
Picking the right adhesive makes all the difference when sticking wood to marble. Whether you’re tackling a DIY project or a full-scale build, each adhesive has its strengths. Let’s break it down:
- Construction Adhesive: Fast, strong, and easy to apply (just grab a caulking gun). It handles temperature swings and impact like a champ, making it great for structural fixes.
- Silicone Adhesive: More about flexibility than brute strength. It’s waterproof, perfect for trim and decorative elements, and prevents cracks by allowing slight movement.
- Epoxy Adhesive: Need a bond that could survive an apocalypse? Epoxy is your best bet. This two-part mix (resin + hardener) forms a rock-solid grip, perfect for heavy-duty, load-bearing applications.
- Polyurethane Adhesive: The middle ground between strength and flexibility. It absorbs movement, resists moisture, and works well indoors and outdoors—ideal for materials that expand and contract.
Brands like Elmers, Loctite, Weldbond, Steinel and many more are easily available online. Do some research, check reviews, and pick the right one so that your wood-marble bond will last longer than your patience waiting for it to dry.
What are the Benefits Of Using Marble and Wood Together?
When it comes to furniture, wood is considered the elite material.
Whether you’re decorating the inside or outside of your house, wood offers an appealing touch and smell that any other material can’t match. This nature’s beauty can enhance the look of houses of various designs as well as it lasts long if properly maintained.
However, because wood is organic, it is susceptible to harm, such as getting rotten.
Rot not only degrades its look and strength, but it also attracts pests such as mildew, mold, and wood termites. And once the rot has set in, it’s very hard to halt it.
Aside from deteriorating, detailed wood furniture needs maintenance because it suffers from dirt accumulation and color fading as well. They can lose their charm with time, making it difficult to discern their delicate intricacies.
All this can be avoided with the usage of the correct product along with wood. And one such alternative product is MARBLE.
Using marble in your DIY projects will give your home a feeling of elegance and beauty with little effort. It is a long-lasting, durable stone that you can enjoy for many years.
Many homeowners prefer marble over alternative surfaces for a variety of reasons, including aesthetics and longevity. Moreover, no pieces of marble are alike, making your project unique right from the beginning. A few additional benefits of using marble are:
a) Durable – It’s one of the most durable natural stones. You are sure to enjoy a long life when using marble around your home.
b) Heat resistant – One of the most heat-resistant natural stones you can find, and this is helpful to provide uniform heat throughout the home.
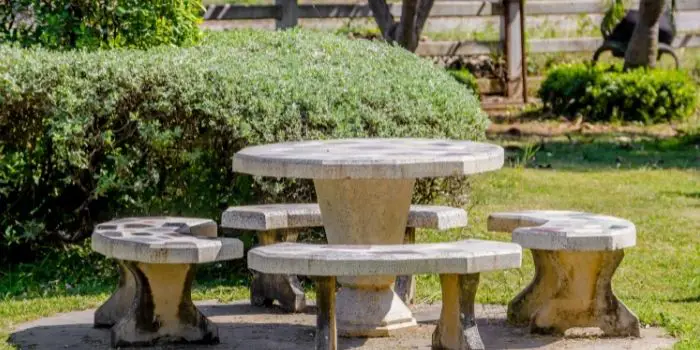
c) Fire-resistant – Being fire resistant makes this outstanding material will help to reduce damage from any home fires that may happen and is perfect to use around a fireplace or even a fire pit.
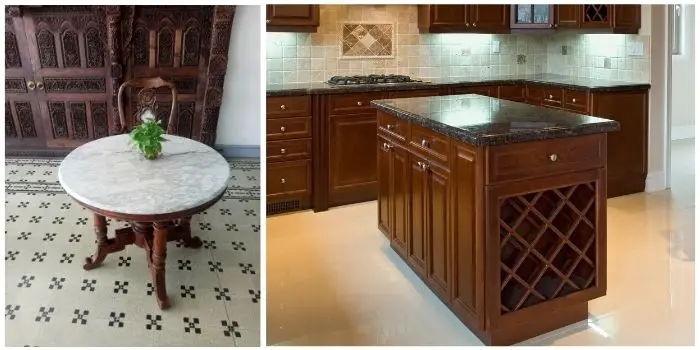
Some ideas to use marble (in combination with wood) throughout your home are:
- Countertops in kitchen
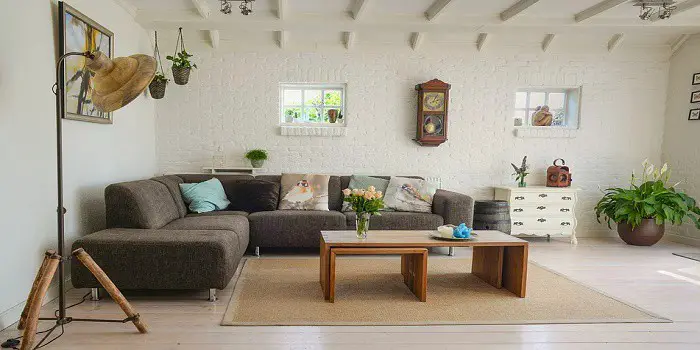
- Coffee table
- Dining room table
- Bathroom Vanity
- Tiles
- Accent pieces throughout your home
- Top for any table
If I were you, I wouldn’t put off utilizing marble for another second.

How to Calculate the Weight of Marble Before Gluing it to Wood?
When mounting marble on wood, be aware that it’s a lot of weight. Whether it’s for a kitchen worktop, floor, or bathroom, precise measurement (determine the square footage) and calculating the weight of your marble tile correctly is key. This will ensure that your wood base can handle it.
Here’s how you can do it:
Step 1: Measure the Area
- Measure the length and width of the area where the marble will go.
- Multiply these numbers to get the total square footage. Example: If your countertop is 5 feet long and 2 feet wide, the total area is 10 square feet.
Step 2: Calculate the Weight per Square Foot
Marble is dense and heavy, so its weight adds up quickly. On average, 1 square foot of marble weighs 13.34 lbs per inch of thickness.
So, it’s essential to first measure the thickness of your marble tile (¼ inch, ½ inch, ¾ inch, or 1 inch) as it greatly affects its weight.
Then, here’s how to find the weight of your marble per square foot:
- Multiply the thickness (in inches) by 13.34 lbs.
- Example: A ½-inch thick marble tile weighs 6.67 lbs per sq. ft. (0.5 × 13.34).
- A ¾-inch thick tile weighs 10 lbs per sq. ft. (0.75 × 13.34).
Step 3: Find the Total Weight
Once you know the weight per square foot, it’s time to find the total weight of your marble tile.
- Multiply the weight of one square foot by the total square footage calculated in Step 1.
- For example: If you have 10 sq. ft. of ¾-inch thick marble, the total weight is: 10 sq. ft. × 10 lbs = 100 lbs.
- If you’re using a full 2 cm thick slab (≈¾ inch) for a large surface like a kitchen island, the weight can easily reach 250 kg (or more).
Remember that if you need to get a new wood piece or plank for the project, pick a strong and stable wood type that won’t warp under the weight. Thicker plywood or hardwood is usually a good choice and if necessary, you can use metal brackets or reinforcements to help distribute the weight.
Also, if you consider attaching marble to a tabletop, make sure the legs are strong enough to support the load. If in doubt, consider reinforcing them with an iron structure.
Final Thoughts
If you are someone who does a lot of home DIY, you probably already have everything you need to work with attaching marble and wood. For you, building a table with a granite top will be a straightforward process.
However, if you are a beginner, you may need a couple of trial runs, but you will master it eventually. You can make this a fun family project and have your kids help if you want. This would be a tremendous learning experience and an excellent time to enjoy with them.
Share the post "How to Adhere Marble to Wood (Step-by-Step Instructions)"

Termites are recognized as one of the most troublesome pests all over the world. They are small and numerous and Read more

Our bedroom is a special place where we find relaxation and refresh after a hard day of toil - the Read more
Let’s be honest: buying a sofa is a bit like dating. In the beginning, it’s all about the looks. You Read more

Wooden furniture, trims, doors, and windows are so long-lasting that you can easily repair and reuse them even after they Read more

Hi, I am Mark Garner a professional carpenter, woodworker, and DIY painter. I live in the small city of Peoria, Arizona as a semi-retired woodworker. I have started this blog with a simple motive to help you with my wood experience in this sector. If you like to know more about what I love doing and how it all got started, you can check more about me here.