Alkyd enamel is a type of oil (or solvent-based) paint that’s highly lustrous, smooth, and viscous. The paint is generally made of three elements, namely the thinner, the binder, and the pigment.
Although alkyd paint does not contain oil, it is many times also called oil-based paint. The reason is it uses chemical binders along with thinners.
The paint is generally produced from alkyd resins dissolved in a chemical liquid. And it dries when the solvent evaporates, leaving just the alkyd resins behind. As the resins cure and oxidize, it leaves a long-lasting glossy appearance on the paint.
Knowing all these about alkyd enamels, you may be wondering whether it is a good choice for wood surfaces or not.
So, here is all that you should know about alkyd enamel paints, their pros & cons, including how to apply them on wood surfaces in the best possible way.
Alkyd Paint for Wood – Pros and Cons
Conventional alkyd enamels are the jack-of-all-trades in the paint world. Whether it’s wood, metal, or other surfaces, these paints bring both resilience and shine—perfect for areas that demand a tough yet polished look.
They offer a mirror-like waterproof finish which makes them a great option for surfaces like wood cabinets, metals, glass, plastics, and even walls or plywood used in bathrooms and kitchens.
Doors, trims, and cabinetry made of wood are often the surfaces that are mostly painted with it because it treats the porous wood much more durable and long-lasting.
Pros:
- High durability and tough to wear
- It offers a shiny and mirror-like finish
- It’s washable and waterproof after cured
Cons:
- It needs paint thinner for cleaning
- It May turn yellow with age and heat
- Releases a high number of VOCs, which leads to the emission of carbon dioxide
Since the chemical solvent in conventional alkyd enamels diffuses a high volume of Volatile Organic Compounds, which are hazardous to people and lead to carbon dioxide emissions, they are not a common choice compared to water-borne enamel paints.
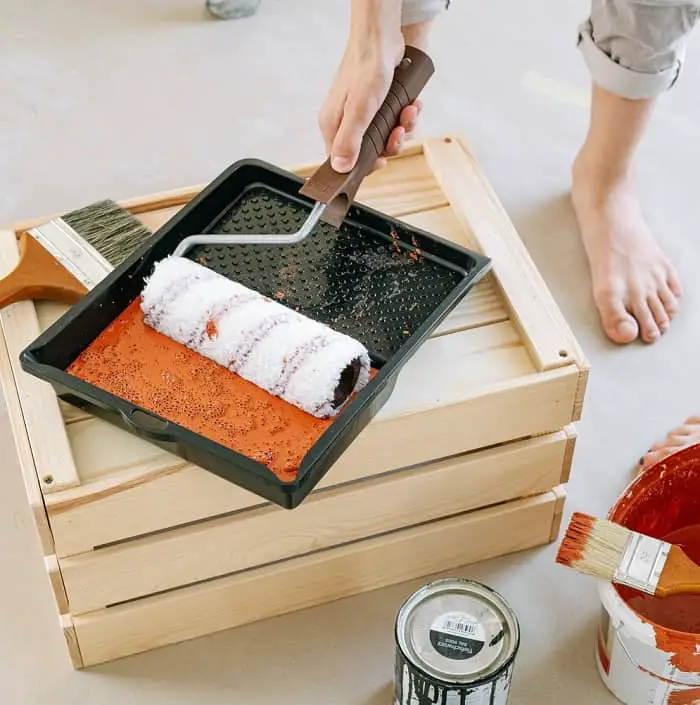
How to Use Alkyd Enamel Paint on Wood?
In comparison to interior latex paints, alkyd enamel paint is thicker and more viscous. Hence, it can be tough to apply if you haven’t done it before.
The key to getting success here is picking the right materials to apply the enamel paint.
Materials You Will Need
The very first thing is to select a rigid-bristled paintbrush that can help you evenly spread the viscous enamel paint on the surface. Make sure the brush you choose is clean and free from any dust or dirt.
Then you will need to select the most suitable primer for the kind of enamel you want to apply.
Oil-based primers will generally work great with enamel paints because they seal the bare wood of the trims and cabinets you may be working on, thereby allowing the enamel to stick well.
Based on the project, you will also require the materials such as:
- Primer
- Paintbrushes
- Painter’s tape
- Painting respirator
- Old sheets to cover the area
- Sander, sandpaper, or sanding sponges
Also, for cleaning the surfaces (before and after the painting), you will require soap and water for hybrid enamels and paint thinner for oil-based enamels.
Steps for Paint Application
No matter whether you are painting trim, cabinets, or doors, the application for enamel paint is relatively similar.
The steps you can follow are as follows…
Step 1. Protect
Before you start painting, lay down an old sheet or drop cloth beneath your furniture or project piece. This simple step saves your floors from paint splatters and stains—because no one likes surprise “artwork” on their tiles or carpet.
Next, grab some painter’s tape and carefully seal off trims, baseboards, or any edges you don’t want to be painted. This ensures clean, crisp lines and saves you the headache of messy touch-ups later.
It is also important to note that if you are using traditional alkyd enamels for cabinets – it has higher levels of VOCs. So, you should use a painting respirator during the paint application process. Also, select a well-ventilated open area to avoid inhaling toxins.
Step 2. Clean & Sand
If the surface already has a paint coat, strip it off with a paint stripper. Then, sand the surface—a random orbit sander works best, thanks to its unique disc that smooths the wood without those annoying swirl marks. This method beats hand-sanding both in efficiency and results.
Before you move on, clean up the dust and, if needed, give it a final wipe with a soapy damp cloth to banish any grime, grease, or stubborn soot. Now, your surface is prepped and ready for a flawless finish.
Step 3. Apply Primer
Once your surface is clean and completely dry, it’s time to prime. A well-primed surface means better paint adhesion, durability, and a flawless finish—so don’t skip this step.
A high-quality oil-based primer is your best bet for smooth adhesion and long-lasting results. If you’re painting an outdoor surface, double-check that your primer is specifically labeled for exterior use—you don’t want your hard work peeling away after a few seasons!
When applying, choose your weapon:
- Paintbrush – Best for small areas and detailed work.
- Roller – Ideal for covering large, flat surfaces quickly.
- Sprayer – Great for an even, professional-looking coat with minimal effort.
Step 4. Apply the Paint
After the primer has been dried, it’s time to apply the alkyd enamel paint.
If you are looking for the best enamel paint for wood Valspar Oil-Based Door and Trim Paint, Benjamin Moore ADVANCE, and ProClassic Acrylic Alkyd Enamel are some great options you can choose from.
Sometimes you may get hybrid enamels with a mix of alkyd and acrylic or urethane resins. These offer additional hardness and lower yellowing to the paint when applied outdoors.
These will have no impact on the application procedure of the paint and will offer similar benefits without emitting high VOCs. So, if you want, you can pick them for indoor and outdoor applications. Just make sure that you thin the paint properly before application.
Penetrol is an oil-based paint additive that will perfectly thin the alkyd enamel paint and give it the right consistency to make your work easier.
To get brilliant results, apply at least two layers of enamel paint over the primer coat using a paintbrush. If required, you should go for a third coat to get perfect finishing and shine.
Also, make sure you take a gap of about 15-24 hours between the coats to dry them completely.
Step 5. Clean and Dry
In case there are any paint spills, clean it as soon as possible, or it may be tough to remove when dry.
Make sure you clean the brushes (roller or sprayer) and dispose of the leftover paint properly.
Freshly painted surfaces with alkyd enamel paints can dry to the touch within 24-36 hours but may take as long as a week or two to cure completely. So, it’s good to avoid any heavy use till the paint is completely cured.
Also, if you want to apply a clear coat of varnish or polyurethane over the alkyd enamel, you can do so. Just make sure that you do this after the paint is completely cured on the surface.
Can you paint over alkyd paint?
If the alkyd paint is in good condition and you just want to freshen up the color, you may paint over it with similar oil-based enamel paint.
However, if you want to paint over an alkyd or oil-based paint with water-based paint, remember first to remove the gloss and prepare the surface for adhesion.
This can be accomplished by using fine-grit sandpaper. You can also use a deglosser, but sanding by hand is just as effective. Once the surface is dull and dry, apply a water-based primer before painting.
How to avoid brush marks with alkyd paints?
Enamel paints, when applied on surfaces like wood cabinets, can leave brush marks which can easily draw attention due to the glossy smooth finish. One good way to avoid these brush marks while painting is by following the natural grain of the wood.
Use sandpaper (to sand the surface in the direction of the wood grain) to smooth the surface before painting, and consider mixing a paint additive like Penetrol. This will also allow you to adjust your strokes better and in hiding imperfections, especially when you are painting over long surfaces like doors or decking.
Do you need to seal the enamel paint on the wood after painting?
If you have coated your wood surface well with alkyd enamel paint with at least two coats, it’s enough to work as a tough protective layer due to the additives added and standard paint blends.
Sealing your wood with a clear coat over enamel is, therefore, not required after the paint job.
Moreover, enamel paints usually hide the beautiful grains of wood, so there’s no point in adding a clear sealer coat if your purpose is to get a beautiful finish.
With that said, there are times when it may work, like if you have coated the wood with old leftover enamel paint in a single layer, you may add a layer of clear coat for additional protection.
Ultimately it’s a matter of personal choice and your project needs.
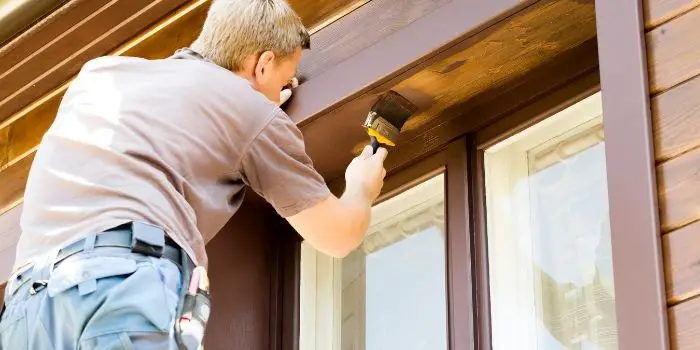
Is Hybrid Enamel Paint and Alkyd the Same?
Hybrid alkyd enamels combine the best water-borne paints with the best oil-borne paints. These types of enamel paints typically make use of waterborne alkyd technology to suspend the resins in a water-borne liquid instead of a chemical liquid.
Hybrid enamels are similar to conventional alkyd enamels but show a less hard finish in comparison to oil-based enamels.
While both paints give the same feel and finish, the only difference is that hybrid enamels are simpler to clean. They are generally odorless and can be easily cleaned with soapy water. Their added advantage lies in low VOC release due to the fact that it’s formulated with water-borne pigments and formulas.
Pros:
- Hard and shiny finish
- Water-proof after curing
- Long-lasting and tough to wear
- It can be cleaned easily with soap and water
- Low VOCs release in comparison to conventional alkyd enamels
Cons:
- Some variants are less shiny in comparison to oil-based enamels
Its important to note that alkyd and acrylic enamel are also different. The key difference is in their composition.
While alkyd paint is oil/solvent-based, acrylic is a water-based paint. Unlike alkyd enamels, acrylic enamels come with lower VOCs (Volatile Organic Compounds) that are classified as hazardous.
How to Fix Tacky Alkyd Enamel Paint That’s Not Drying?
Normally, alkyd enamel paint takes about 24 hours to cure, but sometimes, it stays sticky or tacky longer than expected. If your paint isn’t drying properly, don’t panic—here are some easy fixes:
1- Improve Ventilation
This may sound obvious, but you’d be surprised how often it’s overlooked! Humidity slows drying, so crank open some windows, turn on a fan, or, if possible, move the painted furniture outdoors for fresh air.
2- Try a Topcoat or Drying Accelerator
A clear topcoat helps seal the paint and speed up drying while protecting it from dust and grime. Alternatively, oil-based paint drying accelerators can work wonders by absorbing excess moisture from the paint.
3- Add Some Heat
Use a hair dryer on low heat and hold it about six inches away, slowly moving it over the surface. A room heater can also help—just keep it at a safe distance to avoid melting the paint instead of drying it.
If all else fails and you’re not in a hurry, just let time do its thing. It will dry eventually—just maybe not today.
Tips for Preventing the Paint Coat from Getting Tacky
Want to avoid the frustration of tacky paint? Follow these proactive steps to ensure a smooth, quick-drying finish:
- If you’re using oil-based paint, mix in a bit of mineral spirits to improve flow and speed up drying. Thinner paint dries more evenly and prevents sticky buildup.
- Thick, goopy layers take forever to dry. Instead, apply multiple thin coats, allowing each layer to dry properly before adding the next.
- Some paints are just slowpokes. Opt for alkyd enamel or fast-drying formulas to keep things moving at a reasonable pace.
- Trying to paint a huge area at once can cause uneven drying. Instead, tackle smaller sections, ensuring each part gets proper airflow and curing time.
In addition to all the above, keep in mind that paint and weather don’t always get along. For best results paint on days when the temp is 50-90°F (10-32°C) and humidity below 85%.
If it’s too cold or humid, your paint might stay tacky indefinitely. A thermometer and hygrometer can help you keep conditions in check.
Final Thoughts
Alkyd enamel paints offer a long-lasting glossy finish and are recommended for surfaces such as doors, kitchen cabinetry, baseboards, trims, metallic furniture, and appliances.
As they are waterproof, washable, and tough, you can use them for your bathrooms and kitchens as well. Some of them even provide a great scratch-proof finish that can easily be cleaned with soap and water.
Just make sure to choose carefully whether you want to go for traditional alkyd enamel or hybrid enamel. Also, look for the amount of paint you require, collect the materials needed, and follow the right procedure to apply the paint.

Hi, I am Mark Garner a professional carpenter, woodworker, and DIY painter. I live in the small city of Peoria, Arizona as a semi-retired woodworker. I have started this blog with a simple motive to help you with my wood experience in this sector. If you like to know more about what I love doing and how it all got started, you can check more about me here.

