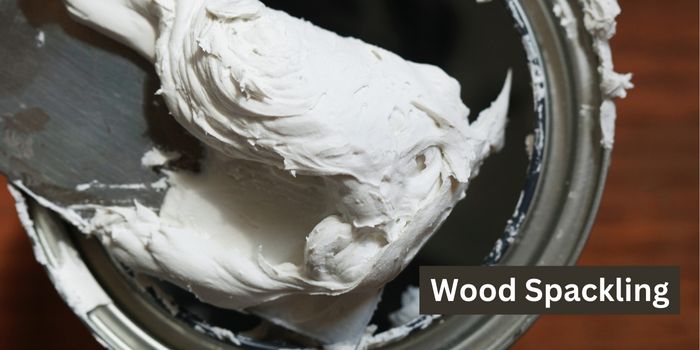
Spackle does have certain advantages over other wood filler types, making it the best choice for some situations.
First of all, it’s much easier to sand and doesn’t require as much time to dry, which means you can sand and apply paint or other finishes much sooner than with a joint compound.
Spackle is also much easier to apply (thanks to its thinner texture and consistency), and it doesn’t shrink as much as a joint compound once it has spread and dried completely over the wood or wall surface.
Moreover, many types of spackling work as a filler very well on wood surfaces.
Vinyl spackling paste, for example, is excellent at repairing indoor cracks or superficial holes in the wooden door and window trims, no matter its solid wood, plywood, or hollow core.
You can also use it to repair small nail holes on wooden TV panels, hardwood floors, wooden ceilings, etc.
The good thing about vinyl spackling is that it adheres to the surface pretty well and dries rapidly, too, so you can usually use them on interior wood surfaces instead of water-based wood fillers without an issue.
How to Use Spackle to Fill Holes in Wood?
Applying spackle is typically done after stripping paint and other finishes from the woodwork.
Once the wood is stripped and sanded, any holes or gouges that will be visible must be repaired before painting or re-staining. Spackle can also be used to fill small cracks in walls before painting.
In terms of the best time to apply spackle, it’s usually recommended to do so in the late afternoon or early evening because the temperature is cooler, and there’s less chance of the spackle drying too quickly, which can cause cracks.
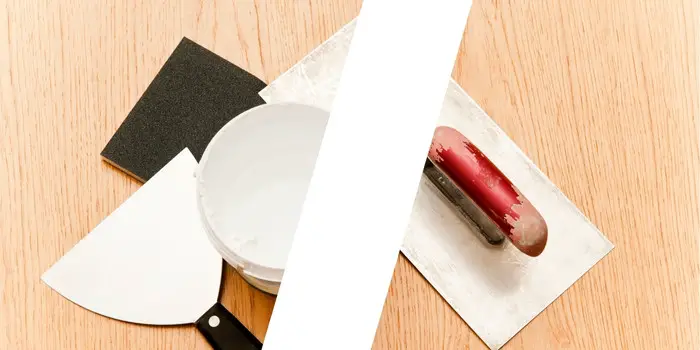
Generally, the process of using a spackle like 3M and Drydex is pretty straightforward once you have the following items at hand:
- Sandpaper
- Putty knife
- Cleaning rags
- Spackle compound
The steps to spackle a hole are as follows…
Step 1- Clean the Surface
Preparing the hole will make it easier for the spackle to adhere. Use sandpaper on any rough edges or debris around the perimeter of the hole until they’re smooth.
Also, clean the area with a damp cloth to get rid of any sanding dust or debris that might be present.
Step 2- Pick Your Compound
The size of the hole or damage being repaired will be the primary deciding factor in which repair compound you should use.
A lightweight spackle that contains a binding agent is usually sufficient for small holes.
If your hole is as wide as ¾ inch, though, you may need to opt for an all-purpose or heavy compound.
Step 3- Mix and Spread the Spackle
Next, you’ll want to combine or prepare the compound of your choice and apply it to the damaged area.
If you purchased a premix powder that must be combined before use, make sure you only use the amount required for the current repair project.
You don’t want to waste money by mixing more than is needed, as it will get dried and wasted without any use.
Now, using your putty knife, apply a generous amount of the spackling compound in a downward motion beginning from the top side of the hole.
Step 4- Level the Spackle and Make it Even
Fill the hole until it is packed, then use a putty knife to level it off.
Avoid pressing too harshly, or you’ll end up taking putty out of the hole. Use a wet cloth or a piece of rag to remove any compound debris from where you just repaired.
Remember, it doesn’t need to look impeccable since you’ll sand over it later when the repaired hole is dry.
Step 5- Check for Shrinkage and Sand Lightly
When the spackle dries, it most likely shrinks. Check to see if the defect has receded after an hour or two. If it has, apply another layer of spackle.
Most holes more than ¼ inch deep need to be filled twice (or more). So, apply some more spackle generously.
Don’t overthink the spackle remaining, as it will be smoothed out during the sanding process.
After you have applied the second coat of spackle, allow it a couple of hours to dry. Then lightly sand the repaired hole area to smoothen the wood trim, panels, or wall.
Use a dampened rag or a cloth to wipe the sanded dust, and your repaired area is ready to finish with paint or touch-ups that matches the rest of the trim/wall.
How Long Does Spackle Take to Dry on Wood?
It’s crucial to remember that various spackles come in a variety of dry times, so choose carefully based on your project deadline – some are fast-dry, while others take much longer.
Generally, a fast-drying lightweight spackle will take only a few minutes to dry. But you should wait for at least 1-2 hours if you intend to sand and paint the surface further.
In contrast, heavy spackles will typically dry in 1-2 hours, but it’s recommended to give it a full day to set and avoid any issues with sanding or painting.
Additionally, conditions such as temperature and humidity have an impact on the drying time of the spackle filler – extreme heat or cold slows down drying time.
Finally, if you’re filling a large surface, expect a longer dry time.
Remember that the drying time of the spackle on wood surfaces affects how strong the bond will be between the spackle and the wood paneling.
If you need a stronger repair with spackle before painting, give it more time to dry before putting any weight on it or painting over it.
Can You Add Water to Drydex Spackling to Keep it from Drying Out?
Once you have applied the spackle paste, it will get hardened and become part of the surface it’s applied to.
It’s only natural that the leftover paste in its container would harden over time and would turn out to be waste.
If this occurs, you can, however, add water to it to loosen it up so you may reuse it again within a short time period.
Remember, the process to revive dried-out spackle will work only if the paste hasn’t been set for too long.
If it’s already been weeks or months, it’s good to dispose of it and use the new container.
Here are the steps to follow with restoring dried-out spackling:
- Remove the lid of the spackling paste container.
- Add some water slowly into the dried spackle paste container.
- Mix it well (using a power paint mixer) until it has a creamy texture and seems to be easily spreadable
- If the paste is still too dry or hard, add more water as needed. The paste should be thick enough to stay in place but easily glide in the container, similar to peanut butter.
If the dried spackling compound has chunks, use a sharp object like a screwdriver to break up the compound into small pieces before adding water.
Continue mixing and piercing at the compound until the chunks smooth out and get smaller.
It might also help if you put the jar in the microwave to heat the spackle for around 20-30 seconds. After that, add water and stir it until you achieve the desired consistency.
After the process of adding water and mixing it well, you’re dried spackle should now be usable again.
If not, it’s best to start with a new container, as the ratio of water to spackle might not have been correct.
Termites are recognized as one of the most troublesome pests all over the world. They are small and numerous and Read more

Our bedroom is a special place where we find relaxation and refresh after a hard day of toil - the Read more

Let’s be honest: buying a sofa is a bit like dating. In the beginning, it’s all about the looks. You Read more
Wooden furniture, trims, doors, and windows are so long-lasting that you can easily repair and reuse them even after they Read more

Hi, I am Mark Garner a professional carpenter, woodworker, and DIY painter. I live in the small city of Peoria, Arizona as a semi-retired woodworker. I have started this blog with a simple motive to help you with my wood experience in this sector. If you like to know more about what I love doing and how it all got started, you can check more about me here.