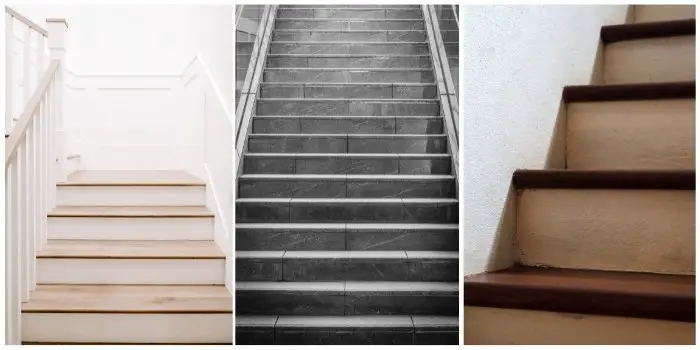
Concrete steps are pretty common – so popular that you may even see them in the basement as part of the layout.
That cold gray slab might be structurally perfect, yet visually it feels more like a parking garage than a welcoming home interior.
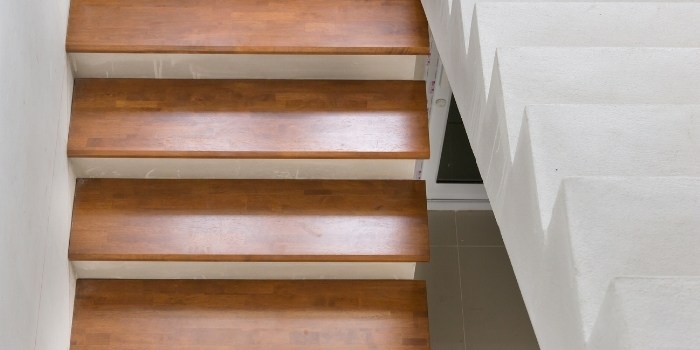
Enter oak stair treads, the upgrade that transforms industrial concrete into warm, elegant, and timeless architecture.
But here’s the catch…
Can You Attach Oak Treads to Concrete Stairs?
Concrete doesn’t exactly welcome nails the way wood does.
Attempting to nail or screw stair treads directly into concrete can lead to cracked masonry, stripped anchors, or a staircase that squeaks like an old pirate ship.
Not exactly the polished result most homeowners are hoping for.
Fortunately, modern adhesives and installation techniques make it entirely possible to install oak stair treads on concrete without a single nail.
In fact, when done correctly, adhesive bonding can create a connection that’s stronger, quieter, and longer-lasting than mechanical fasteners.
In this guide, we’ll walk through a practical, professional approach to installing oak stair treads on concrete steps—no nails required.
I’ll cover the tools, materials, preparation techniques, and a 7-step installation process used by many contractors and finish carpenters.
By the end, you’ll know exactly how to transform bare concrete steps into a staircase that looks like it belongs in a custom-built home.
How to Install Oak Stair Treads Without Nails?
Installing wood treads on concrete relies on two key principles: perfect surface preparation and high-strength adhesive bonding. If either one is done poorly, the installation won’t last.
Follow these seven steps carefully, and your oak staircase will remain solid, silent, and beautiful for years.
Step 1: Inspect and Prepare the Concrete Surface
Before installing anything, take a close look at the concrete stairs themselves.
Concrete steps often develop small cracks, chips, or uneven surfaces over time, and those imperfections can prevent the wood from sitting flush.
Start by cleaning the stairs thoroughly. Remove dust, dirt, grease, paint residue, or construction debris.
A shop vacuum followed by wiping the wood surface with isopropyl alcohol or acetone works well for removing contaminants that could weaken adhesive bonding.
Next, check for uneven areas. If the concrete is rough or has small pits, apply a cement-based patching compound or self-leveling filler and allow it to cure fully.
A flat surface is critical. Adhesive bonds are strongest when the two surfaces meet with maximum contact area.
Step 2: Measure and Dry-Fit the Oak Treads
Once the stairs are clean and level, measure each step carefully. Concrete stairs often vary slightly in width, especially in older homes, so avoid assuming every tread is identical.
Cut the oak treads to size using a circular saw or miter saw. Ideally, leave about 1/16 inch expansion gap on each side where the tread meets the wall or trim.
Before applying any adhesive, place each tread on its step and test the fit. This is known as a dry fit. It ensures the tread sits flat and fully supported across the concrete.
Dry fitting also helps you visualize the final staircase layout before committing to permanent installation.
Step 3: Choose the Right Adhesive
This is the most important step in a nail-free installation of oak stair treads.
Instead of fasteners, you’ll rely on a high-strength construction adhesive designed for wood-to-concrete bonding. These adhesives cure into a flexible but incredibly strong bond.
Popular choices include:
- Polyurethane construction adhesive
- Hybrid polymer adhesives
- Premium subfloor adhesives
These products are commonly used to fasten wooden treads and risers in modern staircase renovations because they reduce squeaks and distribute load evenly.
Apply adhesive using a caulking gun in a zigzag pattern across the concrete surface.
This pattern ensures even coverage while allowing the adhesive to spread naturally when the tread is pressed into place.
Step 4: Apply Adhesive and Set the Tread
With the adhesive applied, carefully place the oak tread onto the concrete step.
Press it down firmly, starting at the back edge and working toward the front. This helps push out trapped air and ensures the adhesive spreads evenly beneath the tread.
Some installers like to slide the tread slightly back and forth once it’s in position. This technique helps the adhesive coat the entire surface area more uniformly.
Once aligned, apply firm downward pressure. The tread should sit completely flat against the concrete with no rocking or movement.
Step 5: Weight the Treads While the Adhesive Cures
Unlike nails or screws, adhesive bonding requires curing time to reach full strength.
To keep the tread firmly pressed against the concrete during this process, place heavy weights on top. Common choices include:
- Toolboxes
- Paint buckets
- Dumbbells
- Stacks of tiles
Leave the weights in place for at least 12–24 hours, depending on the adhesive manufacturer’s instructions.
This pressure ensures maximum contact between the oak tread and the concrete surface.
Step 6: Install the Risers (If Using Them)
Many staircases include both treads and risers. If your design includes risers, they can be installed using the same adhesive technique.
Apply construction adhesive to the back of the riser board and press it firmly against the vertical face of the step. Some installers also apply adhesive along the top edge where the riser meets the tread.
This approach helps attach oak treads and risers securely while minimizing gaps that might otherwise appear over time.
Allow each riser to cure fully before applying significant pressure to the staircase.
Step 7: Seal the Edges and Finish the Installation
Once all treads and risers are installed and the adhesive has cured, finish the staircase with trim work and sealant.
Apply a small bead of paintable acrylic or polyurethane caulk along the edges where the wood meets the wall or concrete. This step:
- Prevents dust from collecting in gaps
- Improves the visual finish
- Allows slight expansion and contraction of the wood
Finally, wipe the staircase clean and apply the desired finish to the oak if it hasn’t already been prefinished.
The result is a staircase that looks custom-built rather than retrofitted.
Should You Install the Treads or the Risers First?
This question comes up frequently during staircase renovations.
The short answer is to install the risers first, then the treads. And there’s a practical reason for this sequence.
When the riser goes in first, the tread overlaps its top edge slightly. This overlap creates a cleaner visual transition and helps hide minor measurement variations.
It also mimics the construction method used in most traditional wooden staircases.
If you install the tread first, the riser must fit perfectly underneath it—something that can be difficult if the concrete surface isn’t perfectly square.
Professional carpenters with proper carpentry skills typically follow this order:
- Install riser
- Install the tread above it
This method makes it easier to fasten wooden treads and risers securely and achieve a seamless staircase appearance.
How Can You Keep the Wood Treads from Slipping on Steps?
One of the biggest concerns homeowners have when installing wood over concrete is whether the treads will move or shift.
When installed correctly with construction adhesive, the bond is extremely strong. However, a few additional precautions can make the staircase even more secure.
1. Select the right type of oak
Both red oak and white oak are popular choices and work best for stair treads. White oak is slightly harder and more moisture-resistant, while red oak offers a classic warm grain pattern.
2. Use high-quality adhesive
Cheap adhesive is the fastest way to create a slipping problem. Premium construction adhesives are engineered for structural bonding and resist shear forces.
3. Ensure full surface contact
If the concrete surface has dips or voids, the tread may rock slightly. Leveling compounds prevent this issue.
4. Add anti-slip features
Even when the tread is firmly attached, the surface itself can be slippery—especially if it’s finished with polyurethane.
To make the stairs non-slippery, you may consider adding: anti-slip stair nosing, textured finishes, clear grip tape, or routed traction grooves.
5. Allow proper curing time
Adhesives reach full strength only after curing. Avoid heavy foot traffic for at least 24 hours after installation.
When these precautions are followed, there is little risk that the staircase will move or loosen over time.
Related FAQs
Do I need to drill the concrete at all?
Not necessarily. Many installers prefer adhesive-only installations because drilling concrete can cause cracks or misaligned anchors. Adhesives provide a simpler and often quieter solution.
Should oak stair treads be prefinished before installation?
Prefinishing is recommended whenever possible. It protects the wood from adhesive stains and makes the installation process cleaner. However, final touch-ups can still be applied afterward.
Can construction adhesive really hold stair treads securely?
Yes. Modern construction adhesives are engineered for structural bonding and can hold hundreds of pounds of shear force. When used correctly on clean surfaces, they can be stronger than many mechanical fasteners.
In fact, with proper preparation and high-quality adhesive, the installation can last decades. Many professional renovations rely on adhesive bonding because it reduces movement and squeaking.
Final Thoughts
Concrete stairs are durable but rarely beautiful. Installing oak stair treads is one of the most effective ways to transform them into an architectural feature rather than a structural necessity.
The key is understanding that nails aren’t required—and in many cases, they’re not even the best option.
With modern construction adhesives, you can securely attach oak treads and risers without drilling, anchoring, or attempting to nail or screw stair treads into stubborn concrete.
Focus on preparation, use high-quality materials, and give the adhesive time to cure properly. Do that, and your staircase will reward you with something every homeowner appreciates: strength, silence, and timeless style.
Share the post "How to Install Oak Stair Treads Without Nails?"
Termites are recognized as one of the most troublesome pests all over the world. They are small and numerous and Read more

Our bedroom is a special place where we find relaxation and refresh after a hard day of toil - the Read more

Let’s be honest: buying a sofa is a bit like dating. In the beginning, it’s all about the looks. You Read more

Wooden furniture, trims, doors, and windows are so long-lasting that you can easily repair and reuse them even after they Read more

Hi, I am Mark Garner a professional carpenter, woodworker, and DIY painter. I live in the small city of Peoria, Arizona as a semi-retired woodworker. I have started this blog with a simple motive to help you with my wood experience in this sector. If you like to know more about what I love doing and how it all got started, you can check more about me here.