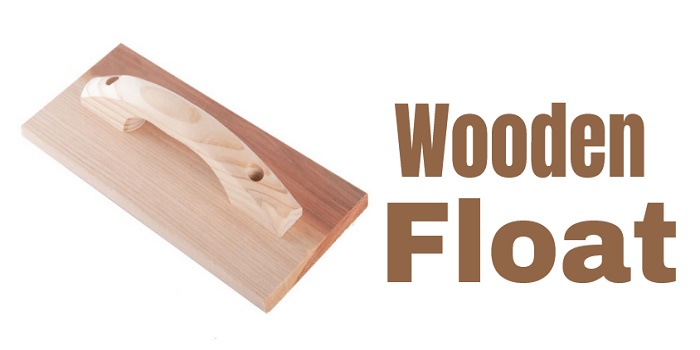
When you hear of a wooden float, you might think of a parade where vehicles support stages and elaborate decorations.
But there is another type of float that makes for an excellent tool when smoothing out a plaster.
Crafted from wood, plastic, and rubber, although some floats will substitute metal for wood, the float is really a small board with a handle used to level out plaster when it is applied.
This tool gets its name from how it glides over plaster that has been freshly applied to a surface.
Its job is similar to that of a trowel used to smooth out freshly poured concrete.
But what is a wooden float, what are its parts, and how is it really used?
Let’s cover all the basics you need to know in this guide.
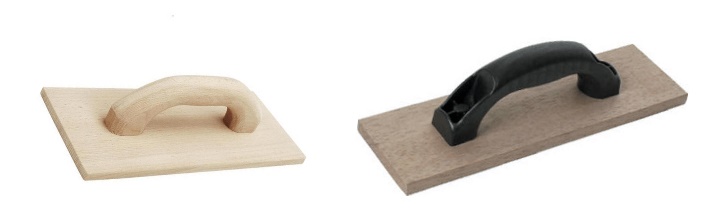
Parts of a Float Tool
A wooden float is a rather simple tool that is quite handy.
Its parts consist of the following.
- Handle
- Base Plate
- Backing Layer
The handle is attached to the base plate.
This rather simple curved handle allows you to hold the float from the top.
You can press down when needed, but it really allows you to move the float easily across the plaster surface.
For plastic floats, the handle is often molded to the base plate itself.
The base plate can be made from plastic or metal, such as stainless steel, magnesium, or aluminum.
Older floats use a metal base plate with a wooden or plastic handle attached.
The base plate is essentially the part in the middle that has the handle on top and the backing layer on the bottom.
The backing layer is what comes into contact with the plaster.
Backing layers can be made from different materials, such as rubber, wood, plastic, magnesium, or a simple sponge.
The sponge versions are often interchangeable, so you can replace the backing layer when needed without having to replace the entire float.
Different Types and Sizes?
You can find wooden floats in different sizes, so they can be used on surfaces that have differences in sizes as well.
The typical range for wooden floats is from 8” long up to 18” long.
The smaller versions are often used for smoothing out plaster and grouting, with the larger versions being used on wide surfaces to cover as much area as possible.
The larger the wooden float, the more area that can be covered, and the faster you can get the job completed.
While smaller floats are better for tighter areas where doorways, windows, or other obstacles prevent the use of a larger float.
There are also different grades for the sponges used on some wooden floats.
The smaller floats tend to use the dense grade, which makes them the most suitable on wet plaster.
What is Wooden Float Used for?
The primary purpose of a wooden float is to smooth out plaster that has been freshly poured or applied to a surface.
That surface is normally a wall or ceiling found inside a room or hallway.
You can also use the wooden float on rendered walls that are found on the outside of buildings.
The purpose is rather simple.
When the plaster is poured or applied to a surface, it can be uneven, with bumps, lumps, and dips that make for an unattractive appearance.
Plus, if the material is to be applied over the plaster, the uneven surface may cause issues as well.
The float smooths out the surface, which improves the overall appearance.
It also makes an even surface for painting or applying other materials when needed.
How to Care for Your Float Tool?
You should always clean the float after each use, and once you are done for the day, thoroughly clean and rinse the float so it can be used again.
Otherwise, you might find that any leftover plaster will set and harden on your float and make it far more difficult to remove.
If you are using a magnesium float, it is smart to wipe down the material with linseed oil every four to six weeks, even if you have not used it.
This will keep the handle from cracking and halt any corrosion that might be occurring on the blade.
Be sure to store the float in a clean place that is dry, which will avoid moisture issues.
Plus, you’ll want to keep the float out of direct sunlight to avoid any damage from ultraviolet rays.
Wondering how to use the wooden float tool correctly, check the video here…
What’s the Difference Between a Float and a Trowel?
At first glance, a wooden float and a trowel appear to be identical, at least in terms of the overall shape.
They both have handles on top, they are roughly the same size, and they are used in a similar manner.
However, there are some essential differences between both tools.
The plaster trowel is typically made from carbon or stainless steel and is used to remove or scoop wet plaster so that it can be applied to the walls or ceiling.
While a wooden float tool is used to smooth plaster that has already been applied.
It is true that you can smooth out freshly applied plaster using the trowel, but that is not its primary purpose.
In addition, the trowel has sharp edges so that it can cut edges into areas where the walls and ceiling meet, for example.
It can also cut edges around doorways, windows, and other features that will be surrounded by the plaster.
A wooden float has no such edges, so it cannot make any cuts when compared to the plaster trowel.
It is true that some plasterers do not use floats, preferring to stay with the trowel for the entire process.
There are different reasons as to why, but quite often, it is when the plaster does not need to be smoothed out to the fine degree that can be achieved with the wooden float.
What Can You Use if You Do Not Have a Float? (Alternatives)
Despite all the advantages that a float offers in smoothing out plaster, there may be times when you do not have one with you.
So, what can you use as an alternative when your float is not in your tool bag?
Plastering Sponge:
This handy sponge is primarily used to keep the wall damp so that you can apply the plaster properly.
In a pinch, you can use it to clean up the grouting.
However, because of the material, it is not possible to apply even pressure when smoothing out plaster on a wall or ceiling.
So, while you can smooth out some bumps, you may still wind up with an uneven surface if you try to apply the sponge across a wide area.
Modern Trowel:
The modern trowel crafted with plastic bodies that hold metal blades is light enough to use on plaster.
Their inherent flexibility makes them well-suited for smoothing out plaster, and you can replace the blade when needed.
However, despite its advantages, it is not quite as good compared to float in terms of smoothing out all the bumps and lumps.
Finishing Trowel:
The most common tool used in place of a float is a finishing trowel.
This is a trowel that is similar in size and shape to a float but has a thin metal base with sharp edges.
Despite its thinner base, the finishing trowel is heavier and does not glide over plaster as smoothly as a wooden float.
Feather Edge and Darby:
Besides the above, there are feather edges and darbies. These are a larger version of float.
While float works great for higher precision jobs, darby can be a good alternative for larger areas and heavy-duty tasks. A feather edge is much like a darby, but it’s more beneficial for lighter tasks.
While there is no true replacement for the float, you can smooth out smaller areas with the aforementioned tools.
If the condition of the plaster is not an issue, then you can use these alternatives if getting a smooth surface is not desirable.
However, a proper float can do the job better than any other tool when it comes to smoothing out wet plaster.
This is why so many who work with plaster carry at least one in their tool bag and have spares available for the job.

One of the best ways to clean your yard of twigs, leaves, and tree branches after a storm is to Read more
Whether you have been working with wood all your life or just getting started, having the proper tools is a Read more
It’s possible to only use hand or manual tools when woodworking, but then it becomes a slower process. For certain Read more
If you have never used this, steel wool is a collection of very thin steel wires bundled together in the Read more

Hi, I am Mark Garner a professional carpenter, woodworker, and DIY painter. I live in the small city of Peoria, Arizona as a semi-retired woodworker. I have started this blog with a simple motive to help you with my wood experience in this sector. If you like to know more about what I love doing and how it all got started, you can check more about me here.