You come across an old, rotting piece of wood on your property. You know that if you don’t take care of it soon, the rot will spread, and the wood will eventually crumble.
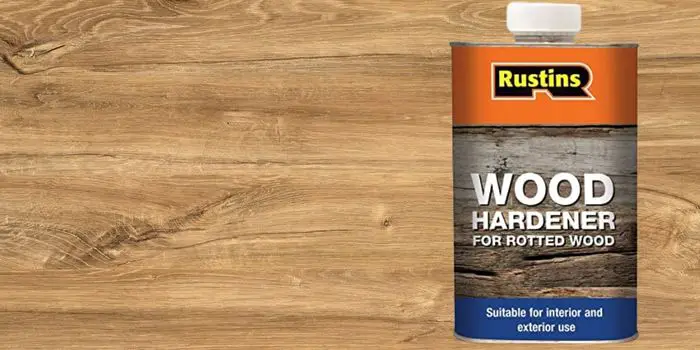
You could try to restore it yourself, but you’re not sure how. Luckily, there is a product that can help: wood hardener.
Wood hardener is a typical glue-like substance that soaks deeply into the wood pores, securing it against further rot or damage while also protecting the surface from excessive moisture.
Wood hardeners are available in aerosol spray cans and small containers or bottles that can easily be applied with a regular paintbrush.
These are solvent-based, made up of crosslinking polymers with a film-forming agent, water, and even defoamers and/or biocides. However, all these constituents in a product can vary depending on the manufacturer.
In this article, we’ll look at the best wood hardeners on the market and tips on how to use them correctly. But before that, let’s start with knowing.
Why You May Need to Harden Wood?
The primary function of hardening wood is to stop rot. If you have a piece of furniture or another structure that’s starting to show signs of decay, applying a wood hardener can help prevent the spread of rot and restore the strength of the wood.
Remember that rot can spread quickly through the wood, weakening it and eventually causing it to crumble. So, by applying a wood hardener, you can stop the rot in its tracks and restore the strength of the wood.
A wood hardener is also a fast and straightforward approach to prevent decay from the elements such as bacterial growth, insects, fungus growth, etc.
If you’re not careful, mold can damage the appearance and value of your wooden furniture and decorations.
Hardening wood can also be helpful if you’re trying to salvage a piece of wood that’s been damaged by water. Water can cause the wood to warp, swell, and crumble, but hardening it can help it retain its shape and prevent further damage.
Also, for load-bearing timber such as beams, studs, panels, etc., the use of a wood hardener is highly recommended. It could be helpful if you used it as soon as you noticed any signs of decay, such as softening, darkening, or flaking of the wood.
How to Use Wood Hardener Correctly on the Surface?
Using a wood hardener to stabilize wood is certainly not a very difficult task. Anyone can do it with the correct tools, products, and a bit of preparation.
Here is a straightforward process on how you can actually use this product.
Step 1 – Clean the Wood Surface
First, clean the area around the rot with a wire brush or similar tool to remove any loose debris, dirt, or grit along with decayed wood particles. This will help the wood hardener to penetrate the wood more easily.
Especially if you are trying to fix the rot on your wooden deck or some external wall paneling made of wood, it is necessary to clear out any oil, dirt, moss, or algae first.
These growths can prevent the hardener from soaking deep into the wood and, as a result, will not fix the rot.
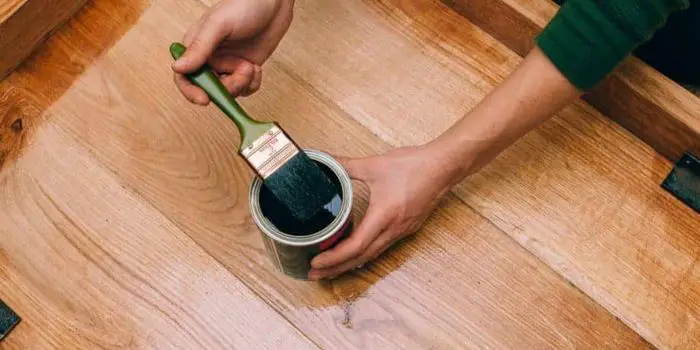
Step 2 – Apply the Wood Hardener
Once the area is clean, apply the wood hardener to the affected area using a paintbrush or sprayer.
- If you’re using a brush to apply wood hardener, make sure to get good coverage of the entire surface.
- If you’re using a wood hardener sprayer, shake the can before using it.
- Then spray it directly on the affected surface, holding it about 6-8 inches away from the surface.
- Next, apply a light, even coat while spreading it using a brush.
For a more durable finish and even coverage, apply multiple applications with the paintbrush.
Step 3 – Allow the Wood Hardener to Dry
After you’ve applied the wood hardener, allow it to dry completely. Wood hardener usually takes about 2-4 hours to seep into pores and get dried.
If for any reason, there are still some holes and cracks visible on the wood surface, you can fill them using a high-quality wood filler.
Once you have fixed all the wood and it’s completely dry, it will keep your wood intact. You can then sand, primer, paint or stain the area if desired.
Unless it’s a less important project like a small decorative box or a craft project, it’s best to use a wood hardener followed by a coat of wood primer and then paint or stain.
You should also consider applying 1-2 coats of varnish to get a protective glossy surface on the wood if that’s what you are looking for.
Additional Tips:
Always inspect your wood to see if there are any holes and cracks. If there are any cracks or holes on your wooden surface, you can repair these using a wooden filler.
While most wood hardeners can act as sealants against moisture, it is also important to use varnish or a primer for additional waterproofing and strength.
Wood hardeners like the PC-Petrifier can double as a primer so that you can apply your paint directly on top.
Can You Use a Wood Hardener on New Wood?
Yes, you can use wood hardener on new wood, as long as the purpose is to strengthen areas that are cracked, damaged, or weakened.
It doesn’t matter whether the wood is freshly milled or aged—the key factor is whether the fibers need reinforcement to restore or maintain structural integrity.
For example, if you notice minor cracks in decking boards or soft spots in plywood underlayment on a roof, applying a wood hardener can penetrate the wood and provide added stability, extending the life of the material.
However, it’s important to note that wood-hardening chemicals are not a universal fix.
Highly engineered or human-made woods that are already soft, such as certain composite boards, MDF, or particleboard, may not absorb the hardener effectively, and the treatment won’t restore their strength.
For natural wood surfaces like decking boards or plywood underlayment, though, wood hardener works best when applied to slightly damaged areas before they become severely compromised, helping maintain the wood’s durability and preventing further deterioration.
How to Remove Wood Hardeners from Surfaces?
Removing wood hardener can be easy if you use the right approach and materials.
Whether it’s on your hands, tools, clothes, or wooden surfaces, acting quickly and using the correct method will save you time and protect your finishes.
For Uncured (Wet) Hardener
If the hardener hasn’t fully set, you can remove it without too much effort:
- Hot, soapy water: Rinse the area immediately with hot, soapy water to dissolve the uncured resin.
- Rubbing alcohol: For stubborn or slightly dried spots, rub with a cloth soaked in isopropyl alcohol.
- Scraping: Once the solvent loosens the residue, use a rigid putty knife to carefully scrape away any remaining film.
For Cured (Hardened) Hardener
Once the wood hardener sets, removal takes a bit more work—but it’s still manageable:
- Acetone: Soak a rag in acetone and place it over the affected area for a few minutes to soften the hardener. Then scrape gently with a putty knife.
- Heat gun: Warm the area on a low setting until the hardener softens. Be cautious not to scorch the wood, and scrape off the residue while it’s still pliable.
- Paint stripper: For thick layers, use an epoxy-rated paint stripper. Let it sit until the surface wrinkles, then wipe or scrape it off.
- Sanding: Finish by sanding the surface smooth to remove any remaining traces and restore the natural wood texture.
Remember that working with solvents and heat requires caution, particularly when tackling larger areas of wood hardener.
So, it’s always recommended to wear gloves, eye protection, and a dust mask to protect your skin, eyes, and lungs from harmful chemicals and dust.
Additionally, make sure your workspace is well-ventilated, especially when using strong solvents like acetone, lacquer thinner, or paint stripper, to avoid inhaling toxic fumes and ensure a safer working environment.
Top Wood Hardener Picks to Stabilize the Wood Surfaces
Now that you know how to use a wood hardener product, it’s time for us to look at what to choose and what are the best products available on the market for your needs.
Here are picks for the best wood hardener that you can use to fix rotted wood and prevent further decay.
MINWAX High-Performance Wood Hardener
If you are looking for an easy-to-use wood hardener that can be applied with just a brush, then this product from Minwax is an excellent choice.
I have used it 2-3 times for wood repair, and I can’t say enough good things about it.
The high-performance wood hardener comes in a 1 Pint can that is easy to store and use. Just stir it thoroughly before use, as the ingredients tend to separate when sitting for a while.
It’s a safe, non-toxic product to use, making it ideal for both indoor and outdoor use. Since it absorbs and dries very quickly, it’s perfect for rotted wood that needs to be repaired urgently.
Also, the fact that it comes in a ready-to-use formulation makes it very convenient to use. You don’t need to mix or thin the wood hardener before using it.
The only drawback I found in this wood hardener is its thin consistency which is sometimes watery.
Unlike many other products, it’s not too thick or too runny, just in the middle, which can be a good or bad thing depending on how you look at it.
Other Alternatives
If for a few reasons, you do not like to use the MINWAX Wood Hardener product, there are plenty of other great wood hardeners available. These include:
- Elmer’s Rotted Wood Stabilizer
- Bondo Rotted Wood Restorer
- J-B WELD Wood Restore Liquid Hardener
- PC PRODUCTS PC-Petrifier Water-Based Wood Hardener
Although I haven’t used any of these other products, they all have great reviews and are worth considering.
PC Products Water-Based Wood Hardener, for example, is known for its environmentally-friendly formulation.
Bondo Rotted Wood Restorer comes with fast drying times, and it penetrates deeply into the dry-rotted wood fibers creating a solid surface.
Elmer’s Rotted Wood Stabilizer is also a great choice if you’re looking for an easy-to-use wood hardener for fixing spongy and rotted wood.
Homemade wood hardeners
There are many recipes for making homemade wood hardeners, but they usually involve mixing epoxy resin with wood flour or sawdust.
An alternative way to make homemade wood hardeners is by using water, salt, and cornstarch.
- In a container, pour 1 liter of water
- Add 300gm of salt to it and stir to dissolve
- Next, add some cornstarch/cornflour along with some egg white
- Stir the mixture thoroughly to form a thick paste that can be applied to the surface with a brush
You can also make a homemade wood hardener by mixing one part white glue with one part water in a container or cup. This mixture will not be as strong as a true wood hardener, but it will still be helpful for small repairs.
Factors You Should Consider When Choosing Your Wood Hardener
Next, it’s time to look at what factors you need to consider before choosing your wood hardener. Here are the few main most essential things:
a) Ease of Use & Drying Time:
How easy is the wood hardener to use? Does it come in a ready-to-use formulation, or do you need to mix it with other products?
Some wood hardeners are very easy to use, while others require a little more work. It’s important to choose a product that is easy to use, so you don’t waste time and money.
Depending on the size of the rotted wood area, you may also need a wood hardener that dries quickly. For example, if you are fixing a large rotted door, you will need a product that dries quickly, then you can continue working on it.
On the other hand, if you are just repairing a small crack or hole, you may not be as worried about the drying time.
b) Hardener Color & Shelf Life :
Some wood hardeners are clear, while others are tinted. The color of the hardener can be important depending on the project you are working on. For example, if you are repairing a white door, you may want to choose a clear wood hardener, so it doesn’t change the color of the door.
However, if you are repairing a piece of furniture, the color may not be as important.
How long does the wood hardener last? This is also an important consideration, especially if you use it occasionally. You don’t want to buy a wood hardener that expires before you have a chance to use it.
c) Coverage and Surface Type:
How much area does the wood hardener cover? This is an important factor to consider, especially if you are working on a large project. You don’t want to run out of wood hardeners in the middle of your project.
Also, when picking, check the type of wood surface you intend to use it on.
Most products will work better on real wood types like softwoods and hardwoods (rather than plywood, particleboard, fibreboard, etc., that are human-made).
Moreover, thicker wood hardeners are more suitable to use on wood surfaces that have crevices, grooves, or other irregularities.
Also, if you’re putting up a shed or fence, remember that splintered wood is less structurally sound than solid wood ones. So, please choose the appropriate wood hardener sealant to make sure your repairs will last when it’s exposed to rainfall, snow, or other moisture sources.
d) The Cost of Hardener:
Of course, the cost is also an important factor to consider. Wood hardeners can range in price from $10 to $50, depending on the brand and size.
It’s important to find a good product that is affordable and also effective. You don’t want to skimp on quality to save a few dollars. So, do not forget to factor in the cost when making your decision.
Wood Filler vs. Wood Glue vs. Wood Hardener – What to Choose for My Project?
Many times, people confuse wood filler, wood glue, and wood hardener—probably because they all sound like magic potions for fixing wood—but each actually works in a very different way.
Wood filler is your go-to for filling holes, gaps, or cracks in wood surfaces. Think of it as the cosmetic fix—like putting concealer on a pimple.
It’s usually made from wood fibers or sawdust mixed with a binder, and once it hardens, you can sand, paint, or stain it. Perfect for hiding imperfections, but don’t expect it to give weak wood a backbone.
Wood hardener, on the other hand, is the muscle-building supplement for your wood.
Made from penetrating resin or epoxy, it soaks deep into softened or rotting wood, hardens, and stabilizes it—basically turning flabby, weak wood into something solid enough to handle repairs.
Wood glue is like the friendly helper—it bonds pieces together. Usually made from PVA or aliphatic resin, it can penetrate slightly into the wood fibers and add some strength, but it’s no substitute for a real wood hardener.
It’s perfect for joining boards or fixing minor splits, but don’t rely on it to resurrect a seriously rotten piece of timber.
In short, wood filler hides the flaws, wood hardener strengthens the weak, and wood glue keeps things stuck together. Use the right potion for the right problem, and your wood will thank you—without any magical hocus-pocus.
FAQs
Is Minwax wood hardener waterproof?
Although it’s not a completely waterproof product and cant be used for waterproofing wood, Minwax wood hardener is perfect for repairing rotted wood as it will penetrate deep into the fibers and strengthen the wood while giving it a waterproof and weatherproof finish once you’ve painted or stained it.
Can I nail the wood after using wood hardener?
Yes, you can nail or screw wood after applying wood hardener, but timing and care are important.
After application, the hardener needs to fully cure and penetrate the wood fibers—rushing this step can cause the wood to splinter, crack, or chip, particularly in previously soft or damaged areas.
Once the hardener has cured completely, the wood becomes stronger and more stable, allowing nails or screws to hold securely without damaging the surface.
For best results, pre-drilling pilot holes is recommended, especially in thicker or denser sections, to ensure smooth and clean fastening.
Does wood need to dry before you put wet rot hardener on?
Yes, the wood needs to be dry before applying a wet rot hardener. Wet or damp wood prevents the hardener from properly penetrating the fibers, which reduces its ability to strengthen and stabilize the material.
For best results, allow the wood to dry thoroughly, then remove any loose or decayed fibers before applying the hardener. This ensures deep absorption, maximum reinforcement, and a longer-lasting repair.
Final Thoughts
So, that is everything you need to know about wood hardeners and how to use them correctly to restore a rotted piece of wood.
In my opinion, wood hardeners and wood stabilizers offer a number of benefits. They are great products to use for repairing rotted wood and preventing further damage.
But it’s important to choose the right product for your project and to consider the factors I discussed above.
With a little bit of research, you should be able to find the perfect wood hardener for your needs.

One of the best ways to clean your yard of twigs, leaves, and tree branches after a storm is to Read more
Whether you have been working with wood all your life or just getting started, having the proper tools is a Read more
It’s possible to only use hand or manual tools when woodworking, but then it becomes a slower process. For certain Read more
If you have never used this, steel wool is a collection of very thin steel wires bundled together in the Read more

Hi, I am Mark Garner a professional carpenter, woodworker, and DIY painter. I live in the small city of Peoria, Arizona as a semi-retired woodworker. I have started this blog with a simple motive to help you with my wood experience in this sector. If you like to know more about what I love doing and how it all got started, you can check more about me here.