
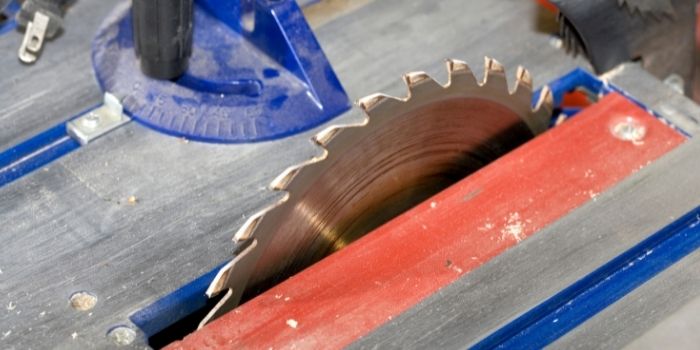
My table saw is probably my favorite device in the workshop.
I have lost track of how many precision cuts I’ve made with my table saw, but even the best brands still need a tune-up every so often.
Like any device, unless you keep the table saw in shape, it will start to lose accuracy and become subject to more breakdowns.
What follows are the important tips I have learned over the years when using my table saw.
So, you should approach a tune-up with confidence when you know what to do.
Prepare Before Tune-Up
First and foremost, you will need to keep safety at the front of your mind.
The last thing you want to do is overlook something obvious that puts you in danger.
a) Be Safe:
Keep in mind that a device that can easily cut through wood can also cut through you.
So, make sure that when you fine-tune your table saw that you do everything by the book and use caution.
The next step is cutting off the power to the table saw before you perform any adjustments.
This means unplugging it from the wall or disconnecting the battery.
This ensures that the saw will not turn on accidentally while you are working on it.
If your table saw has lockout tabs that prevent an accidental start-up, then engage those as well so you can make final checks before turning the saw on.
Even though the power is off, be sure to wear the proper eye and ear protection just in case.
Plus, you will need to use a respirator as you tune up the table saw to keep any particles from entering your lungs.
Check the safety gear first before using it.
b) Clean:
Next, cleaning up the table saw is a good idea.
This gets all the dust and debris out of the way so you can focus on taking care of your table saw.
Once you have removed all the debris, check to see if there is any rust on the table saw.
This will need to be addressed before you can move forward. By removing the rust now and cleaning away the dust, you may prevent further issues from occurring.
Check the knobs, blades, and levers to ensure that they are operating smoothly.
Quite often, dust and debris get inside which inhibits their performance.
By removing them, you not only improve how they function you also eliminate a potential heat source.
Clean away any grime and buildup before you take the next step.
c) Tools:
And finally, gather all the tools needed before you get started.
This will save time and effort when doing the tune-up.
You will need wrenches to remove the saw blade and screwdrivers to tighten any bolts that may be present.
Do not forget the squares and angle gauge to help make the alignments easier to make.
Plus, you should gather all cleaning supplies that may be needed once the tune-up is complete.
Clean water, dry towels, and rags can be quite handy when assisting in your clean-up efforts.
Just remember to wipe down any metal parts that become wet so that rust does not form.
Once you have completed the tune-up, you should have some scrap wood around to test the results.

7 Things You Need to Set Up and Align
When you are ready with all your preparations, it’s time for you to start with the tune-up process.
Personally, I go through the 7 important things to get the things aligned. These include…
1- Table Extensions
The extensions allow you to create flat cuts on large surfaces.
Otherwise, if the excess hangs over the edge you are likely to get a beveled cut.
Start the tune-up by using a level to ensure that the extensions are flat and provide an even surface.
2- Throatplate
The next step in tuning the table saw is to adjust the throatplate.
This is a crucial piece that is essential as part of the safety equipment.
But if it sticks above the table, it can cause the cuts to go awry.
So, place a piece of flat wood perpendicular to the miter slots.
Run it across the throat plate.
If it catches, then you will need to adjust the throatplate until it is even or slightly under the tabletop.
3- Check the Saw Blade
If the blade is not in good condition, it will affect the cuts you make.
Start by cleaning the blade and examining it for any defects.
Ensure that the teeth are aligned and properly sharpened.
And then you’ll want to check the blade for any wobbling. You can spin the blade by hand or turn on the table saw.
If the blade is damaged or dull, replace it.
4- Straighten the Saw Blade
A saw blade that is not perpendicular to the table will make crooked cuts.
It may also cause kickbacks which can create an unsafe working environment.
You can check the alignment by extending the blade to its highest point and inserting a combination square in the slot.
The square should be extended so that it touches the top tooth of the blade.
Rotate the blade so the top tooth is at the level of the tabletop.
If it is not aligned, you will see the difference as it passes the square.
Adjust the blade so that it is perfectly straight-up using the combination square.
5- Bevel Stops
It’s important to check the bevel stops on your table saw.
The two angles that I use more than any other are 90-degrees and 45-degrees.
If you check both points and they are aligned properly, then the rest of the angles should be good as well.
This is where you use your angle gauge on the saw blade at both angles.
Make sure they match the gauge and the table saw indicator.
You can run a test using scrap wood to ensure that the angles match.
6- Splitter/Riving Knife Alignment
The splitter attachment prevents kickbacks from happening.
But only if it is aligned properly.
Place your straight edge across the splitter and blade at the same time and then check both sides.
If you need to make any adjustments, do so at this time.
7- Rip Fence
This is the accessory I use more than any other with my table saw.
If the rip fence is not aligned properly, it shows up in my work.
Find a straight edge as long as the rip fence.
Stand it up in the miter slot alongside the wall nearest to the rip fence.
Push the rip fence into the straight edge and look down its length.
If it does not make full contact along the entire edge, then make the necessary adjustments.
Below is a wonderful table saw tuning and setting up a video that can help. You should definitely check this out…
When Should You Plan for Your Table Saw Tune-Up?
For those who are experienced, knowing when a table saw needs a tune-up becomes obvious.
This is because any issues generally start small with the feel of the wood being pushed through the saw blade.
Once it starts taking longer ger to make cuts, that means something may be wrong with the table saw itself.
You can see the cuts starting to drift, edges that are not as smooth, and final cuts that are not aligned call for a tune-up.
For those who do not have the experience, it may be less obvious to know when a tune-up is needed.
So, what follows are some guidelines that will help you know when a tune-up is needed.
A tune-up from the start
If you have just purchased a table saw, then you are ready to make your first tune-up.
For new table saws, you can skip the clean-up phase, but you will need to ensure that everything is ready and working probably before you start to use it.
The tune-up should include all the accessories such as jigs, fences, and miter gauges.
Plus, you will need to check the alignment of the saw blade as well.
Doing a tune-up with a new or used table saw before putting it into operation is always a good idea because you can spot damage or other potential issues that might fall under your warranty.
If it’s cutting slow
Another time to do a tune-up using your table saw tune-up kit is when you notice the blade is not cutting the lumber as fast as it should.
It is possible the blade may be dirty, not be aligned properly, or that the teeth are starting to dull.
If it is the alignment, then also check the miter gauge, jig, or fence.
Once that is cleared, then look at the blade guard, riving knives, and throat plate to ensure that they are in place, so they do not shift the lumber as it is being cut.
If there is an alignment issue
When you start noticing issues with the accuracy of the cuts, then you need to do a tune-up.
You should frequently check the alignment of the blade which only takes a few seconds.
It’s a good idea to change out the saw blades on a regular basis.
Be sure they are aligned in a parallel fashion to the miter slots.
The blade itself needs to be perpendicular to the table.
The jig, fence, and miter gauge also play a role in alignment issues, so be sure to check them as well.
But something that does get overlooked is the spindle between the saw blade and electric motor – any variance and this will offset the cuts you are making.
If it’s time for your scheduled maintenance
Although you should tune up your table saw when first noticing any issues, you should also schedule proper maintenance as well.
And make sure you do not mix the schedule.
This may catch potential problems before they become big issues.
For the casual hobbyist, an annual tune-up will probably be fine.
If you use your table saw more frequently, then every three months is recommended.
If you are a professional that uses the table saw daily, then a once per month maintenance and tune-up is recommended.
Why Do I Tune Up My Table Saw on a Regular Basis?
I tend to tune up my table saw every so often to catch any minor slips.
A good tune-up can prevent potential issues from arising as well. This means that my work tends to be sharp and precise time after time.
There is no set schedule I use to tune up my table saw.
But after a big job or if I haven’t done a tune-up in a while I will go ahead and schedule on a day that I’m not doing anything else.
A proper tune-up does not take that long, but I do not like being distracted by a big job I have to do that day, so a tune-up is performed the day before.
I’ll also do frequent checks and clean-ups to prevent any debris from causing issues with my table saw as well.
This means a wipe down after a job is complete or when the sawdust starts to really build up.
And, if I start noticing any issues such as cuts that are not quite that clean or angled when they should be straight, then I stop to make the proper adjustments.
Always be safe. I’d rather go slower and have all 10 fingers than go faster and risk not having them all.
Be safe and take enough time to do a tune-up properly with your table saw.
Share the post "How to Fine Tune a Table Saw (Tune-up Tips and Adjustments)"

One of the best ways to clean your yard of twigs, leaves, and tree branches after a storm is to Read more

Whether you have been working with wood all your life or just getting started, having the proper tools is a Read more
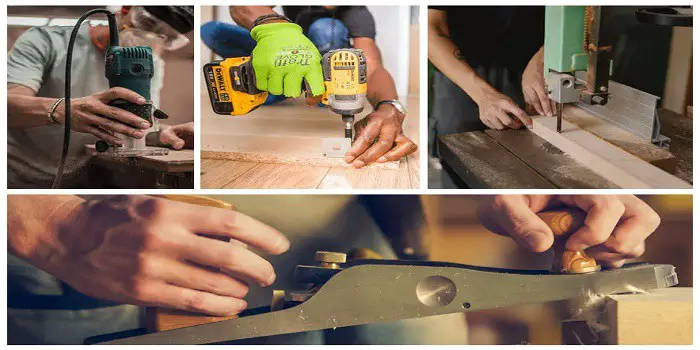
It’s possible to only use hand or manual tools when woodworking, but then it becomes a slower process. For certain Read more

If you have never used this, steel wool is a collection of very thin steel wires bundled together in the Read more

Hi, I am Mark Garner a professional carpenter, woodworker, and DIY painter. I live in the small city of Peoria, Arizona as a semi-retired woodworker. I have started this blog with a simple motive to help you with my wood experience in this sector. If you like to know more about what I love doing and how it all got started, you can check more about me here.