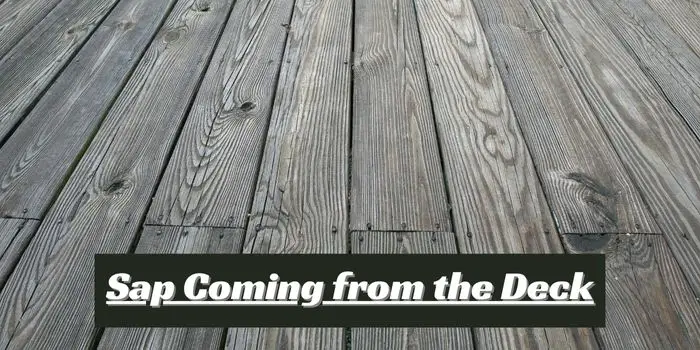
If you’ve ever stepped out onto your deck on a warm day only to find sticky spots clinging to your shoes, you’ve met one of wood’s most stubborn little habits—sap.
It’s nature’s way of protecting the tree, but once that wood becomes your deck boards, that slow, shiny ooze can quickly turn a beautiful outdoor space into a sticky situation.
I’ve dealt with this myself more than once, and let’s just say—scraping it off every weekend isn’t exactly anyone’s idea of relaxing deck maintenance.
The best way to handle sap coming out of deck boards is to treat the wood with methods that involve scraping away the sap as it shows up and reapplying any oiling or drying agents you think could help.
But wait, the process isn’t as simple as it sounds. You will need to do it right, so the problem doesn’t arise anytime soon.
So, allow me to walk through the step-by-step process that can make removing sap from deck boards effortless and effective.
Removing the Sap from the Deck Boards
The sap (pitch) is how the tree moves nutrients through itself, so there is no escaping wood with sap.
The truth is, sap doesn’t just appear out of nowhere. Heat, sunlight, and natural pressure inside softwoods push resin to the surface, especially in boards that weren’t fully seasoned.
The result is glossy amber beads that attract dust, stain the wood, and test the patience of even the most dedicated DIY homeowner.
Fortunately, there are a few steps you can follow to stop this from happening. Here are they…
Step 1 – Crystallize the sap
Before you can begin to remove the sap, it must be dried and hardened.
To harden and easily remove tree sap, use the crystallizing technique. To reach the desired outcome, use a heat gun.
Some saps and woods can withstand higher temperatures and longer drying times, so it is critical to determine the type of wood you are working with before applying heat.
As a precaution, start heating at 120-140°F, then gradually increase if the specific wood allows it; this will ensure that your sap slowly hardens as opposed to rapidly solidifying.
Remember that trying to clean the wet sap off wooden surfaces may even make the problem worse, as it could potentially spread the residue in an almost transparent film.
To ensure this isn’t the case, check that all sap oozing from the wood has become dry and brittle; if still sticky or moist, then it won’t be easy to clean off of surfaces.
Step 2 – Remove the dried sap crystals
Once the sap has dried, you must take extra care in removing it from your wood surfaces.
For larger clusters of crystals, simply use your hands to pick them off with ease.
However, for smaller or more tightly-gripped areas that prove too stubborn for manual removal methods, a putty knife or chisel can help chip away at the sap residue without damaging the surface of the wood beneath it.
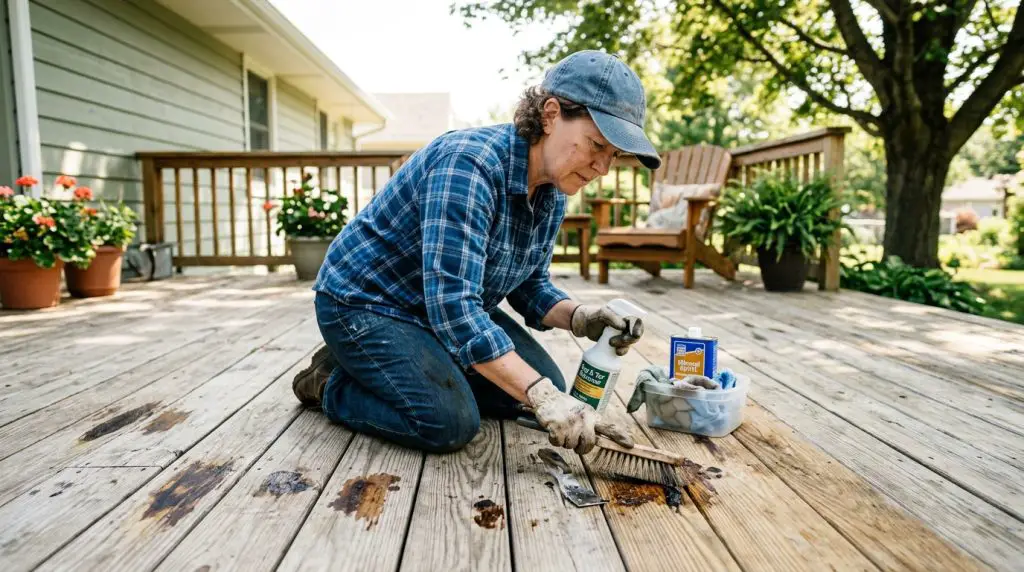
Step 3 – Clean the sap residues from the wood surface
Even at this stage, there can be sap coming out of the wood as a fluid or gummy sap that hasn’t crystallized.
So, after removing the maximum sap crystals, it’s good to use a solvent such as turpentine to clean the remaining sap.
Alternatively, you can use alcohol-based solvents such as hand sanitizer, mineral oil, wax, or varnish removers, etc.
Start by liberally applying the solvent to all the discolored areas on your wood.
Allow it to sink in for several minutes, and then move a coarse sponge around those same spots until any visible residues are gone.
Follow up with a damp cloth dipped in more chemical solution – this should give you a clean surface after wiping everything clean.
Finally, leave your treated wooden surface for a few hours to dry properly before use.
Step 4 – Sand and clean again to get rid of sap residues
Once you have thoroughly cleaned the sap resin from the wood, use 240 grit sandpaper to sand the surface down.
Sanding is an essential step in the preparation of wood for sealing, as it smoothens and eliminates marks or scratches that may have been incurred during cleaning.
After sanding has been completed, use a cloth to wipe away any dust from the surface – if you are dealing with larger areas, then a vacuum should be used instead.
Keep in mind: sealers will not adhere properly to surfaces that still contain dust particles.
Step 5 – Seal to prevent the sap from bleeding again in the future
Everything that has been done so far only sets the stage for sealing.
Without taking this crucial step, sap will still seep through even after thoroughly cleaning the wood surface – treating merely the symptoms, not curbing the real issue.
So, sealing is essential to prevent future issues from arising and ensure long-term success.
Shellac-based sealers are usually preferred as they can be applied in a layer over bare wood better than other types.
For maximum protection, you may consider staining the surface before sealing. While not entirely foolproof, staining and then sealing can help ensure the best results.
Especially in regions with cold or humid climates, this method will provide a better quality seal than using just sealant alone.
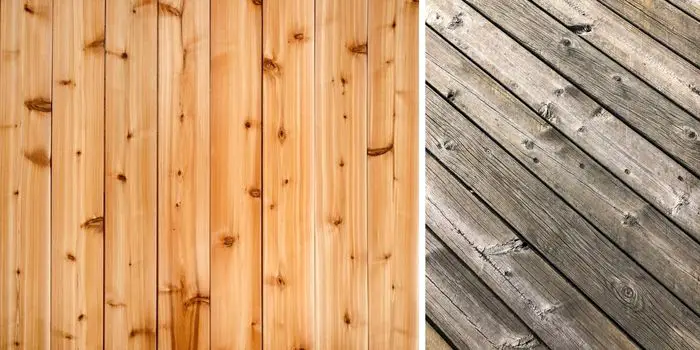
What Kind of Wood Produces the Sap Most?
All types of wood have sap in them to some degree or another – pine and fir are the biggest offenders.
Because all trees have sap, you can expect that any piece of wood you use will also possess sap to some extent.
In general, these types of wood also contain and ooze out the sap fluid, most…
a) Fresh wood – You will notice that fresh wood will start to seep sap within only a few days of use.
b) Untreated wood – When preparing wood, many chemicals are used in the process.
If any step in the treatment process has not been correctly done, you will notice there is sap in the wood.
c) Incorrectly dried wood – Drying is done either in a kiln or in the sun. If the wood has not been dried properly, the sap will begin to ooze.
d) Wood that’s not dried long enough – Some types of wood have to be left longer to dry than others, and this is something that is determined by the kind of wood.
If whoever prepared your wood isn’t aware of this and does not allow it to sit as long as it needs to, you will notice that the wood will ooze sap.
Can You Paint or Stain Over Deck Boards with Sap?
You can paint right over the sap fluid, but it may make the paint look bumpy. And as time moves forward, the paint may begin to bubble and peel due to the sap.
Also, you can stain the wood if you notice that sap is seeping out, but the parts of the wood where the sap has already begun to congeal won’t look the same as the smooth wood areas.
When there is an extreme case of sap, it could even cause large areas of the wood to remain unstained, creating an unattractive blotchy look.
To avoid this, it’s good first to sand the wood to remove any congealed sap and then apply the paint or stain to the wood.
While this will finish the wood the way you want, it won’t prevent more sap from showing up later down the line.
Mistakes to Avoid When Removing Dried Pitch from the Deck
Removing sticky pitch from deck boards seems simple, but a few common mistakes can actually make the problem worse—or even damage the wood.
Here are some things many homeowners unknowingly do that backfire.
1. Scraping Too Aggressively
Many people attack dried pitch with metal scrapers or knives.
While it might remove the surface residue, it often gouges the wood and exposes fresh pockets of bleeding sap or resin beneath the surface. This can cause even more sap to appear later.
2. Cleaning It While It’s Still Fresh
It feels logical to wipe off sticky green sap immediately, but doing so often just spreads it deeper into the wood grain.
Instead of removing it, you end up creating larger sticky patches that are harder to clean later.
3. Using Harsh Solvents Without Testing
Some homeowners try strong chemicals to dissolve stubborn pine sap, assuming stronger means better.
In reality, harsh solvents can discolor deck boards or strip protective finishes, leaving the wood more vulnerable to future sap seepage.
4. Ignoring the Type of Wood
Not all decks behave the same. Pitch problems are common with treated lumber, and using the wrong cleaning method can weaken the protective treatment.
Gentle removal methods and sealing afterward work much better.
5. Thinking All Sap Is the Same
Sometimes people assume every sticky spot is from the deck boards themselves.
In reality, debris like fallen pine cone sap can melt in the sun and stick to the deck surface, leading homeowners to treat a surface stain as if it were a deep wood issue.
Avoiding these mistakes not only protects your deck boards from rotting but also saves you time and frustration when dealing with stubborn pitch.
How to Stop Wood and New Deck Boards from Leaking the Sticky Sap?
Sap leaks are common in softwood decks, especially during the first few warm seasons after installation.
If you handle the problem correctly early on, you can prevent those annoying sticky spots from becoming a long-term issue.
1. Allow the Wood to Fully Cure
Fresh deck boards often release resin when exposed to heat and sunlight. The best first step is patience.
Let the boards go through a full warm season so the excess sap naturally works its way out before applying any heavy treatments.
2. Clean and Seal the Sap Pockets
Once the sticky resin hardens, gently remove it and clean the area. After the surface is dry, apply a high-quality deck sealer.
Sealing the wood helps close the pores and is one of the most effective ways to stop pine sap on new deck boards from repeatedly surfacing.
3. Lightly Sand Problem Areas
If a particular spot keeps leaking, lightly sanding that section can open the surface and remove resin buildup.
This often solves the issue when a single leaky board on the deck keeps creating sticky patches.
4. Use a Stain or Resin-Blocking Sealer
Certain deck stains and primers are designed to lock in natural resins.
Applying a resin-blocking finish can significantly reduce future sap seepage and protect the wood from heat-related bleeding.
5. Keep the Deck Cooler and Maintained
Direct sunlight and high heat push sap to the surface faster.
Regular cleaning, re-sealing, and even adding shade (like pergolas or umbrellas) can help reduce temperature stress on the wood and minimize sap leakage.
Related FAQs
Will sap cause a composite deck to damage?
Sap usually won’t permanently damage a composite deck, but it can create sticky spots and stains if left for long periods.
Composite decking materials—such as those made by brands like Trex—are designed to resist moisture and organic substances better than natural wood.
However, sap can attract dirt and may leave discoloration if it bakes in the sun. Prompt cleaning helps maintain the deck’s appearance.
Regular maintenance, such as gentle washing and removing debris, keeps composite boards looking clean and prevents long-term surface staining.
What solution is best to get rid of sap from the deck?
The best way to remove sap from a deck is to start with warm soapy water and a soft brush.
For stubborn spots, rubbing alcohol, mineral spirits, or a deck cleaner designed for composite or wood surfaces can break down the sticky residue.
Apply the solution, let it sit briefly, then gently scrub and rinse with water. Avoid harsh chemicals that could damage finishes.
Commercial cleaners from brands like Simple Green can also work effectively when used according to instructions.
What causes a new wood deck to weep pitch after staining?
A new wood deck may weep pitch (sap) after staining because heat draws resin out of the wood’s natural pockets.
Softwoods like pine or fir contain resin canals, and when the sun warms the boards, the trapped pitch expands and pushes to the surface.
If the wood was stained before it fully dried or cured, the problem can become more noticeable.
Over time, the resin flow usually decreases. Cleaning the surface and lightly sanding affected areas can help before applying another finish coat if needed.
Final Thoughts
While unfinished wood is most susceptible, there are many reasons why sap (pitch) might come from finished wood.
If, for example, you used green wood that has not been adequately dried, the sap can get stuck in the little crevices and eventually seep through the exterior.
For this reason, the standard practice for woodworking and preventing the sap is to allow the wood to dry completely, either in the sun or in a kiln, before moving on.
If you still see the sap on wood beams or deck boards, follow the steps above to get it off completely.
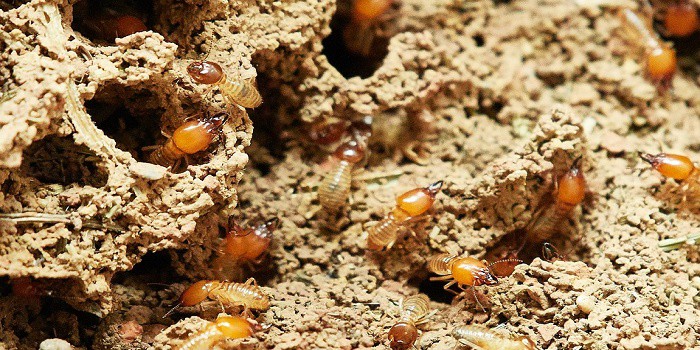
Termites are recognized as one of the most troublesome pests all over the world. They are small and numerous and Read more

Our bedroom is a special place where we find relaxation and refresh after a hard day of toil - the Read more

Let’s be honest: buying a sofa is a bit like dating. In the beginning, it’s all about the looks. You Read more

Wooden furniture, trims, doors, and windows are so long-lasting that you can easily repair and reuse them even after they Read more

Hi, I am Mark Garner a professional carpenter, woodworker, and DIY painter. I live in the small city of Peoria, Arizona as a semi-retired woodworker. I have started this blog with a simple motive to help you with my wood experience in this sector. If you like to know more about what I love doing and how it all got started, you can check more about me here.