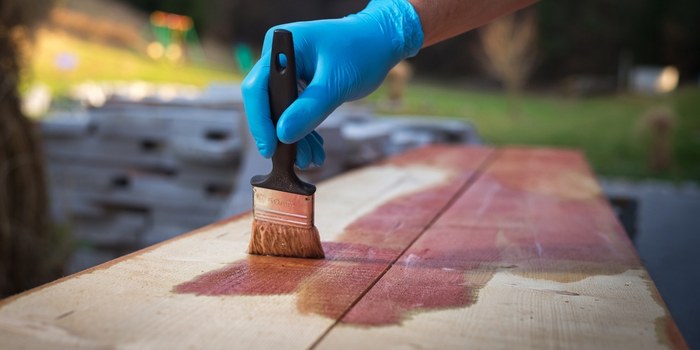
Neither poplar nor pine holds regular wood stains well. Wood stains will need to get soaked into the wood for more prominent results. But both these wood varieties don’t accept the wood stain and are therefore tricky to finish with a wood stain.
Poplar wood is soft and porous, whereas pine (both white pine and yellow pine) comes with dark knots and uneven grains that make it hard to produce a consistent finish when staining.
Trying to stain these woods results in uneven stain penetration with a dull, splotchy surface. You can, however, achieve a similar look by painting or whitewashing the wood.
If you are set on using either poplar or pine for your next staining project, we recommend using a pre-stain conditioner. It will help the stain to penetrate the wood and avoid that splotchy, uneven finish.
Below, I will walk through how to stain poplar and pine wood furniture.
And later will also discuss a few differences between these two wood varieties, which can help if you’re trying to decide which one to use for your next woodworking project.
Staining Poplar and Pine
To stain poplar wood, you will need the following:
- Pre-stain conditioner
- Clean rag
- Lint-free cloth
- Fine grit sandpaper
- Your chosen wood stain (gel stain)
Once you have all the materials, here are the detailed steps.
Step 1. Cleaning the Wood Surface
First, clean the wood surface with a clean rag. Make sure to remove any dirt, dust, or debris sticking to the surface.
Depending on the dirt, you can use a vacuum or a dampened cloth to eliminate all the dirt and grime.
Step 2. Sand the Wood
Next, with fine-grit sandpaper, lightly sand your poplar or pine wood surface in the direction of the grain. It will help to create a smooth surface for staining.
Do not use coarse grit sandpaper as it will damage the soft wood if you’re not sure about the direction of the grain; always sand in the direction from the center of the board outwards.
Step 3. Applying Pre-stain Conditioner
After the surface is clean and sanded, it’s time to apply a pre-stain conditioner to prepare pine or poplar wood for staining.
It will help the stain to penetrate the wood and avoid that blotchy, uneven finish.
To apply the conditioner, use a clean cloth or lint-free rag and follow the manufacturer’s instructions. Once you have applied the pre-stain conditioner, let it dry for about 15-30 minutes.
Step 4. Applying the Wood Stain
After the pre-stain conditioner has dried, it’s time to apply the wood stain. For best results, use a gel stain by Minwax, which will give you more control over the application and help avoid any dripping or running.
Again, use a clean cloth or lint-free rag to apply the gel stain and follow the manufacturer’s instructions.
After you have applied the gel stain, allow it to dry for about 2-4 hours.
Depending on the finish and darkness of a color, you may need to apply one or two additional coats of gel stain. Apply them only once the previous coat has completely dried for 2-4 hours.
Step 5. Apply a Top Coat
After the stain has dried, you can apply a top coat to protect the poplar or pine wood and give it a glossy finish. For this, we recommend using Minwax Polycrylic Protective Finish.
To apply the Polycrylic, use a clean cloth or lint-free rag and follow the manufacturer’s instructions.
After you have applied the Polycrylic, allow it to dry for the time specified by the manufacturer. This is usually about 2-4 hours.

Does Pine or Poplar Stain Better?
Poplar is a much better option for staining than pine. Pine is a very soft wood that tends to absorb stains unevenly, resulting in a blotchy and uneven finish.
Poplar, on the other hand, is relatively hard and will accept stains evenly compared to pine.
With that said, if you plan to use a dark-colored stain on your furniture, it’s better to choose pine wood than poplar. Poplar is a light-colored wood that will show through the dark stain more than pine.
When staining poplar or pine furniture, it’s always best to test the stain on a small inconspicuous area and see how it will look before applying it to the entire piece.
What Wood Stains Can You Use on Poplar and Pine?
The most common wood stains used on poplar and pine are gel stains. Gel stains are easy to control and don’t run or drip like other stains. This also makes them ideal for staining vertical surfaces such as furniture.
Minwax is a leading brand of wood stains and gel stains. Another popular option is Varathane which is getting high in demand in countries like the US.
These brands offer a wide range of colors to choose from, such as dark walnut, cherry, ebony, mahogany, etc.
You can also find specialty colors like weathered gray if you want to give your furniture a rustic look.
Pine vs. Poplar – Which is Better for Woodworking Projects?
Poplar is a deciduous tree (like oak), and pine is an evergreen. Both of them come in different species.
As for the woodworking projects, both of these woods have their own advantages and disadvantages.
Let’s have a look at them while comparing the woods below.
Poplar is simpler to work with than pine. But if it’s the cost factor – pine is generally regarded to be the cheapest wood for making furniture, cabinets, fences, and numerous other applications.
Pine is also considered to be better than poplar in terms of durability. Poplar is less resistant to scratching and denting.
Poplar, on the other hand, is lighter, and it comes with lesser sap and fewer knots. So, compared to pine, you need not deal with these issues in woodworking when working with poplar.
Hardness & Strength
When it comes to warping and twisting, both these kinds of wood are not so strong. Despite being hardwood, poplar is among the softest hardwoods that can dent or bend.
Pine is, although hardwood, there are certain species that are known to be significantly harder than poplar.
When compared closely, poplar is known to be more dimensionally stable than pine because of its higher hardness rating.
| Wood Type | Janka Hardness Rating |
| Yellow poplar | 540 lbf |
| White poplar | 410 lbf |
| Balsam Poplar | 300 lbf |
| Longleaf Pine | 870 lbf |
| Radiata pine | 710 lbf |
| Scots pine | 540 lbf |
| Eastern white pine | 380 lbf |
Moisture & Density
Poplar is also a winner among both because of its lower moisture content and lower density (and hence lighter weight).
This can be especially useful where you may need to consider the weight of the finished product – like with shelves, drawers, wooden chests, etc.
Pine being sturdier and heavier, furniture made of pine will comparatively have more weight and are not as easy to move around if you need to rearrange your home.
The lower density of poplar wood also means that it’s pretty easy to work with whether you are using handheld tools or machines for carving, trimming, or making furniture.
Stained Poplar Or Pine – Which Wood is Better to Use Outdoors?
Both pine and poplar are not very resistant to rot and decay. So, they both are not good candidates for outdoor use.
If, however, you want to use it, you can go ahead with a good surface treatment.
When you are comparing the two types of lumber, pine is slightly more durable than poplar outdoors; moreover, if it’s pressure-treated pine, it’s a better candidate for construction-grade lumber.
So, if you are looking for wood to use in an outdoor project that will be painted, I would say pine would be the better choice.
Final Thoughts – Pine vs. Poplar Wood – What to Use?
So, what is the better lumber to use for your woodworking project – pine or poplar? This depends on what you are looking for.
- Do you need a light and cheap wood that is easy to work with? Then go for Poplar.
- Do you need to stain the wood? Neither will stain well, use the paint or pretreat the lumber with conditioner.
- Do you want a heavier and denser wood that is a bit more challenging to work with but is cheaper? Then go for pine.
- Do you need wood that is durable and strong? If so, then pine is the better choice.
At last, it all comes down to your personal preferences and what you need for your project. Whatever lumber you choose, just ensure you take proper precautions while working with it.

Hi, I am Mark Garner a professional carpenter, woodworker, and DIY painter. I live in the small city of Peoria, Arizona as a semi-retired woodworker. I have started this blog with a simple motive to help you with my wood experience in this sector. If you like to know more about what I love doing and how it all got started, you can check more about me here.


