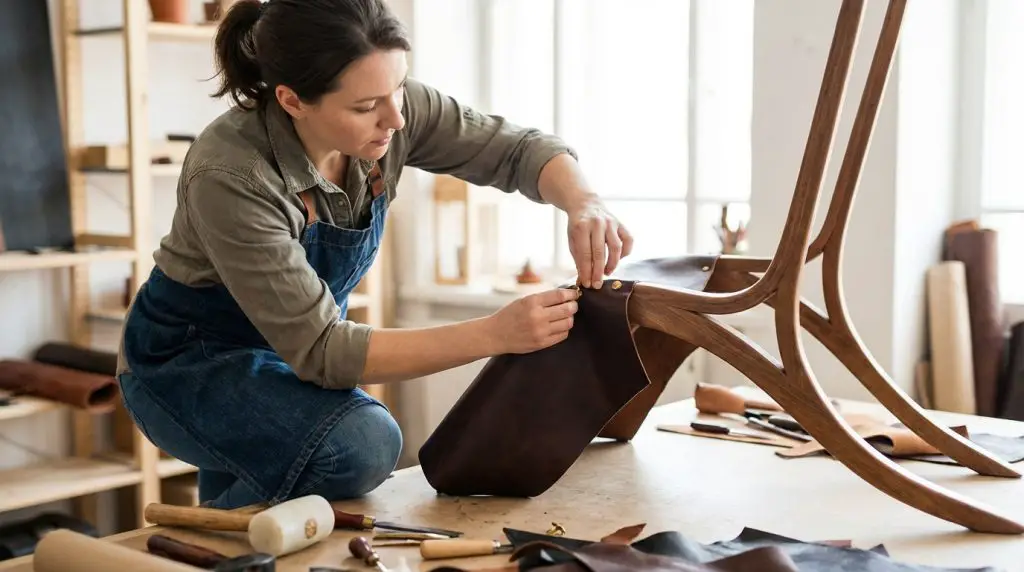
Whether you’re crafting a bespoke valet tray or finally fixing that heirloom chair, marrying leather to wood is a bit like a high-stakes first date: if the chemistry isn’t there, things are going to fall apart pretty quickly.
Leather is organic and flexible; wood is rigid and stubborn.
To get them to stay together through thick and thin, you need more than just a “sticky situation”—you need the right science and a few trade secrets.
In this guide, we’re skipping the “hope and a prayer” method.
We’ll dive into the specific adhesives that actually hold, how to prep your surfaces so they don’t reject each other, and the expert techniques that separate a masterwork from a DIY disaster.
5 Best Glues for Leather to Wood Project
When bonding leather to wood, the challenge isn’t just sticking two materials together—it’s managing the interaction between a porous, fibrous organic material (leather) and a rigid, often porous but dimensionally stable substrate (wood).
The adhesive must accommodate surface porosity, differential expansion, and shear stress without becoming brittle or failing over time.
Below are several adhesives that consistently perform well for this application. They’re listed alphabetically, not by ranking.
1. Barge All‑Purpose TF Cement
If there were a “classic” adhesive in leathercraft, Barge would probably hold the title.
This solvent-based contact cement has been used by cobblers, upholsterers, and leatherworkers for more than 70 years, and for good reason.
The TF (“toluene-free”) formulation replaces harsher solvents while maintaining the adhesive’s hallmark high initial tack and flexible bond line.
Contact cements work differently from typical glues: both surfaces are coated, allowed to partially dry until tacky, and then pressed together. Once contact is made, the bond forms almost instantly.
From a technical standpoint, this adhesive excels because it:
- Penetrates leather fibers and wood grain, creating strong mechanical adhesion
- Maintains flexibility, preventing bond failure when leather flexes
- Resists delamination under shear stress
For leather-to-wood projects such as desk inlays, furniture upholstery, or leather-wrapped panels, Barge remains one of the most reliable choices.
2. Glue Masters Industrial Grade
Glue Masters Industrial Grade Cyanoacrylate Super Glue is based on cyanoacrylate (CA) chemistry—the same fast-curing polymer family commonly known as “super glue.”
Cyanoacrylates cure via moisture-activated polymerization, forming long molecular chains that create a rigid, high-strength bond.
The Glue Masters formulation is slightly thicker than typical CA adhesives, which improves gap-filling ability and application control.
Key technical advantages include:
- Extremely fast curing (often seconds)
- High tensile strength once fully polymerized
- Good adhesion to leather, wood, ceramics, and plastics
However, CA adhesives cure rigid rather than flexible, which means they’re best suited for small bonding areas, edge repairs, or precision work rather than large flexible leather panels.
As a bonus, the same adhesive can handle quick repairs on items like ceramics, shoe components, and small hardware.
3. Loctite Super Glue Brush On
Backed by the adhesive expertise of Henkel, the Loctite brand has been a mainstay in industrial bonding solutions for decades.
The brush-on applicator is particularly useful when working with materials like leather, where controlled, even coverage prevents glue saturation or stiff spots in the hide.
Technically speaking, this adhesive:
- Uses a liquid cyanoacrylate formulation
- Bonds effectively with porous and semi-porous substrates
- Provides good resistance to humidity and moderate temperature fluctuations
The brush applicator also reduces the common CA problem of over-application, which can lead to brittle glue lines.
For leather-to-wood work, it’s best suited for small surface areas, trim pieces, or quick assembly tasks rather than large upholstery bonds.
4. Gorilla Super Glue Gel
The gel formulation of Gorilla’s super glue addresses one of the common frustrations with cyanoacrylates: runny consistency.
By increasing viscosity, the gel:
- Prevents dripping and migration into unwanted areas
- Improves gap filling on uneven surfaces
- Allows better control when bonding vertical or irregular surfaces
Like other CA adhesives, it sets rapidly—often within 10–30 seconds—and cures into a strong polymer bond.
The cured adhesive dries clear and stain-free, which helps preserve the appearance of natural leather and finished wood surfaces.
That said, similar to other cyanoacrylates, it creates a rigid bond line, so it performs best for small joints, decorative elements, or spot repairs rather than flexible assemblies.
5. Titebond III Ultimate Wood Glue
Manufactured by Franklin International, Titebond III is widely regarded as one of the best PVA-based (polyvinyl acetate) wood glues available.
While primarily engineered for wood-to-wood bonding, its water-resistant cross-linking PVA formula can also bond well to porous materials such as leather and fabrics, particleboard, hardboard, etc.
Technically, the adhesive offers:
- Type I waterproof rating (ANSI/HPVA)
- Longer open time than many wood glues, allowing repositioning
- Strong creep resistance once cured
- Easy water cleanup before curing
Unlike contact cement, Titebond III usually requires clamping pressure while curing to achieve optimal adhesion. It also works best when the leather surface is roughened slightly so the glue can penetrate the fibers.
This adhesive is particularly useful for large leather-to-wood laminations, such as leather desk tops, panels, and decorative furniture surfaces.
Gluing Leather to Wood: Step-by-Step Instructions
Bonding leather to wood is not quite the same as gluing two pieces of timber together.
Leather is flexible, slightly oily, and often finished with dyes or sealants, while wood is porous and rigid.
Because of this mismatch, the bond relies less on brute adhesive strength and more on proper surface preparation and the right type of glue.
In most professional shops, contact cement is the adhesive of choice when it comes to bonding leather to wood.
Unlike standard PVA wood glue, contact cement creates an instant, flexible bond that tolerates the natural movement of leather without peeling or cracking.
But remember, even the best adhesive will fail if the surfaces aren’t properly prepared. So, here’s the process that gives the most reliable results.
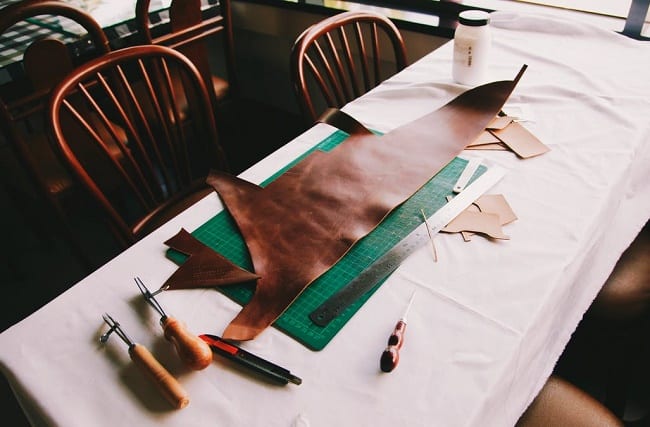
Step 1: Prepare (and lightly roughen) the leather
Flip the leather over and work on the flesh side—the fibrous backside of the hide.
Using medium-grit sandpaper (around 120–150 grit), lightly scuff the surface.
The goal isn’t to remove material but to raise the nap and create micro-abrasion so the adhesive can mechanically grip the fibers.
If the leather has a heavily finished or sealed back, this step becomes even more important.
After sanding, wipe the surface with a dry cloth or a small amount of isopropyl alcohol to remove dust and oils.
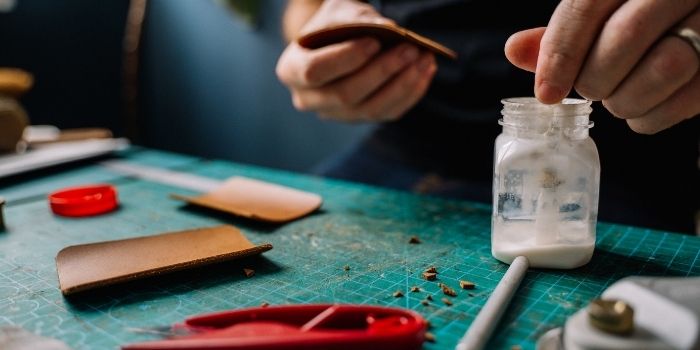
Step 2: Apply contact cement to the leather
Brush or spread a thin, even coat of contact cement onto the prepared side of the leather.
Professional contact adhesives work by solvent evaporation, not pressure curing.
That means the glue must be allowed to flash off until it becomes dry to the touch but still tacky—usually about 10–20 minutes, depending on the brand and humidity.
If the leather is very porous, a second thin coat can help create a stronger bond. Allow it to become tacky again before assembly.
Step 3: Apply contact cement to the wood
Apply the same thin, even layer of contact cement to the wood surface.
Wood, being porous, may absorb the first coat quickly. If the surface looks dry or uneven after the first application, add a light second coat once the first has flashed off.
Both surfaces should reach the tacky stage at roughly the same time before joining.
Step 4: Join the surfaces (carefully)
Once contact cement touches itself, it bonds immediately—there’s no sliding time like with wood glue.
Carefully position the leather over the wood and press it down, starting from one edge, working outward to prevent trapped air bubbles.
Use firm, even pressure across the entire surface.
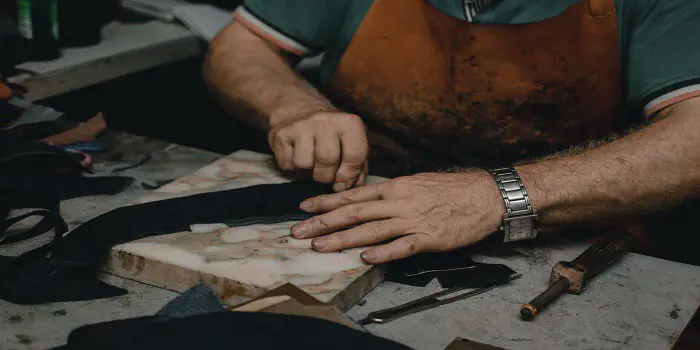
Step 5: Reinforce the bond
One helpful hint is to use a smooth mallet to hammer the leather as the glue is drying. This will help reinforce the bond developing between the leather and the wood surface.
Professionals typically use:
- A rubber roller (J-roller)
- A wood block wrapped in cloth
- Or even a smooth mallet with light tapping
This pressure activates the adhesive and ensures maximum surface contact, which is where the real bond strength comes from.
After bonding, place the piece under light clamping pressure or weighted boards for about an hour. While contact cement grabs instantly, giving it time to fully cure and stabilize improves long-term durability.
How to Pick the Right Glue for Attaching Leather to Wood?
Now that you have the different choices available, you are ready to make your pick.
Keep in mind that there are several highly qualified types of glue, and there are enough differences between them.
So, you should use the following guidelines to choose the best one for your project.
a) Simple to Use
Basically, the fewer issues, the better the glue will be for your project.
You do not want glue that is too thin, too thick, or difficult to pore and place on the materials.
In addition, you want glue that can be stored under room temperature conditions. And for many projects, you want an adhesive that does not have a strong odor.
That may seem like a tall order, but there are many types of glue that have good consistency, are easy to store, and keep the odor to a minimum.
b) Specific to Certain Materials
This can be an easy one to overlook.
Many types of glue will say they are multipurpose, but they may not cover the materials you are trying to bond together.
If you are looking only to glue leather to wood, you should look for glue that does that.
Ensure the materials are included in the package description for the best results. Otherwise, you may find yourself with glue that does not work for what you want.
c) Quality of the Bond
For gluing leather to wood, you will need to use glue that has the right chemicals. This is because certain chemicals or substances work better than others when gluing leather to wood.
Polyurethane, for example, offers one of the strongest bonds you can find.
If you can find a glue that contains cyanoacrylate, that works quite well with leather and wood. Such glues are quite versatile, so they not only work well with adhering leather to wood.
They also work with many different materials, including ceramics. That way, you can stretch the usefulness of the glue to different substances over the years.
You should look for cyanoacrylate first when shopping for glues that work well when combining leather and wood. But that is not the only consideration.
You should check out the instructions on each type of glue to see if it meets other requirements, such as the following.
- Time to Set
- Time to Cure
- Is Clamping Needed?
There is a difference between when glues are set, meaning they can initially hold a bond. And the cure is when the glue is fully dried to its maximum potential.
Short curing times are desired if you are repairing materials for use, so the faster it cures, the faster you can get going.
Be aware that some glues take up to 24 hours to cure while others take over seconds fully.
Clamping may be a requirement with some of the glues, especially if there is a considerable weight difference between the materials. But you will need to check out all the possibilities.
d) Resistant to the Elements
In other words, can this glue hold up to extreme changes in temperature and moisture?
You may be surprised to learn that some glues will break apart when the temperature stays below freezing for an extended time.
Or that the adhesion will fall apart under extended humid conditions.
If you are going to use glue on items exposed to the elements, then you need to ensure that they are designed for such circumstances.
However, if what you are gluing is going to stay indoors at room temperature, then you do not need to be that concerned.
Brief exposures to changes in temperatures or humidity do not have much of an effect on most types of glues used to bond leather and wood.
e) Cost
Last but not least, how much you pay for the glue should be the final consideration.
Remember that you are not looking for the cheapest glue; you are looking for the best glue at the lowest price.
There is no need to pay more for the right glue when you have many choices available.
Consider that glues that work well on leather and wood tend to be less expensive because the materials themselves are so commonly bonded.
In this case, the price difference may not be all that much, depending on the brands you are considering.
The biggest price difference will be in the strength of the bond itself.
Do you need industrial strength that offers longevity under different environmental conditions?
If so, then you will probably pay a little more for that feature.
However, if the leather and wood you are gluing together are for a project that is small or does not have much weight involved, then a standard consumer glue may be more than enough.
Remember to pay for what you need and not waste money on glues that offer more than what you want.
Does the Type of Wood Matter When Gluing Leatherette to Wood?
When bonding leatherette to wood, the type of wood absolutely matters.
While many assume glue will adhere uniformly across all wooden surfaces, the reality is that wood species vary significantly in density, porosity, and natural oil content—all of which influence how well an adhesive performs.
Dense hardwoods such as Teak or Rosewood naturally contain oils and resins that can interfere with adhesion.
These oils form a microscopic barrier that prevents many common adhesives from properly penetrating the wood fibers.
As a result, glue may initially appear to bond well, but the joint can weaken over time, especially under temperature fluctuations or mechanical stress.
To improve adhesion on oily woods, it’s good practice to thoroughly clean the surface with a solvent such as isopropyl alcohol or acetone to remove surface oils.
Light sanding or surface etching with 180–220 grit sandpaper can also help by creating micro-abrasions that increase the mechanical “key” for the adhesive.
On the other hand, more porous woods like Pine or Birch tend to accept adhesives more readily because their open grain structure allows glue to penetrate slightly into the surface.
This penetration creates a stronger mechanical bond between the wood substrate and the leatherette backing.
However, excessively porous wood may absorb too much adhesive, so applying a thin, even coat—and sometimes a primer layer—can help maintain consistent bonding strength.
When attaching leather and wood, equally important is the type of adhesive used.
Contact cement, polyurethane adhesives, and certain flexible epoxy formulations are commonly chosen for leatherette applications because they maintain flexibility after curing.
Leatherette, being a synthetic material often backed with fabric or foam, expands and contracts differently than wood. A rigid adhesive can crack or delaminate over time, while a flexible bond line accommodates small movements without failing.
Ultimately, achieving a durable leatherette-to-wood bond is less about brute adhesive strength and more about surface preparation and material compatibility.
A clean, lightly roughened wood surface paired with the right adhesive ensures that the bond is not only strong on day one, but reliable for years of use.
Final Thoughts
Gluing leather into the wood is hard but not impossible. To get the job done successfully, ensure that you are using the right adhesive for the right kind of wood.
There are several factors in selecting the suitable glue to attach the leather to the wood. You will just need to review your specific requirements and search for the correct type of glue to do the job.
Share the post "How to Glue Leather to Wood (Best Adhesives & Expert Tips)"
Termites are recognized as one of the most troublesome pests all over the world. They are small and numerous and Read more

Our bedroom is a special place where we find relaxation and refresh after a hard day of toil - the Read more
Let’s be honest: buying a sofa is a bit like dating. In the beginning, it’s all about the looks. You Read more
Wooden furniture, trims, doors, and windows are so long-lasting that you can easily repair and reuse them even after they Read more

Hi, I am Mark Garner a professional carpenter, woodworker, and DIY painter. I live in the small city of Peoria, Arizona as a semi-retired woodworker. I have started this blog with a simple motive to help you with my wood experience in this sector. If you like to know more about what I love doing and how it all got started, you can check more about me here.